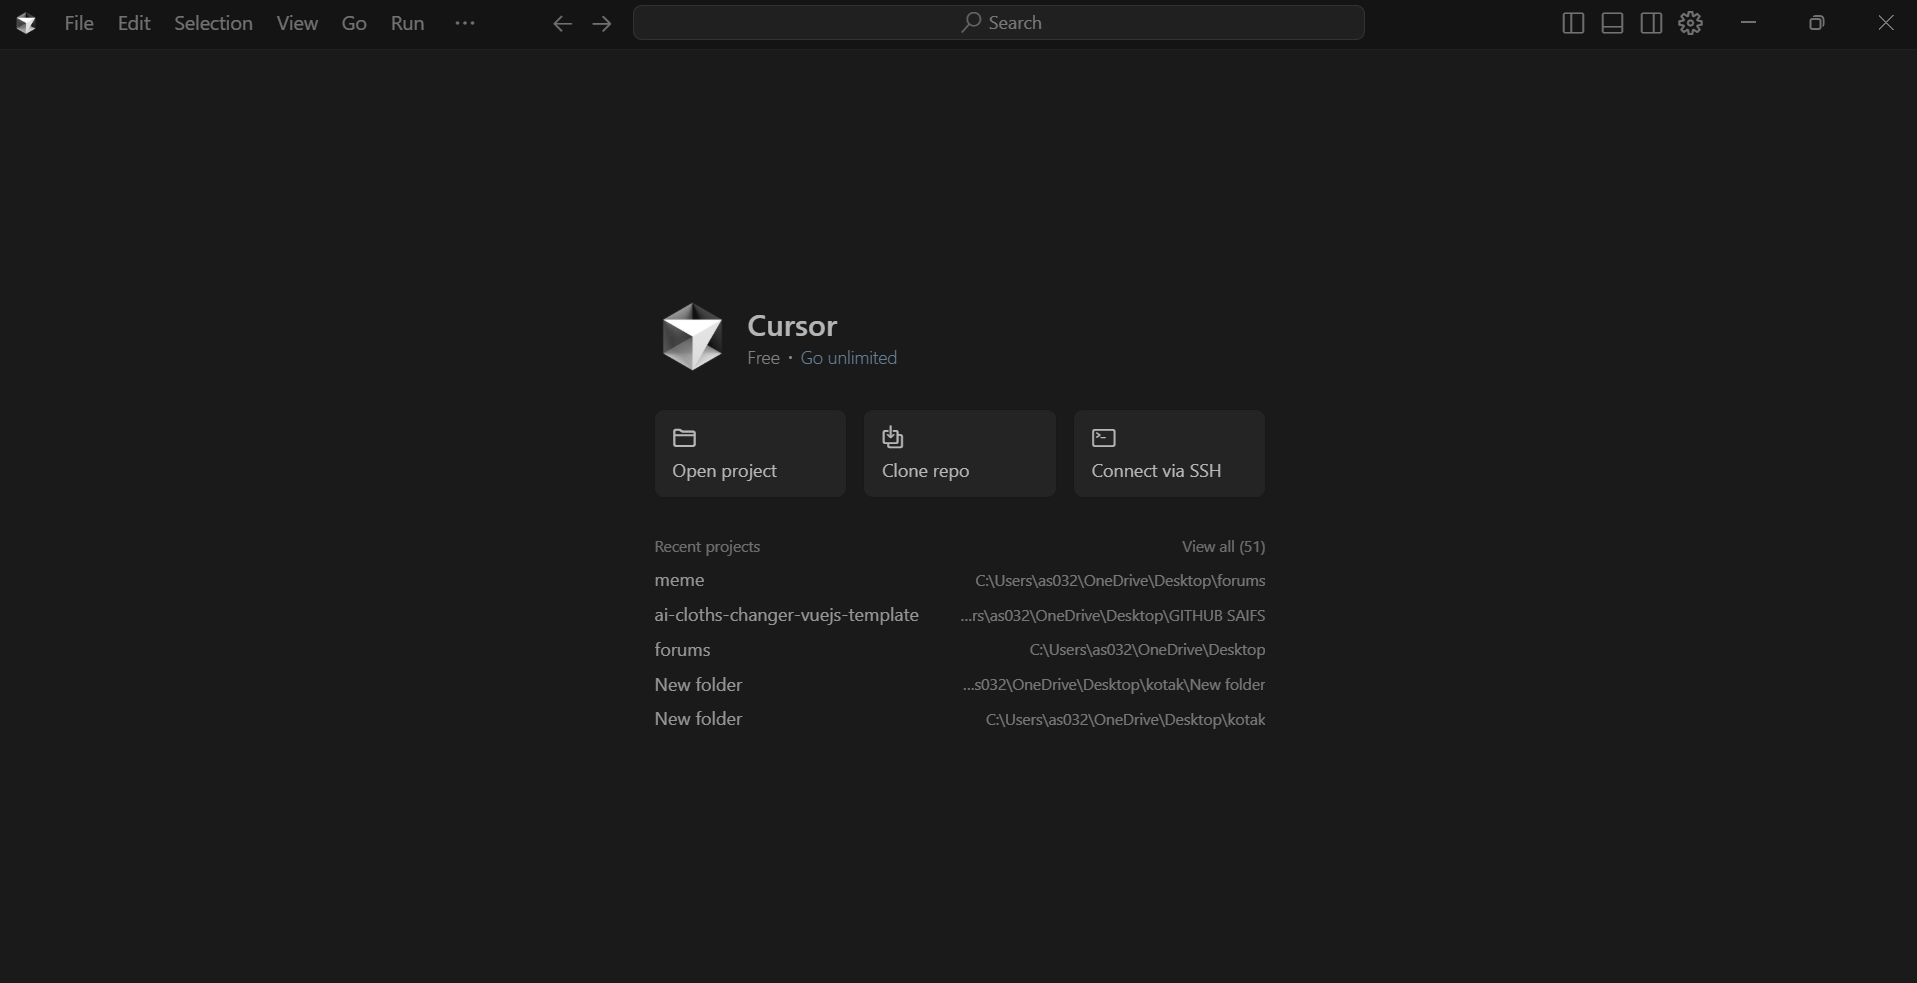
Step 1: Launch Cursor IDE
• Open the Cursor application on your desktop.
• On the home screen, choose Open project, Clone repo, or Connect via SSH to begin working on a project.
Step-by-step explanation for each image that shows how to integrate an MCP (Model Context Protocol) server in Cursor IDE.
• Open the Cursor application on your desktop.
• On the home screen, choose Open project, Clone repo, or Connect via SSH to begin working on a project.
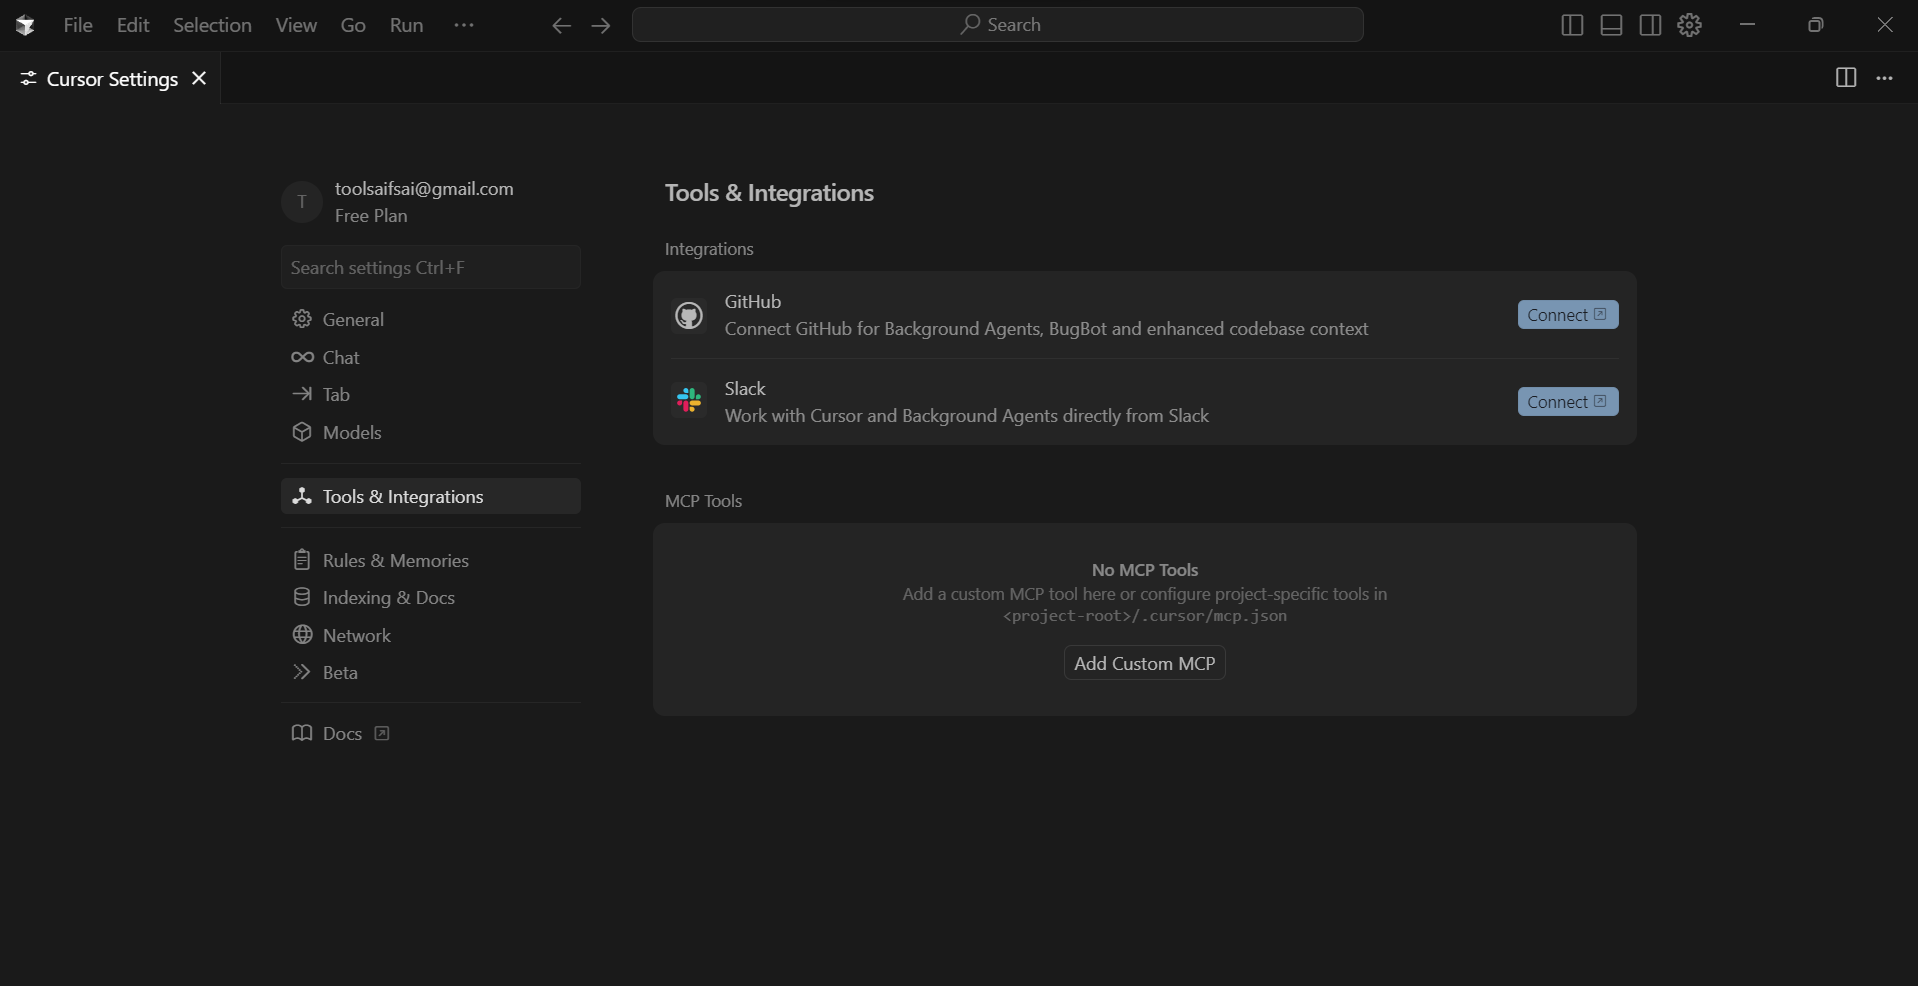
• Click the gear icon ⚙️ (top right) or go to the File menu > Settings.
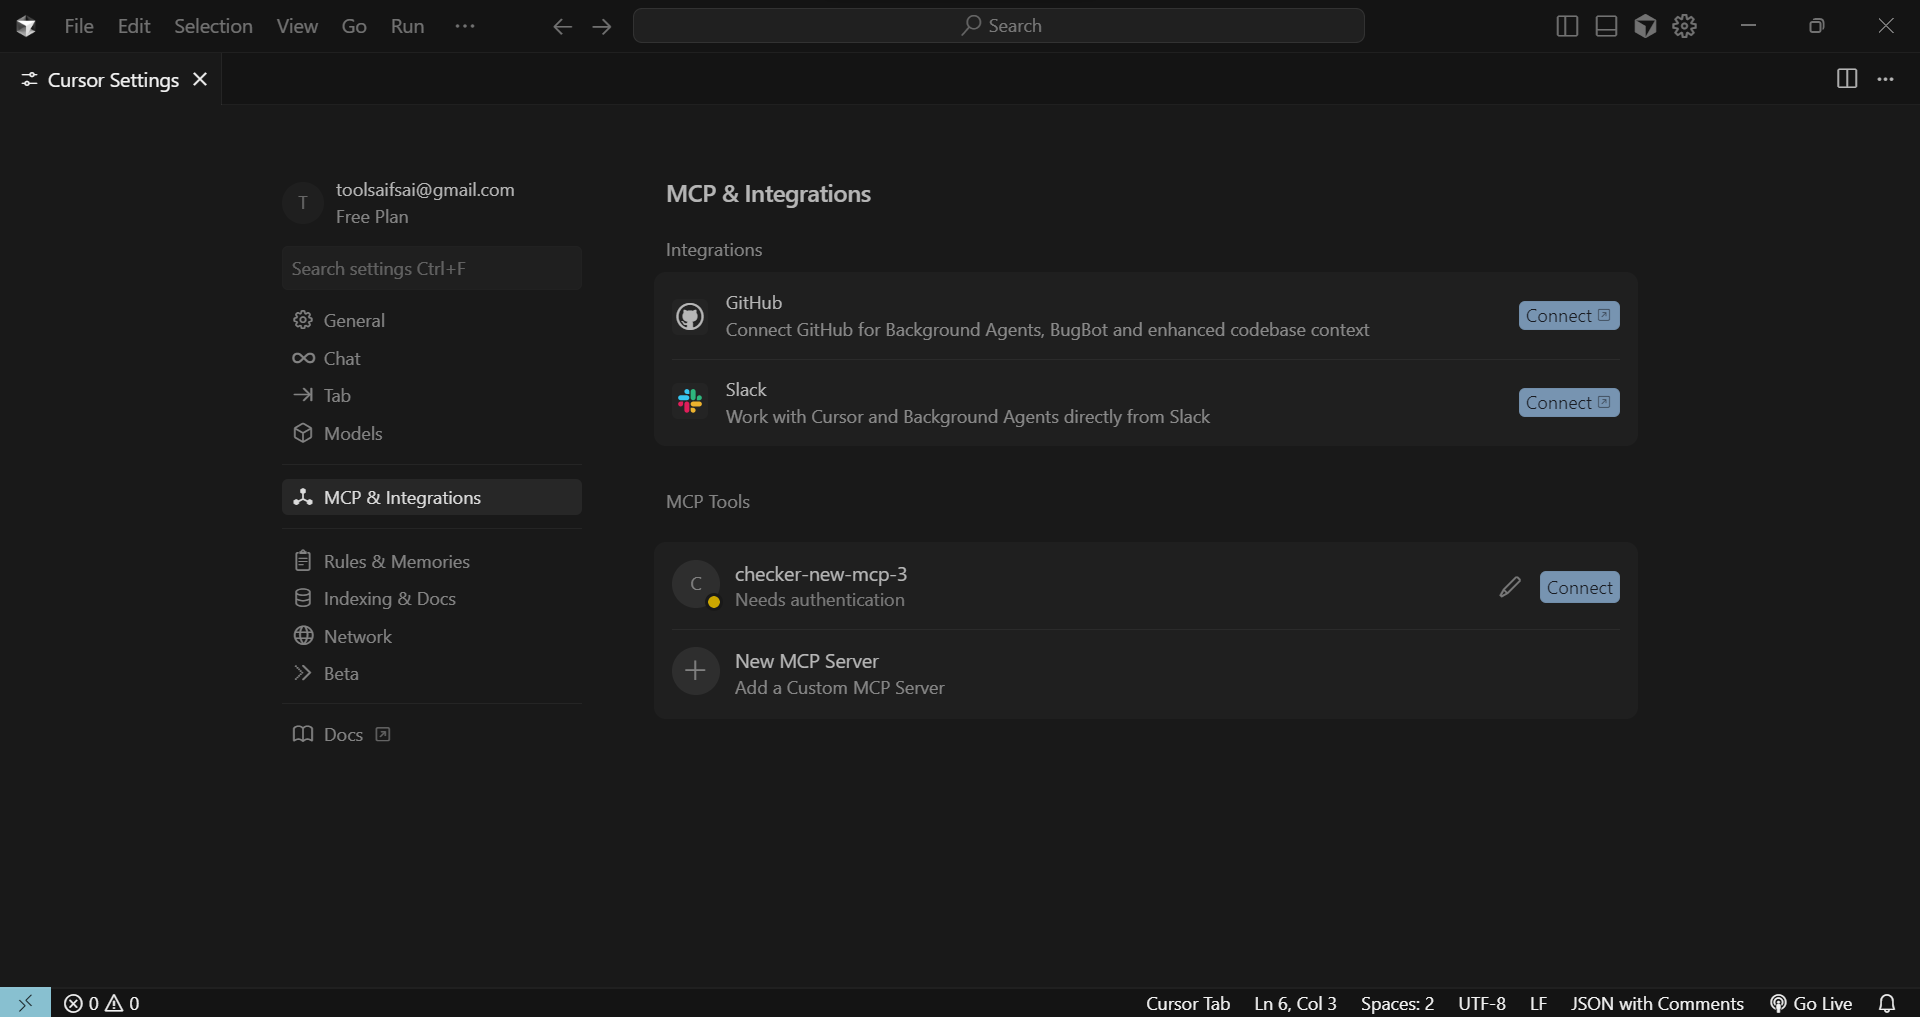
• In the left panel, click Tools & Integrations.
• Scroll down to the MCP Tools section.
• Click Add Custom MCP to proceed.
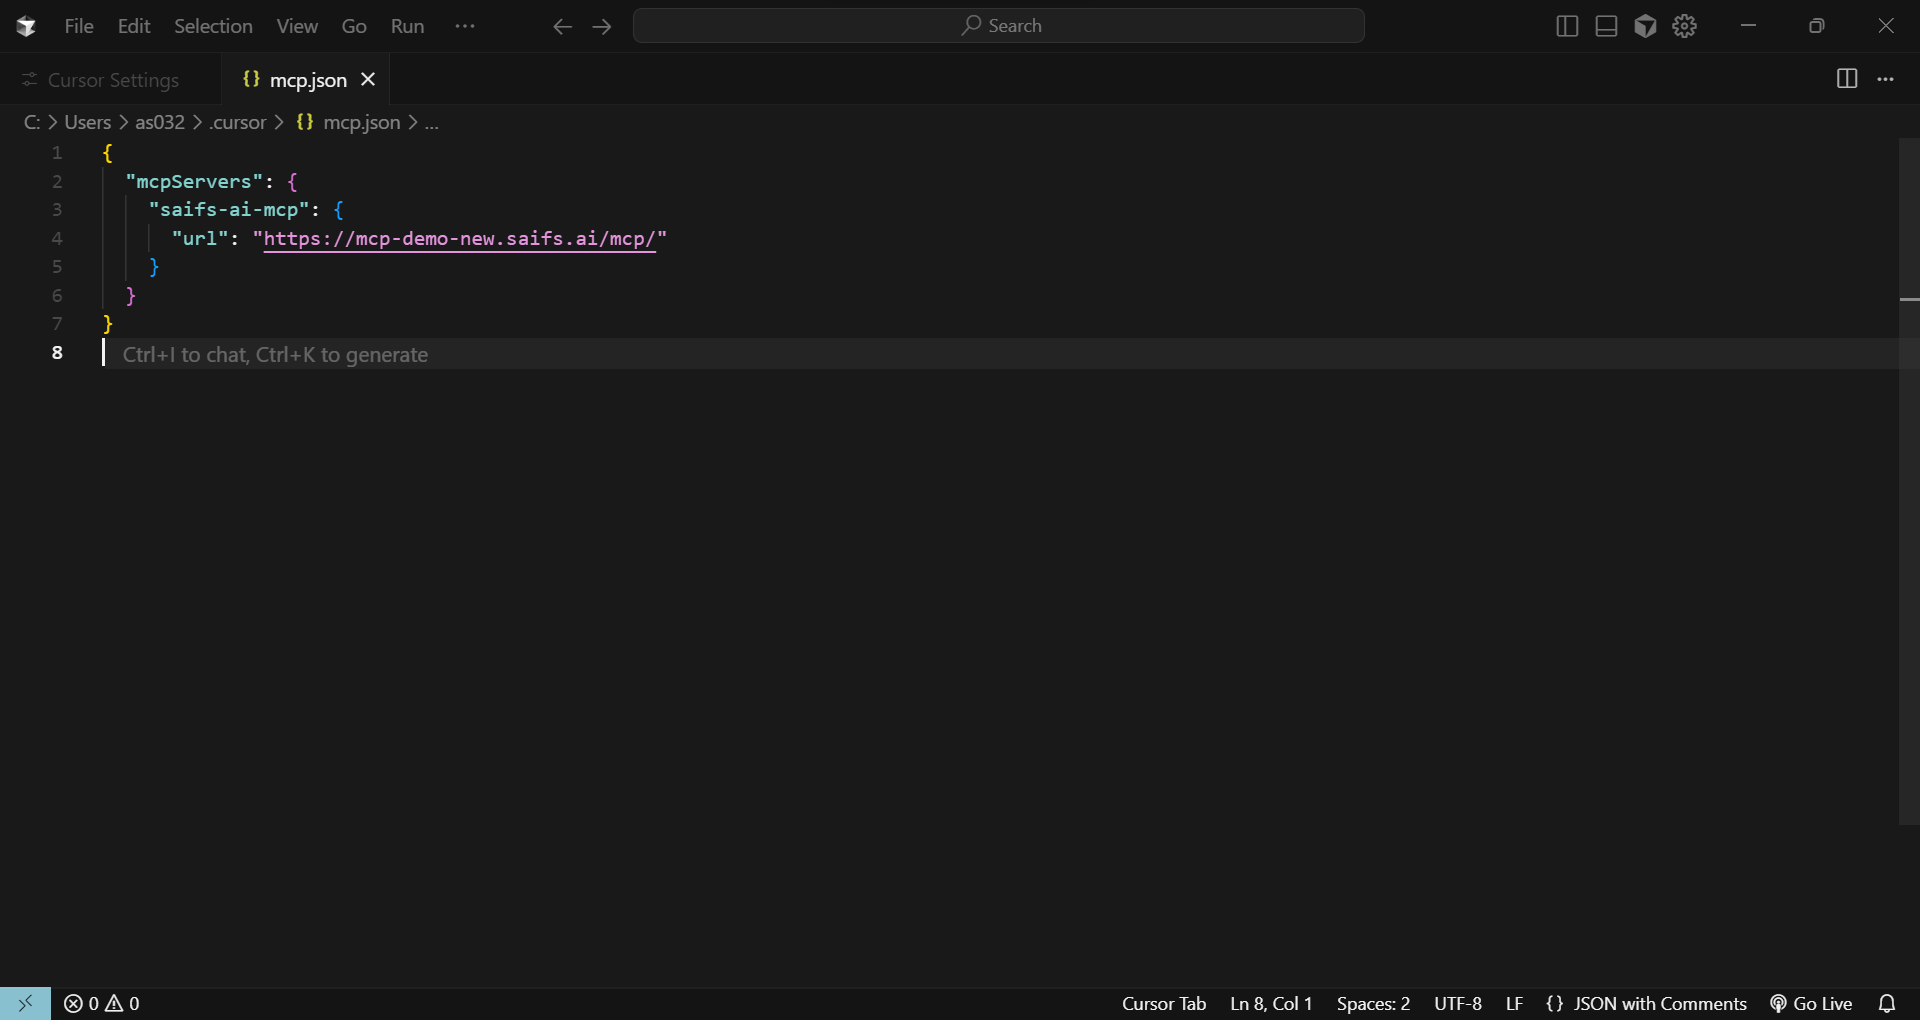
• After clicking Add Custom MCP, Cursor creates or opens a file at:
~/.cursor/mcp.json
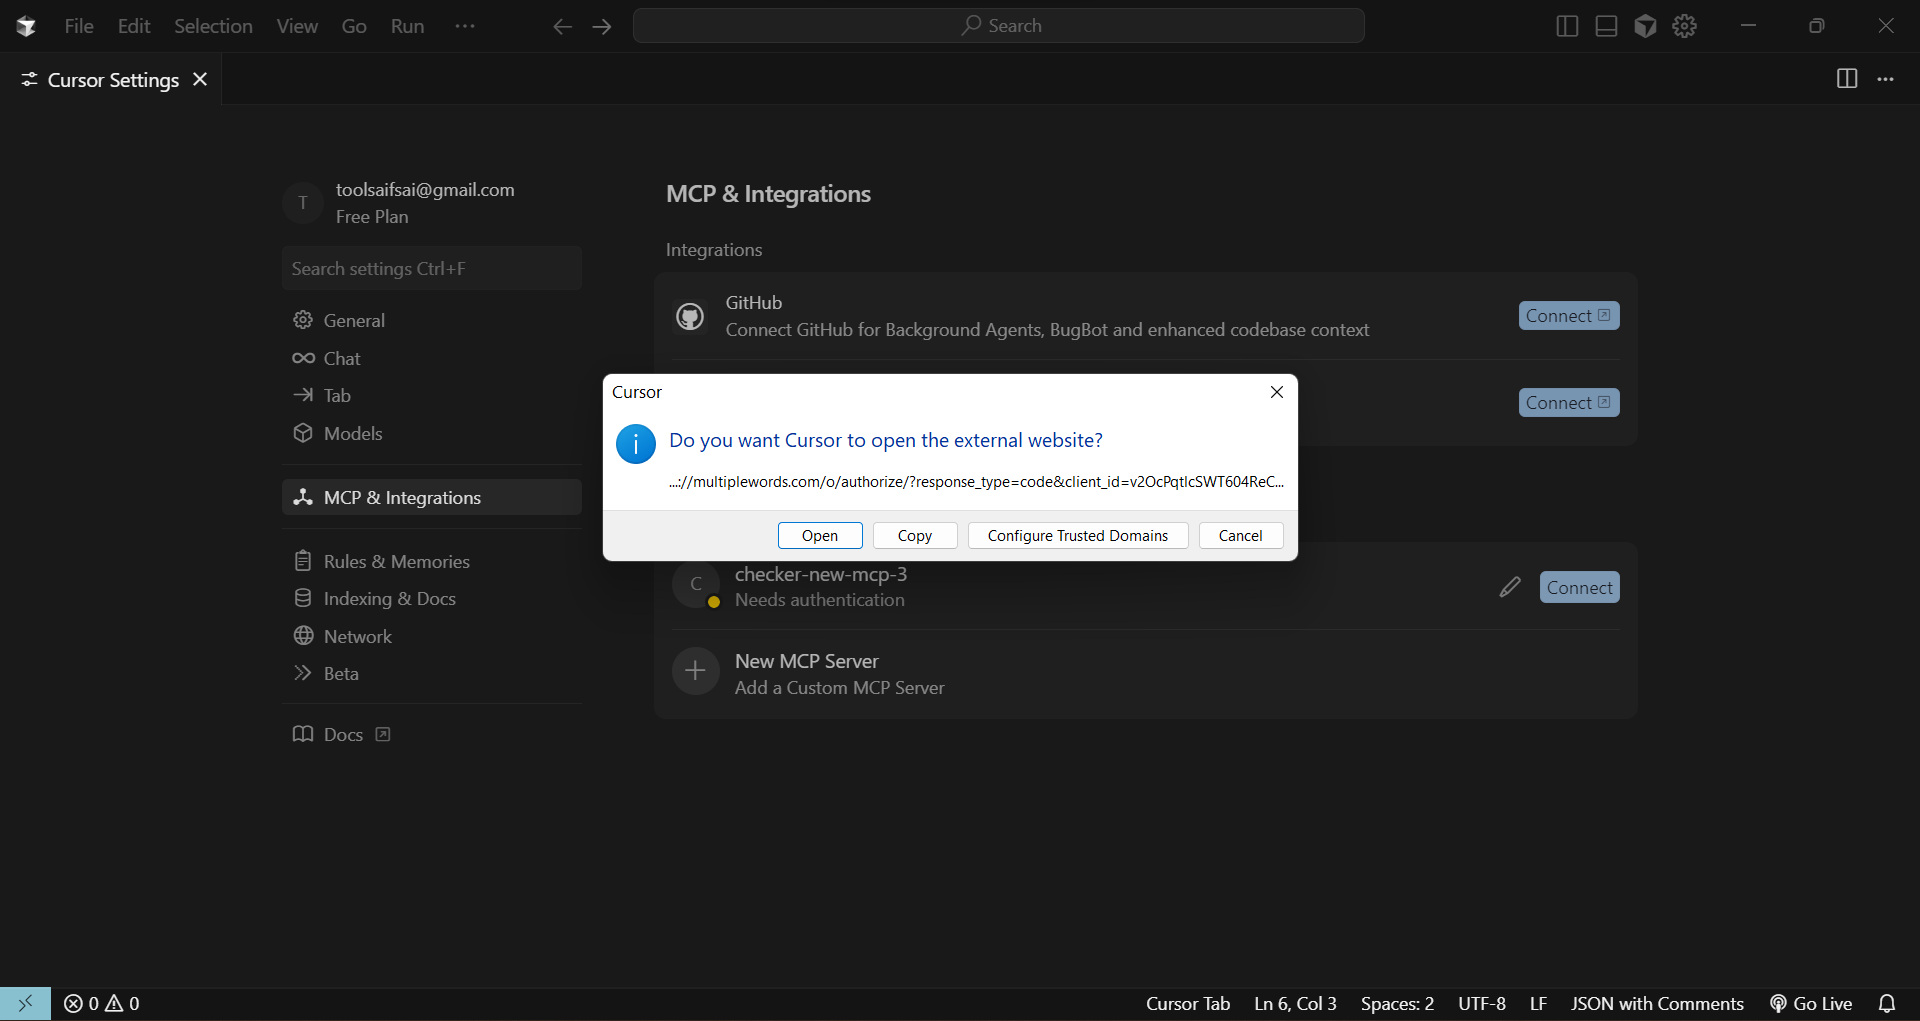
Click on the Connect button next to "New MCP Server" under the MCP Tools section to begin integrating your custom MCP server.
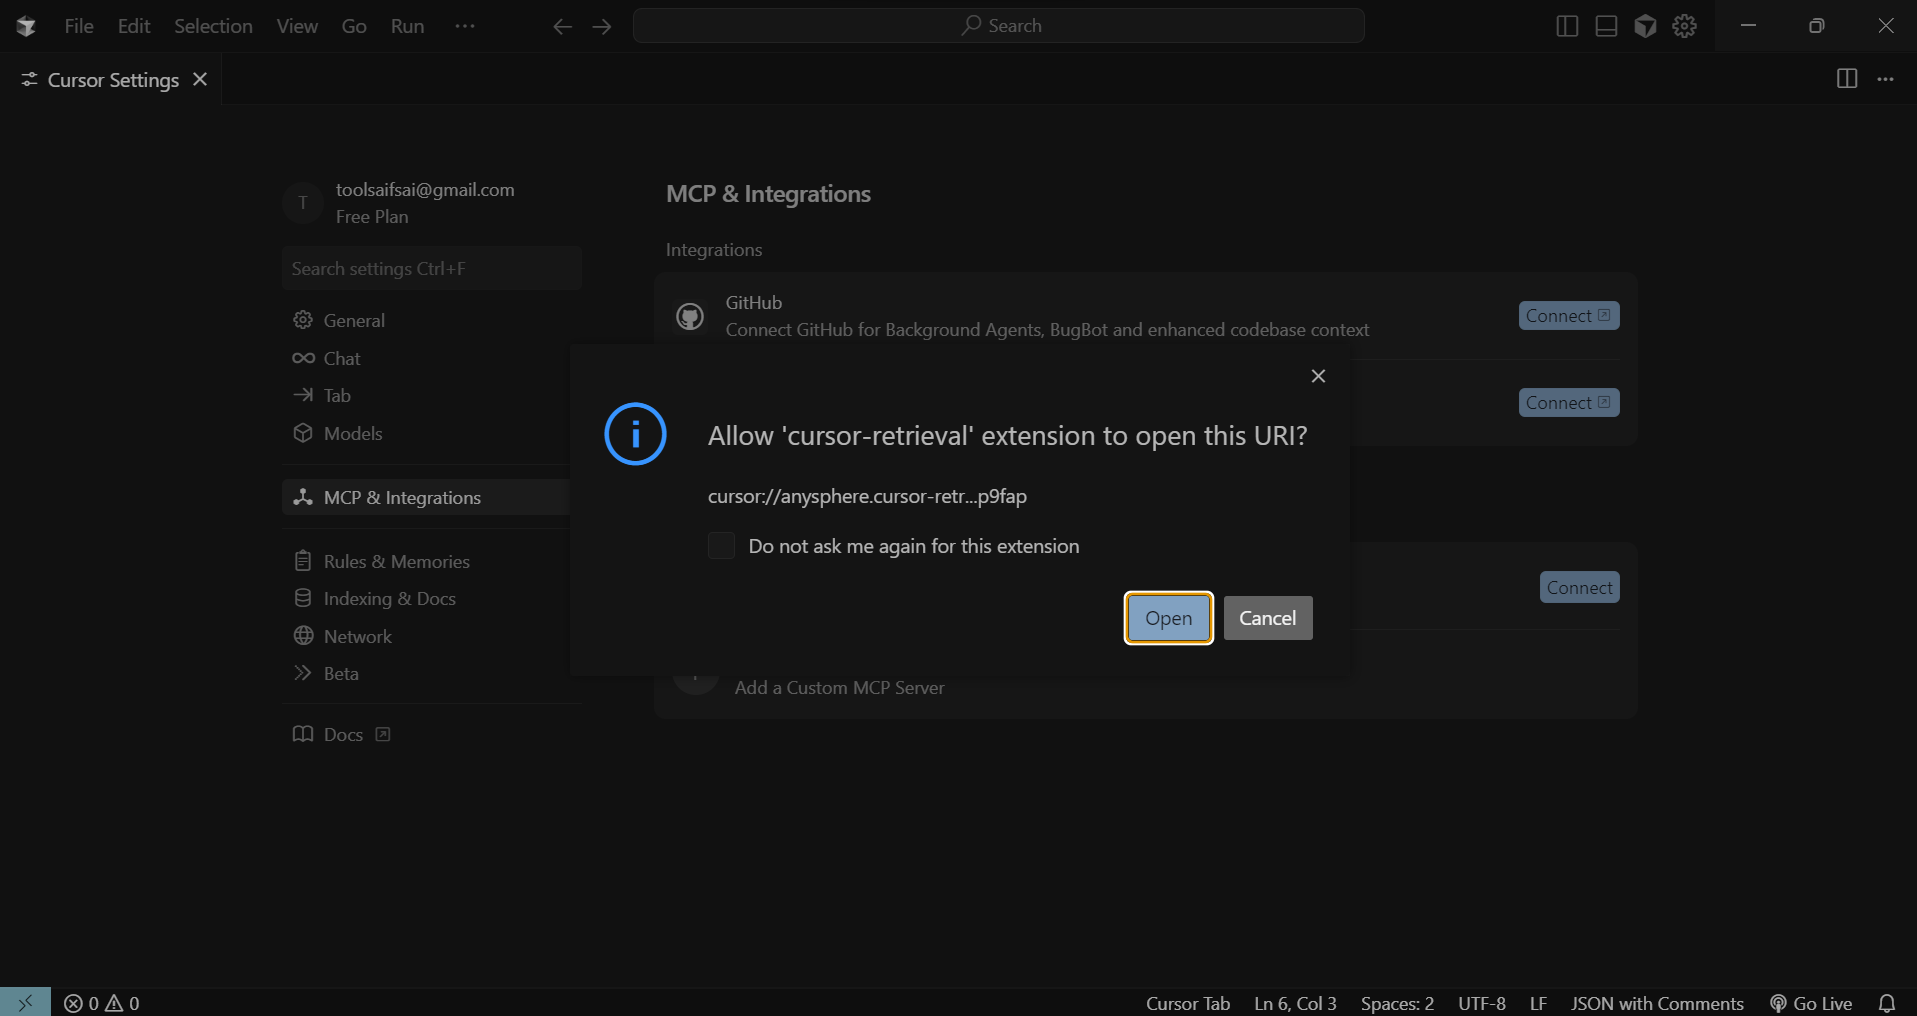
When prompted, select Open to allow the 'cursor-retrieval' extension to process the URI and initiate the integration flow.
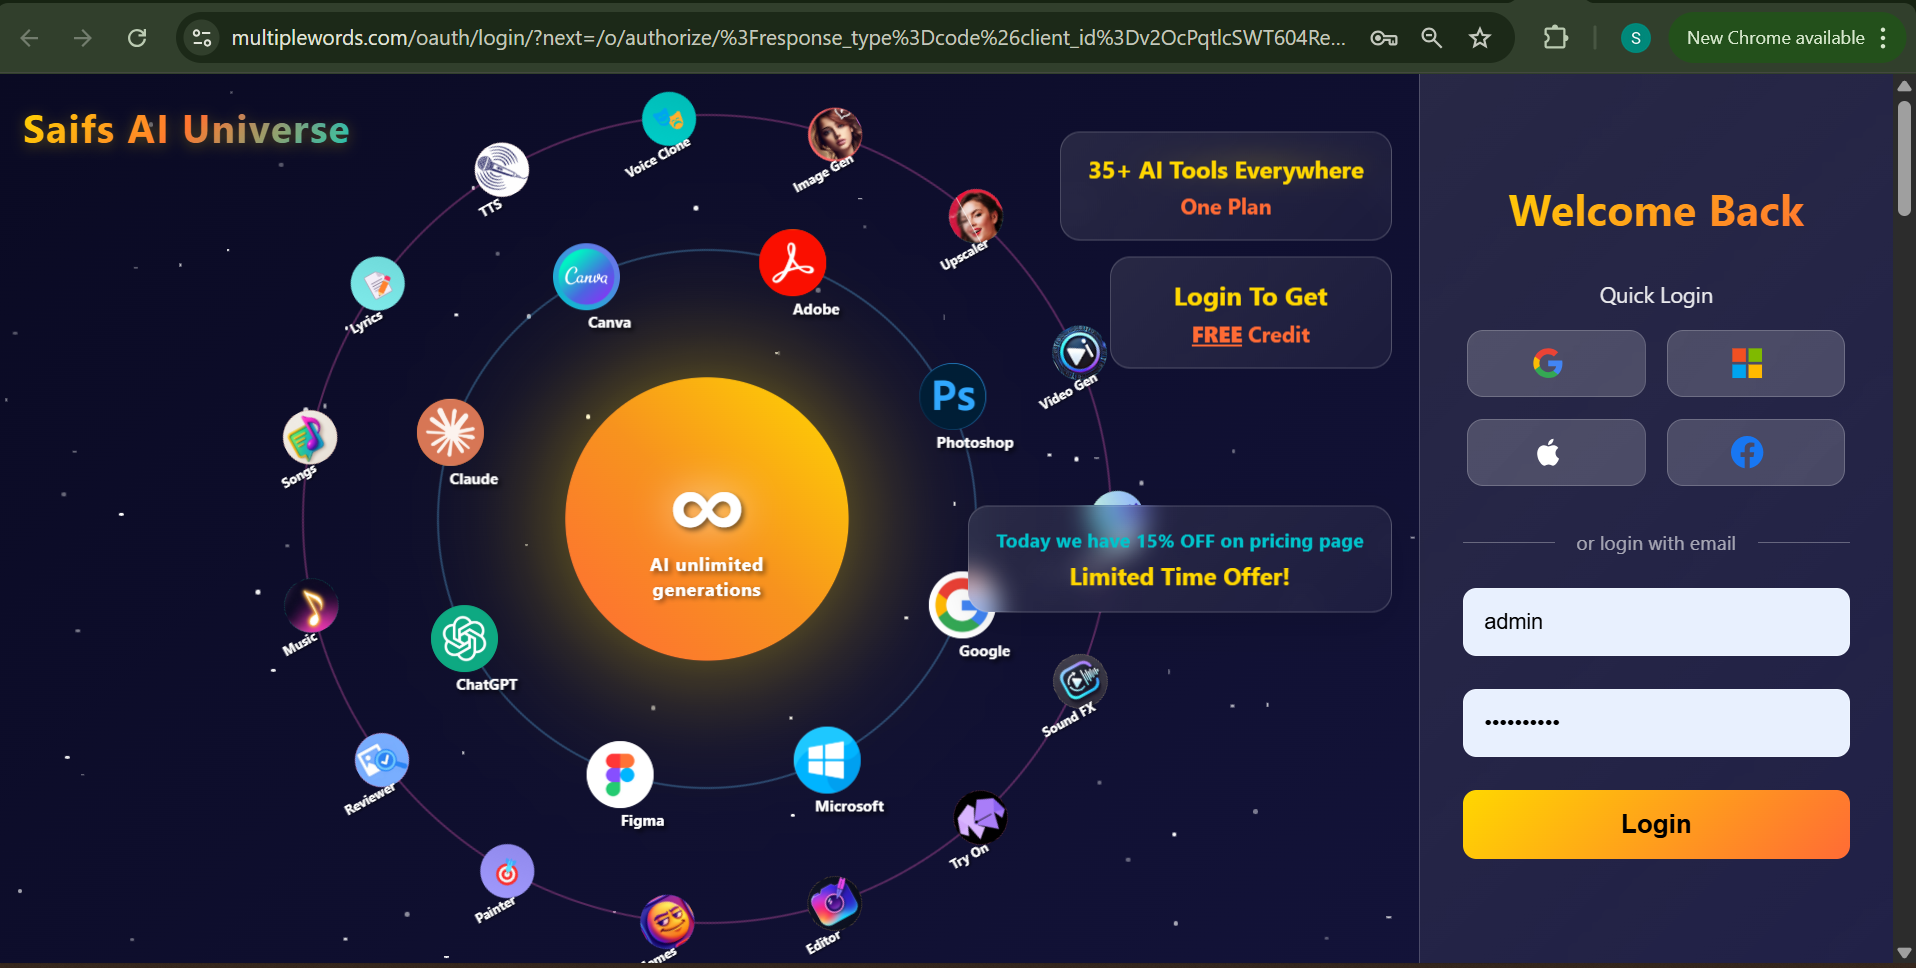
On the authentication webpage, choose your preferred login method by clicking on Google, Microsoft, Apple, or Facebook.
After successful authentication, a prompt will appear—click Open to finalize the connection and complete the MCP server integration in Cursor IDE.
The toggle should be ON, indicating that the MCP server is successfully enabled and connected. This confirms your integration is active, and all associated tools and features are now accessible within Cursor IDE.
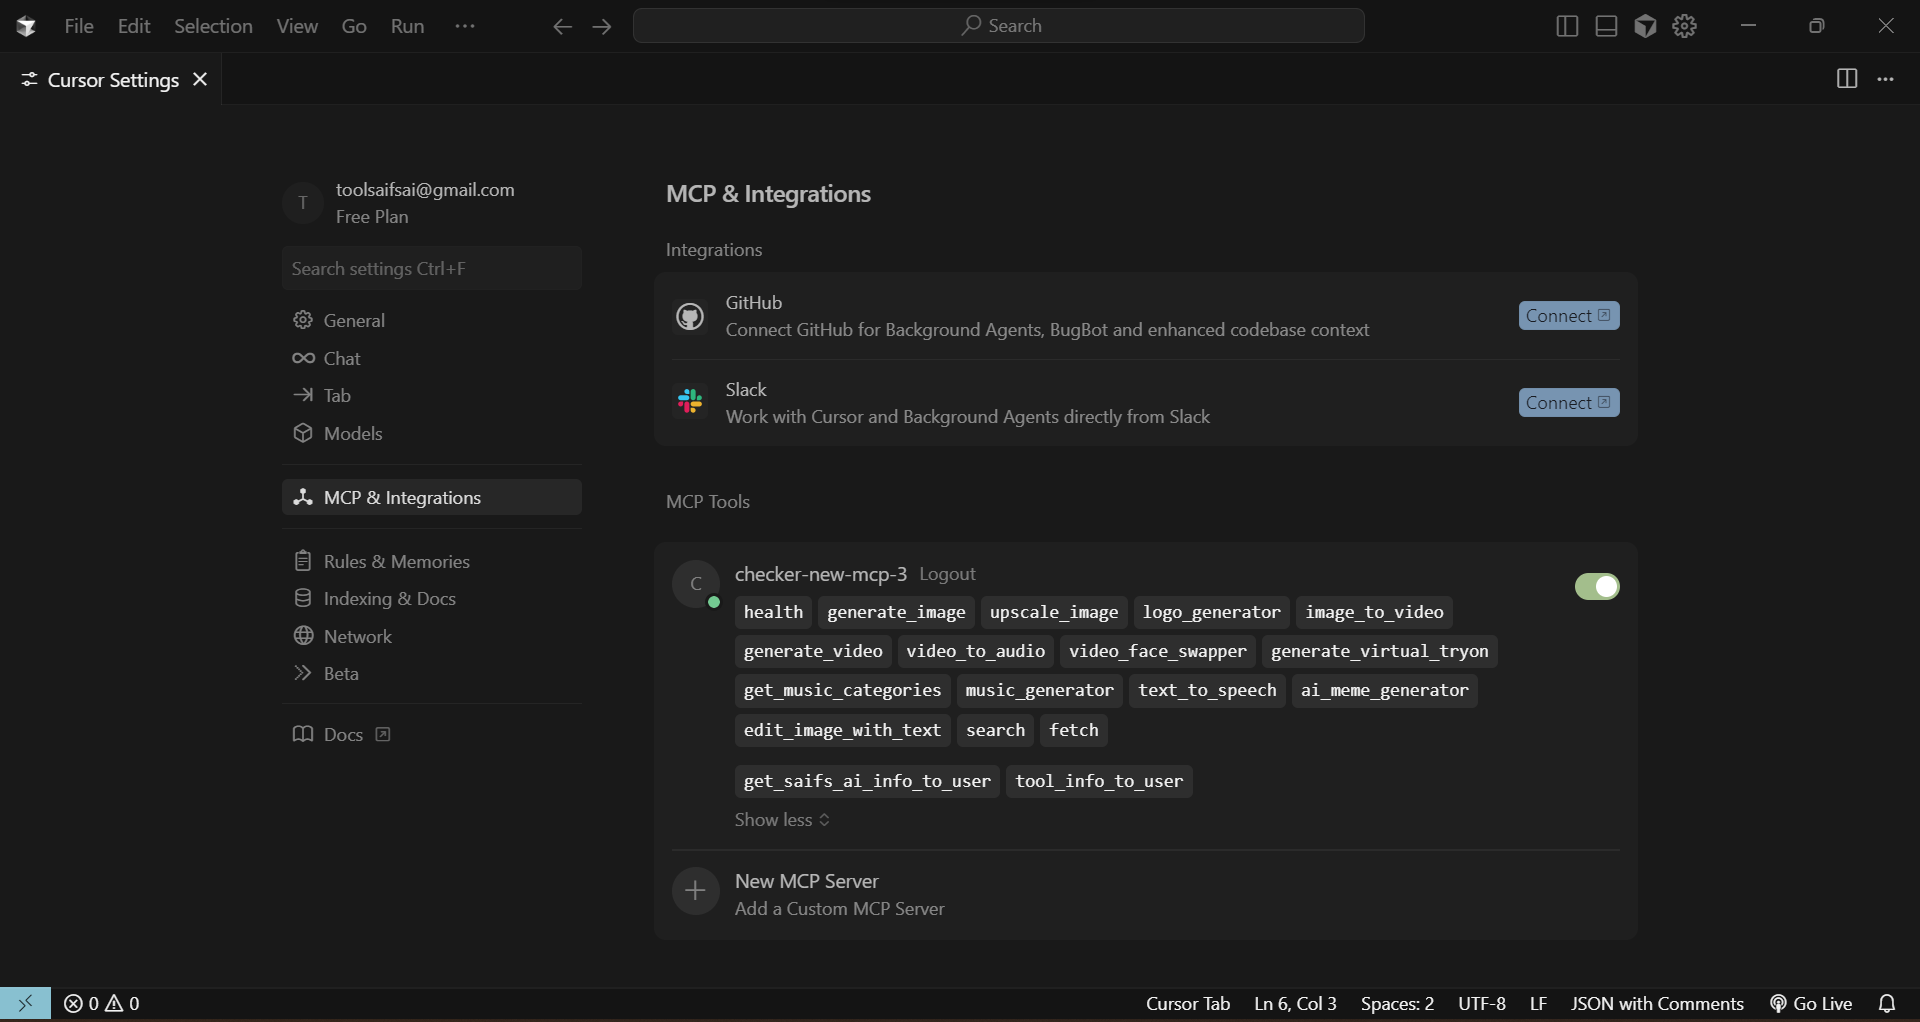
Follow the steps above to integrate Saifs.ai with Cursor IDE and unlock powerful AI tools directly in your workflow.

