How to Build Your Demand Forecasting Agent
Building the agent isn't a development project — it's four decisions. Here's exactly how it works.
Pick the platform you already use, add your sales history, and connect our MCP. After that, the agent returns a forecast with a range — what will sell next, and how unsure the model is — not last year plus 10% you have to interpret yourself.
Step 1: Find an Agent Builder
Pick the platform you already use, or the one your team is standardizing on. Common choices:
- Microsoft Copilot Studio
- AWS Bedrock
- Google Gemini Enterprise
- Salesforce Agentforce
- Cursor — the walkthrough below uses Cursor; Claude Desktop works the same way
- More platforms being added as they gain adoption
You're not locked in — the same underlying intelligence connects to whichever builder your organization runs on.
Step 2: Add a Data Source
Every agent builder needs to know where your sales history lives. There are two ways to connect it:
CSV / Excel
Export the sales file you already have and upload it. Date and quantity are enough. SKU, region, and lead time help but are not required. Voucher Date, Billed Quantity, Item Code, Godown — you don't even have to rename the columns. Fastest way to get started, no setup required.
MCP
Connect through a standard protocol built for secure, structured access. The agent queries live calculated intelligence instead of a file that went stale the moment you exported it.
What Is MCP, and How Does It Work?
MCP (Model Context Protocol) is an open standard that lets an AI agent connect directly to a live data source — instead of you exporting a file and hoping it's still accurate by the time someone reads it.
In plain terms:
- Your agent builder (Copilot Studio, Bedrock, Gemini Enterprise, Agentforce, Cursor, etc.) acts as the client.
- Our MCP acts as the server — it exposes your demand forecasts (what will sell next, with a range, and which products the model is least sure about) in a structured, secure format the agent can query directly.
- When your agent needs an answer — "what will we sell next quarter?" — it asks the MCP server directly, instead of working off a static file someone uploaded weeks ago.
- Because it's a standard protocol, not a custom integration, it works the same way across every agent builder — connect once per platform, and every query after that pulls current, calculated numbers.
The result: your agent isn't reading a snapshot. It's asking a live, governed source of truth every time — which is what keeps the forecast accurate and the access controlled.
Step 3: Choose MCP Where Possible
CSV upload works, but MCP is the preferable path — it's the secure, standardized way for an agent to access live data, rather than a static file that goes stale the moment you export it.
Step 4: Connect Our MCP
This is the step that turns a generic agent builder into a Demand Forecasting Agent. Connecting our MCP is what makes the data behind every answer deterministic — not last year plus 10%, a calculated forecast with a range you can trust twice.
Pick your platform below. Connecting our MCP is the same idea on each one — you add it once, then sign in with your Saifs AI account.
Steps to Enable MCP on AI Platforms
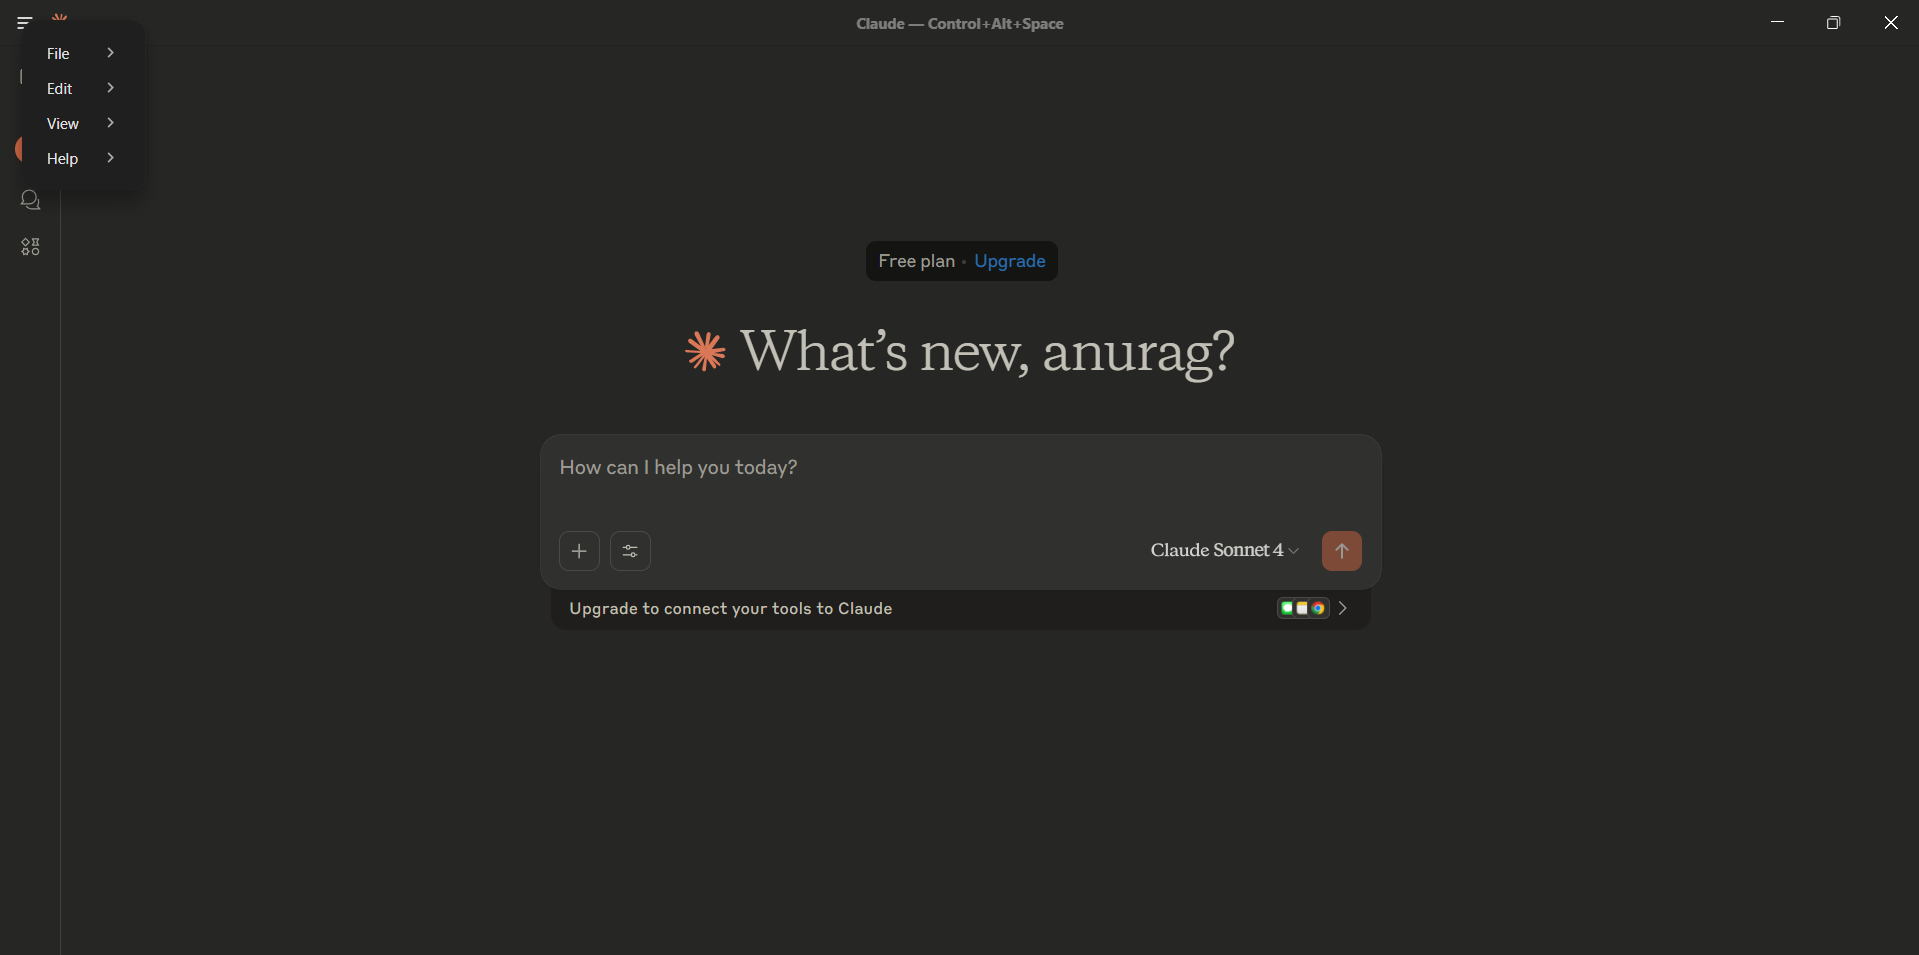
Open Claude and reveal the main menu
Launch Claude Desktop. In the top-left corner, click the three-dot menu to open the app's main menu.
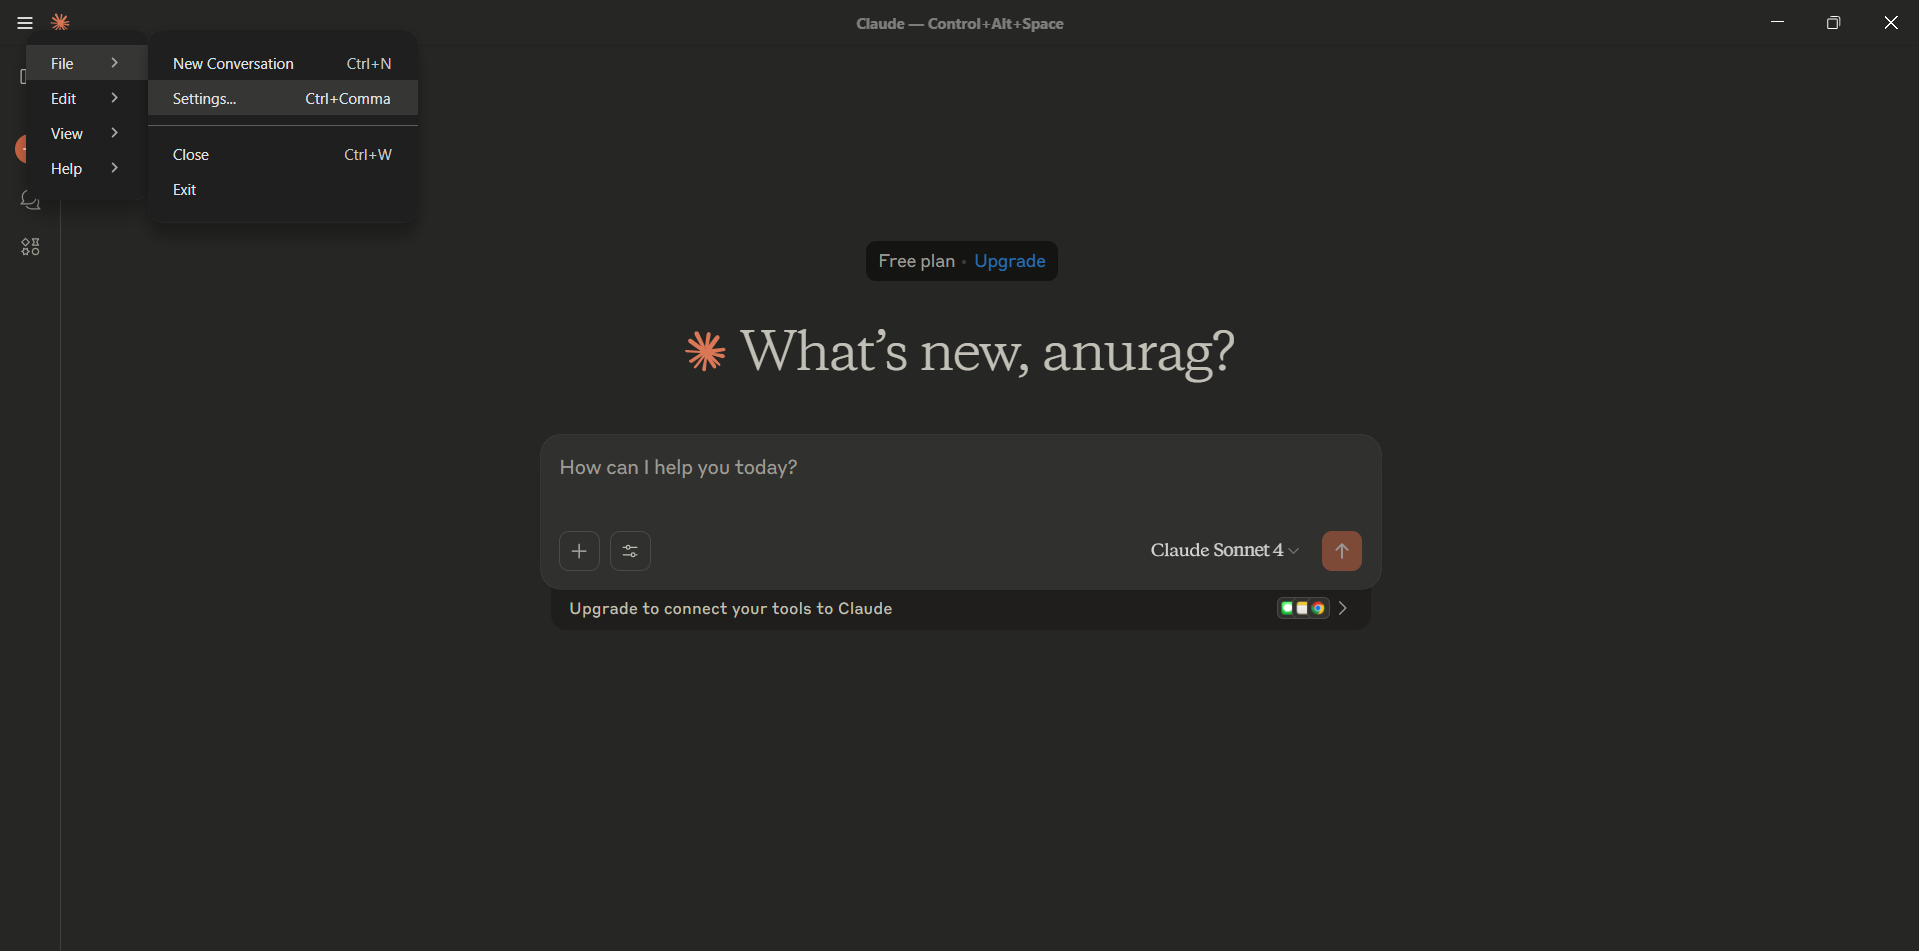
Go to Settings
From the three-dot menu, hover over File. Click Settings (or press Ctrl + Comma).
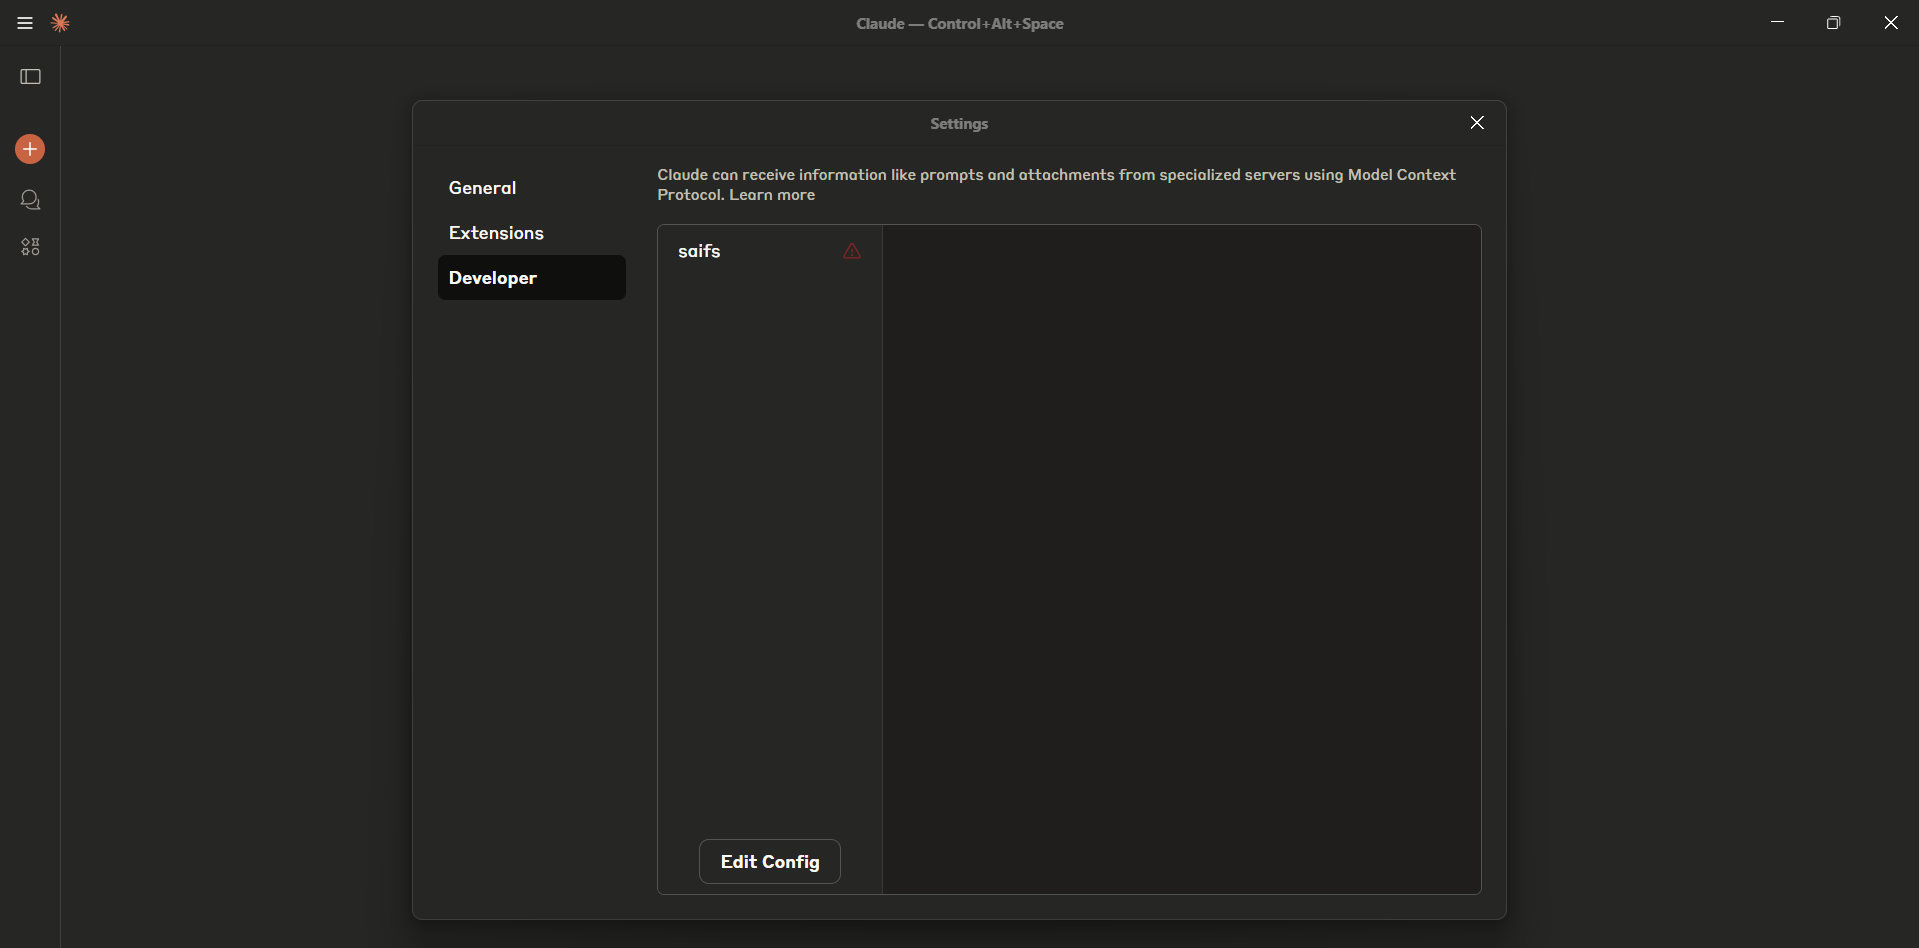
Open the Developer config editor
In Settings, select the Developer tab. Click Edit Config at the bottom of the panel.
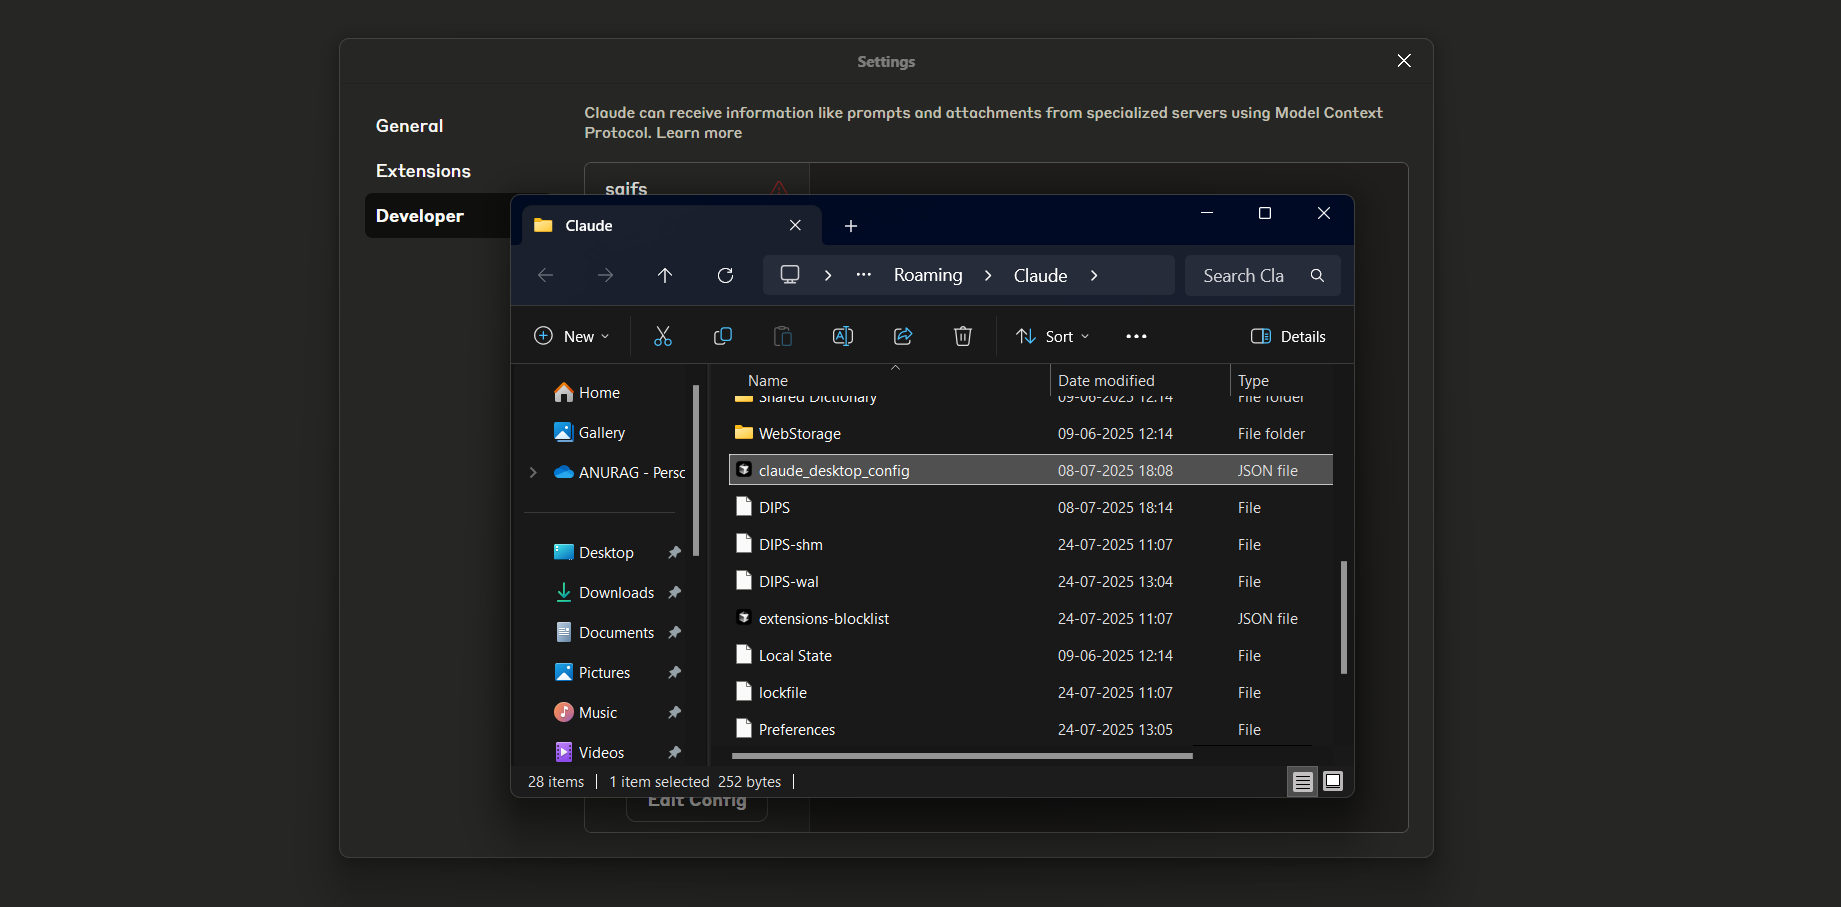
Locate the config file
A File Explorer window will open at the Claude config folder. Click to select claude_desktop_config.json.
Paste the Demand Forecasting MCP
With the config file open, add this server — not the generic Saifs AI MCP. This one is Demand Forecasting only. Then restart Claude.
{
  "mcpServers": {
    "demand-forecasting": {
      "command": "npx",
      "args": [
        "-y",
        "mcp-remote",
        "https://demand-forecaster-mcp.saifs.ai/mcp"
      ]
    }
  }
}
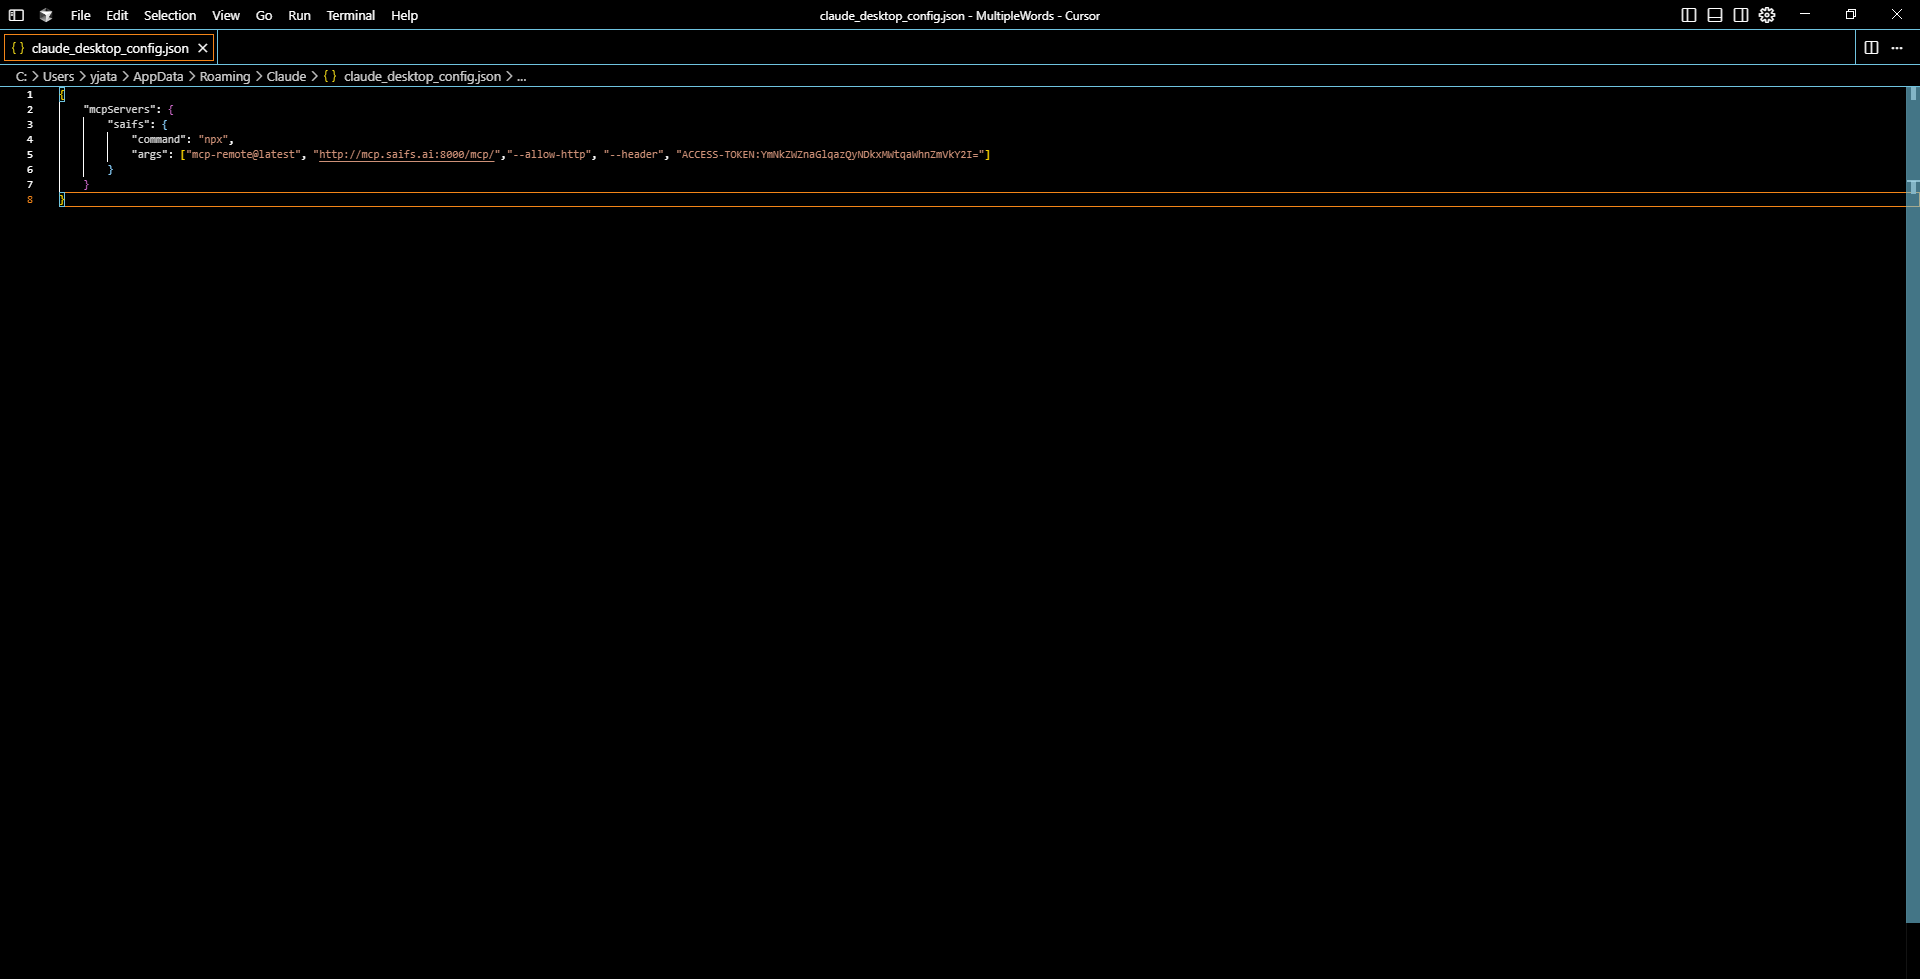
Launch Cursor
Open the Cursor application on your desktop. On the home screen, choose Open project, Clone repo, or Connect via SSH to begin working on a project.
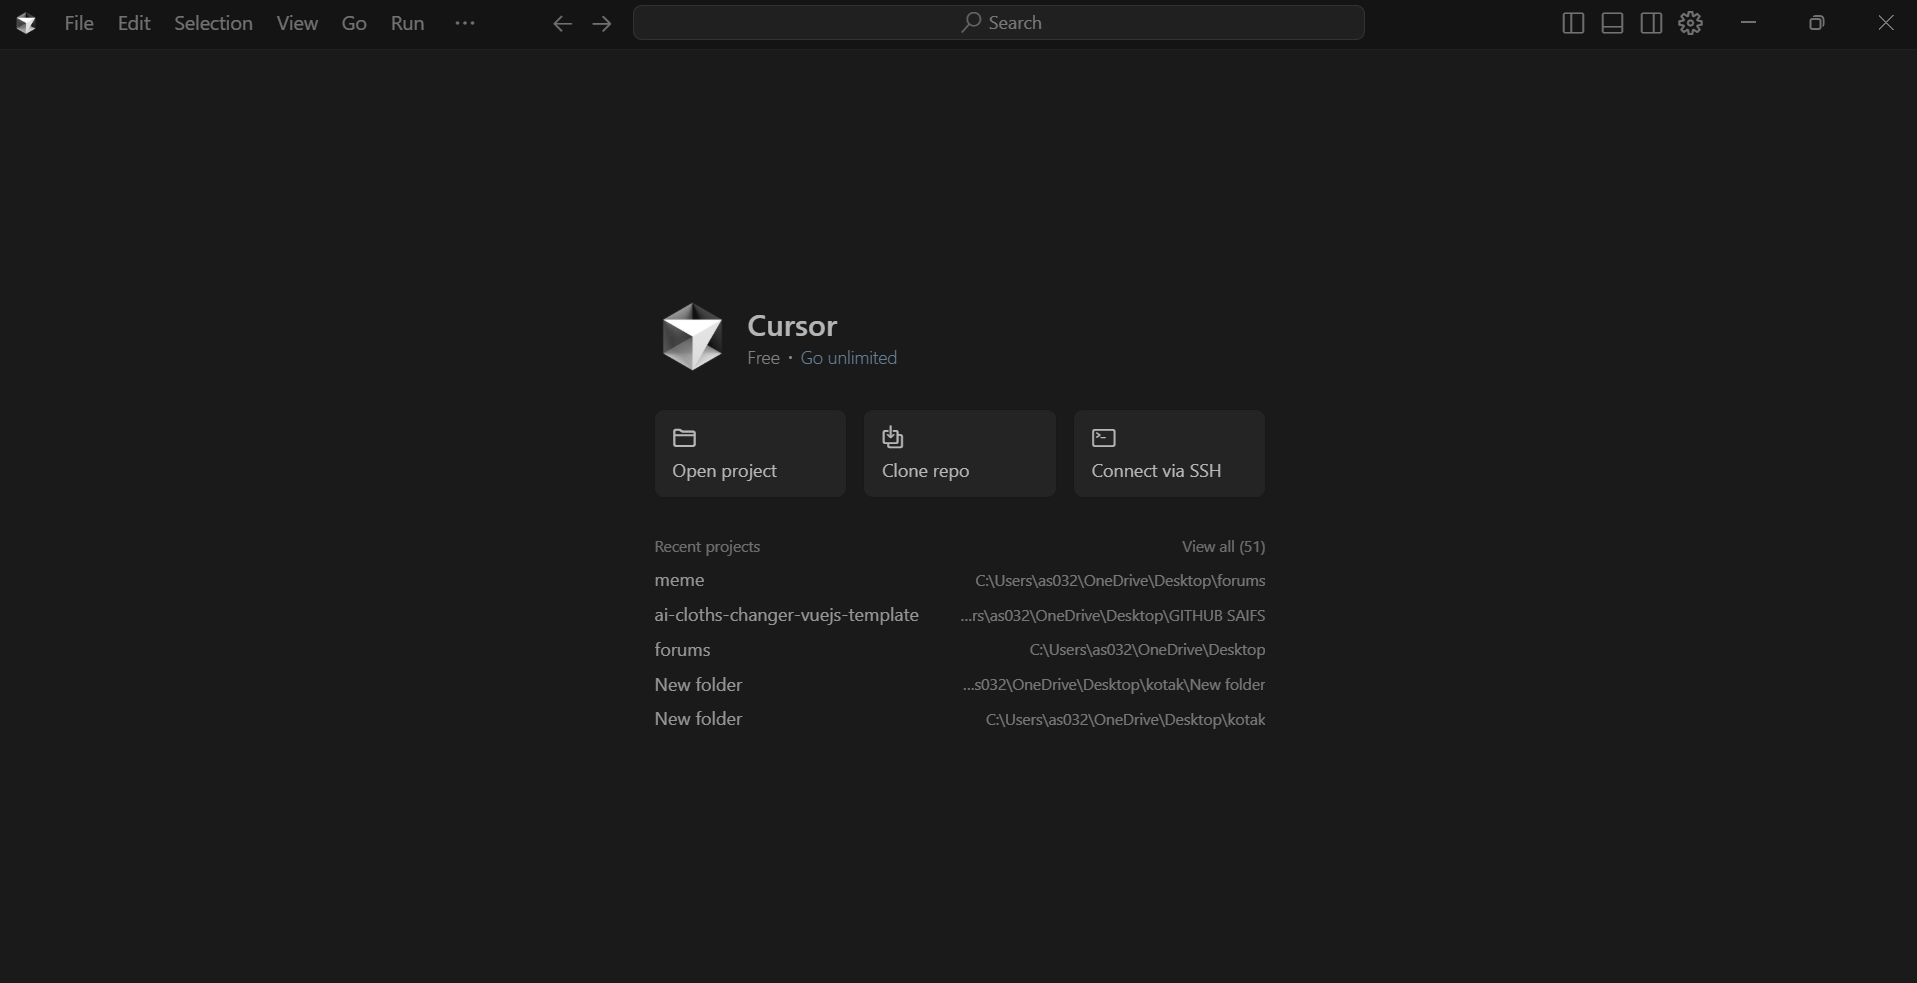
Settings → Tools & Integrations
Click the gear icon (top right) or go to File → Settings. In the left panel, click Tools & Integrations. Scroll to MCP Tools and click Add Custom MCP.
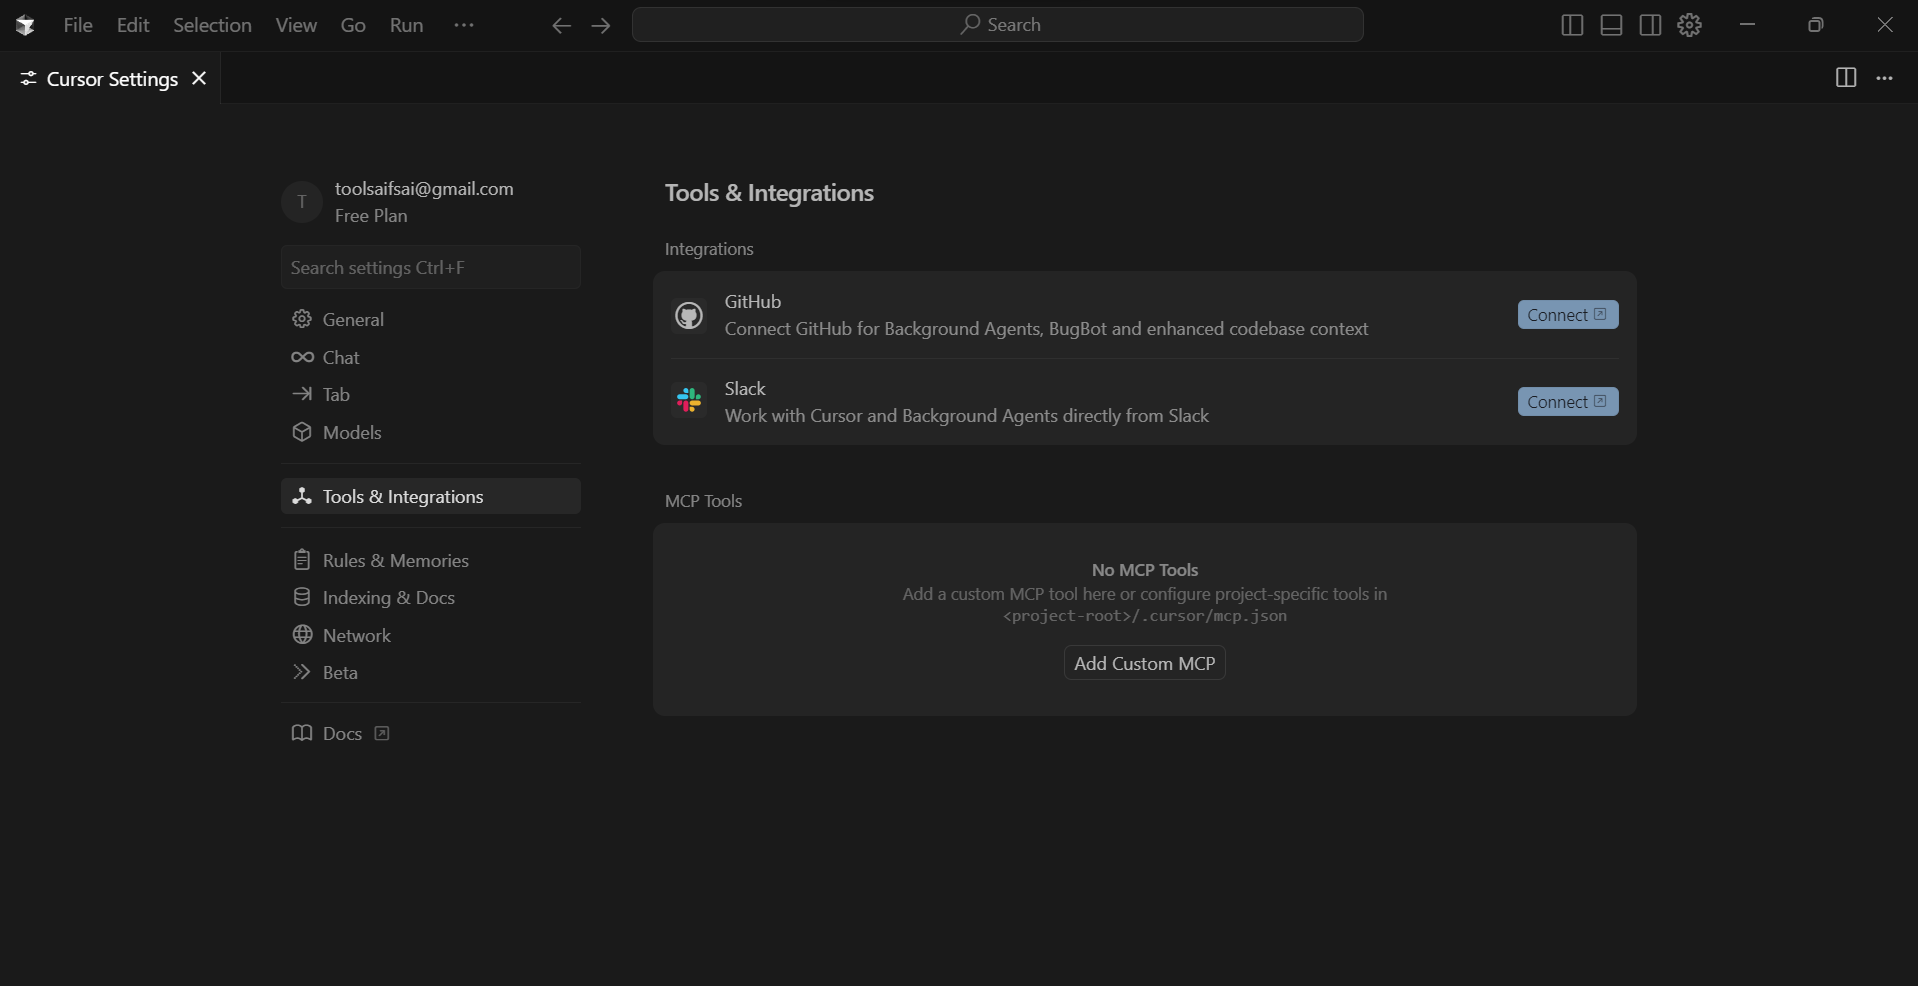
Add the Demand Forecasting MCP
After clicking Add Custom MCP, Cursor opens the MCP config file. Add this server — not the generic Saifs AI MCP. This one is Demand Forecasting only.
{
  "mcpServers": {
    "demand-forecasting": {
      "url": "https://demand-forecaster-mcp.saifs.ai/mcp"
    }
  }
}
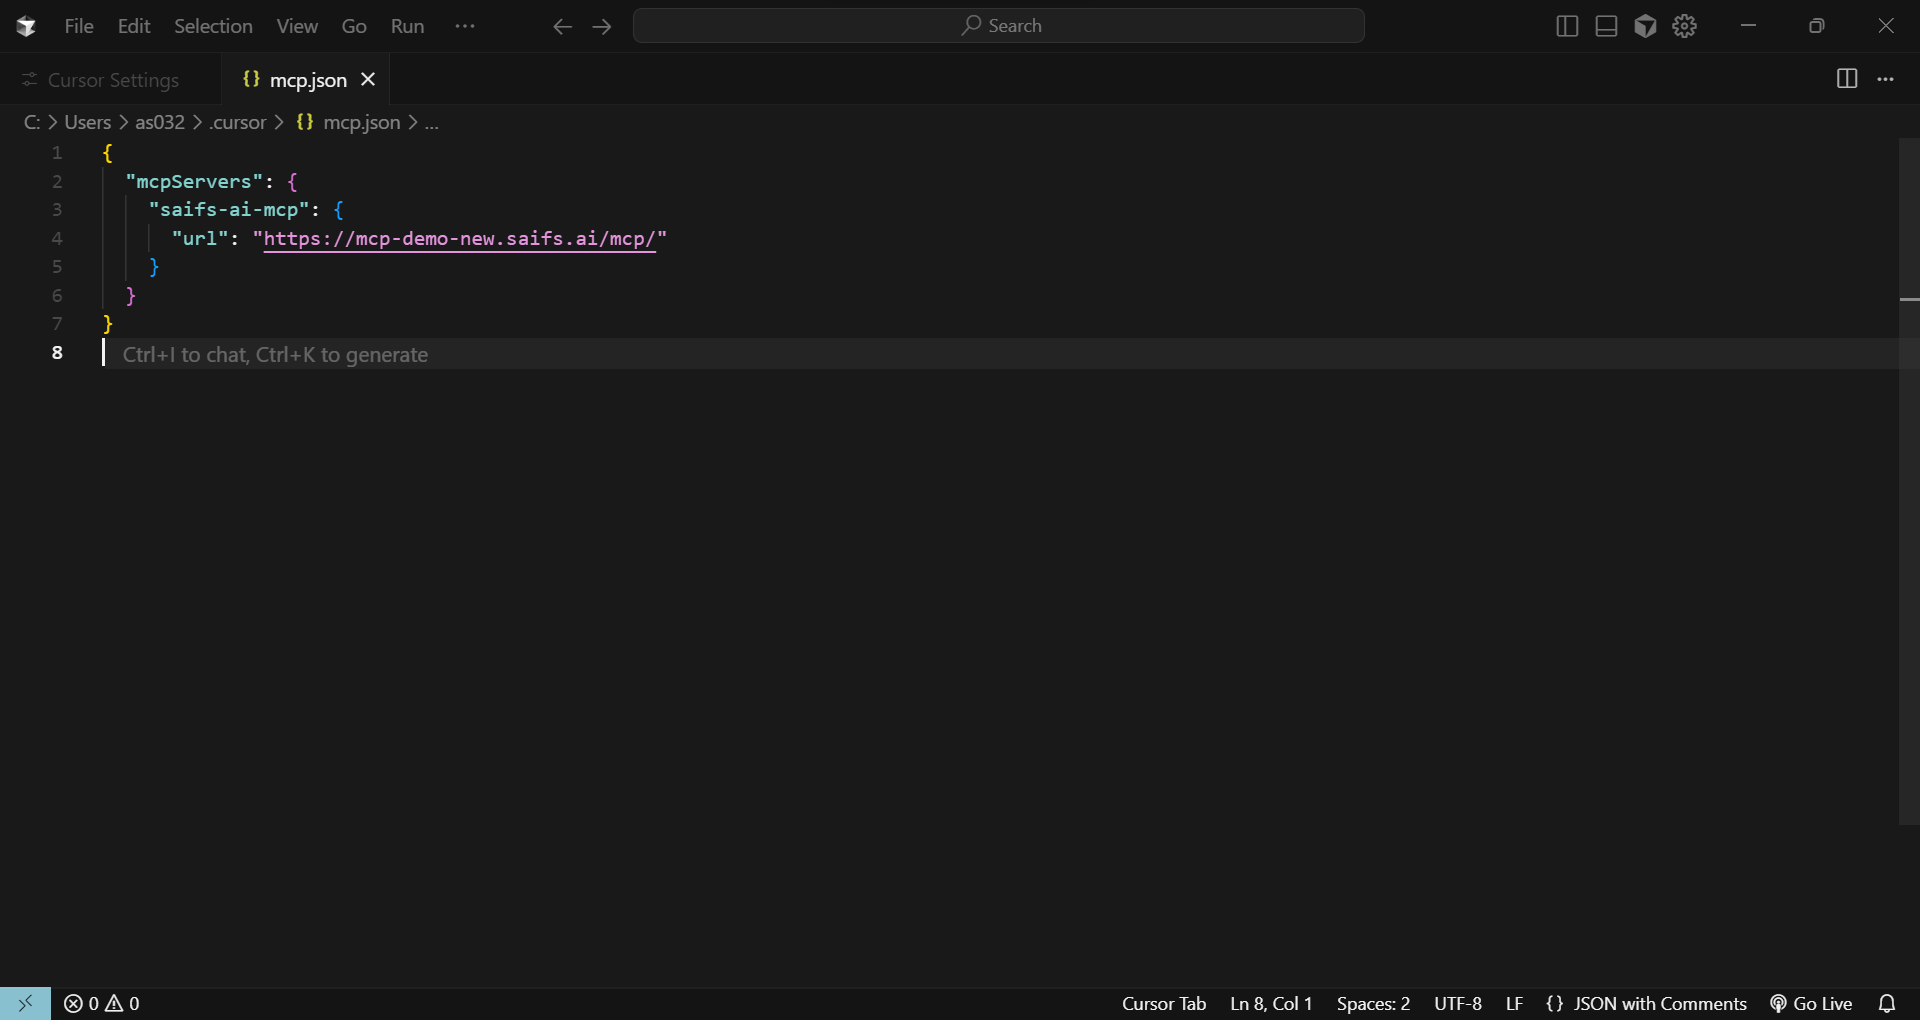
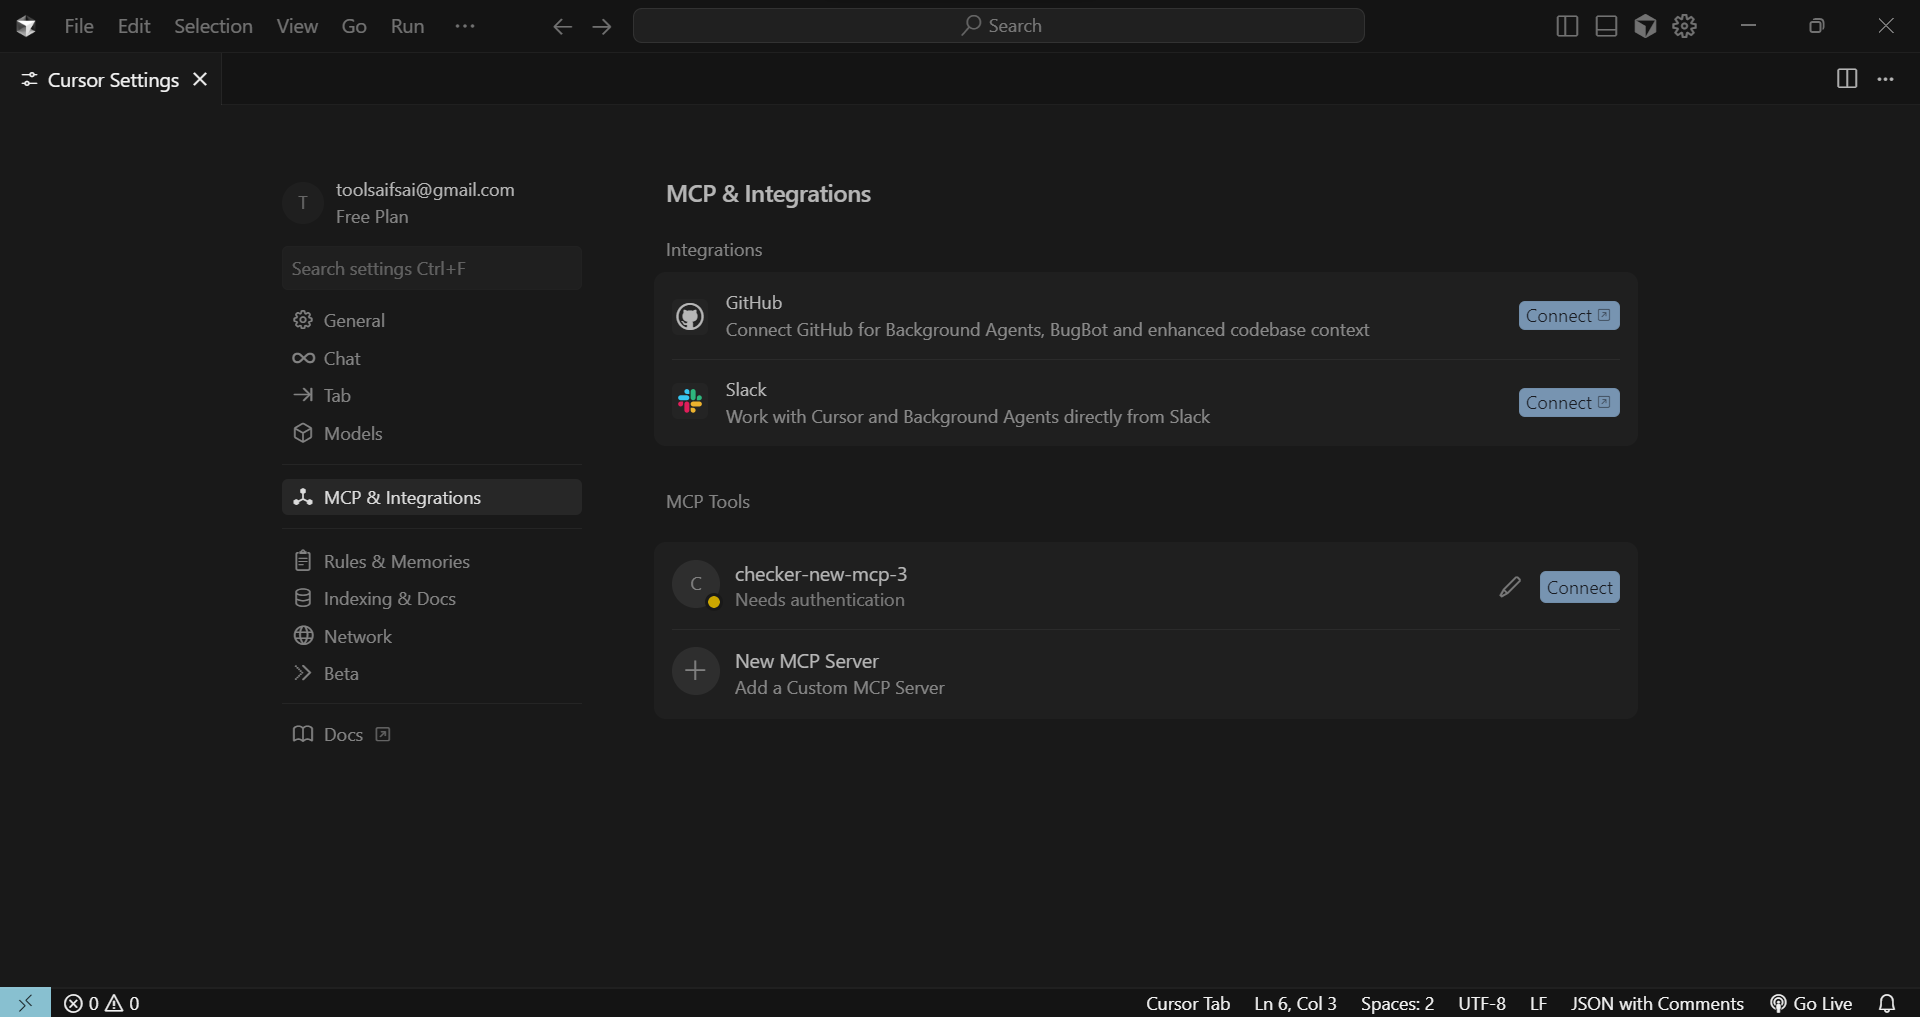
Click Connect
Click Connect next to the new MCP server under MCP Tools to start the integration.
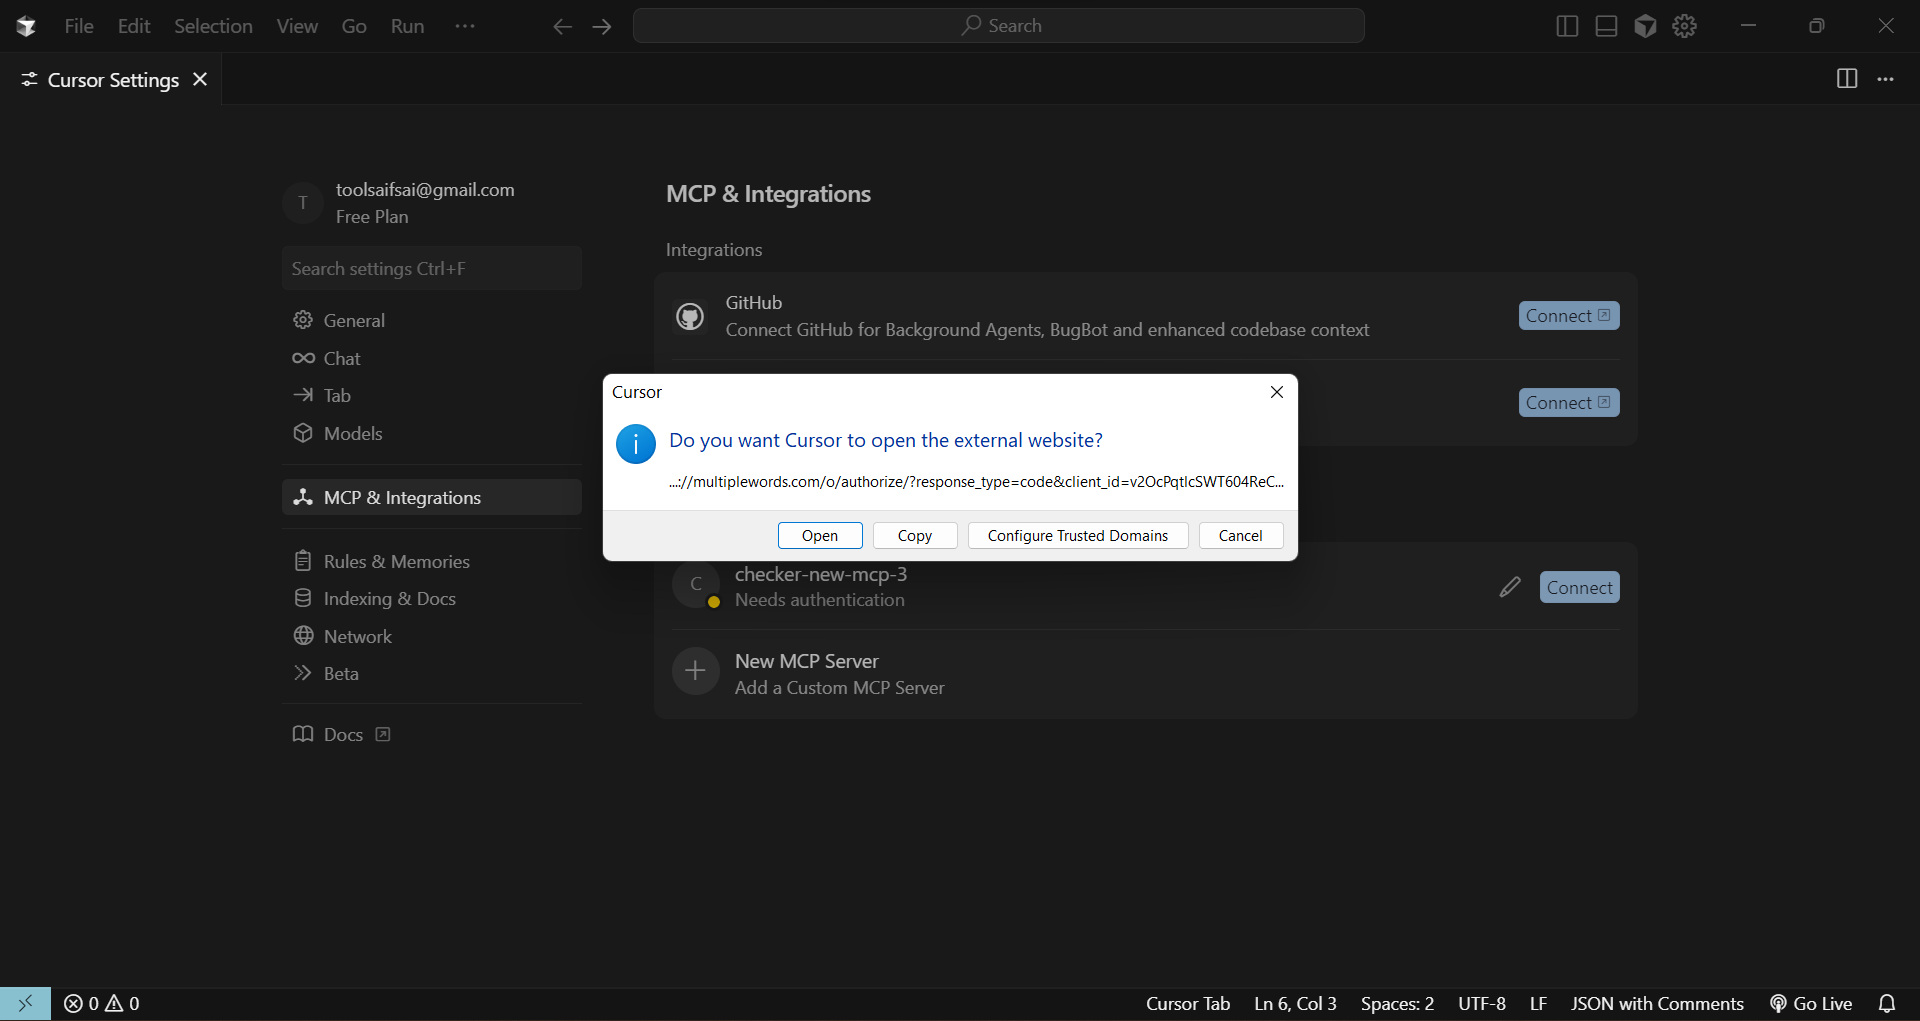
Allow extension access
When prompted, select Open so Cursor can process the URI and start the login flow.
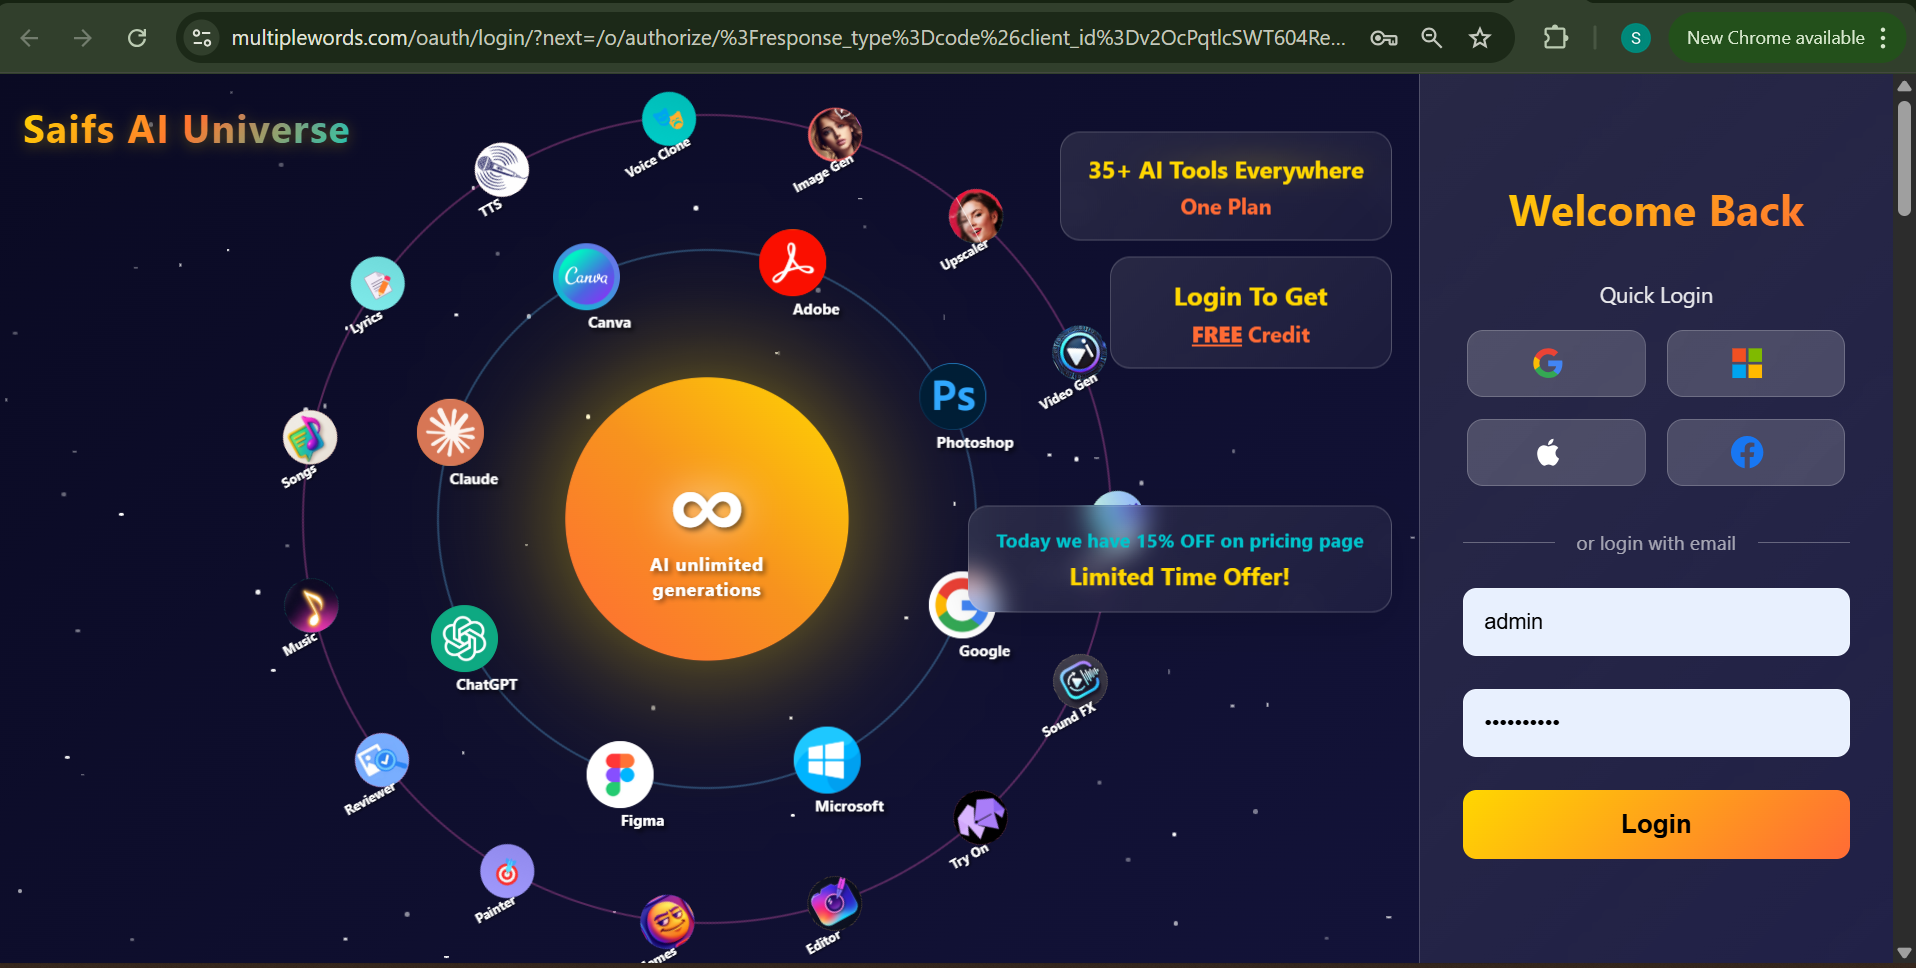
Choose a login method
On the authentication page, sign in with Google, Microsoft, Apple, or Facebook — the same Saifs AI account you already use.
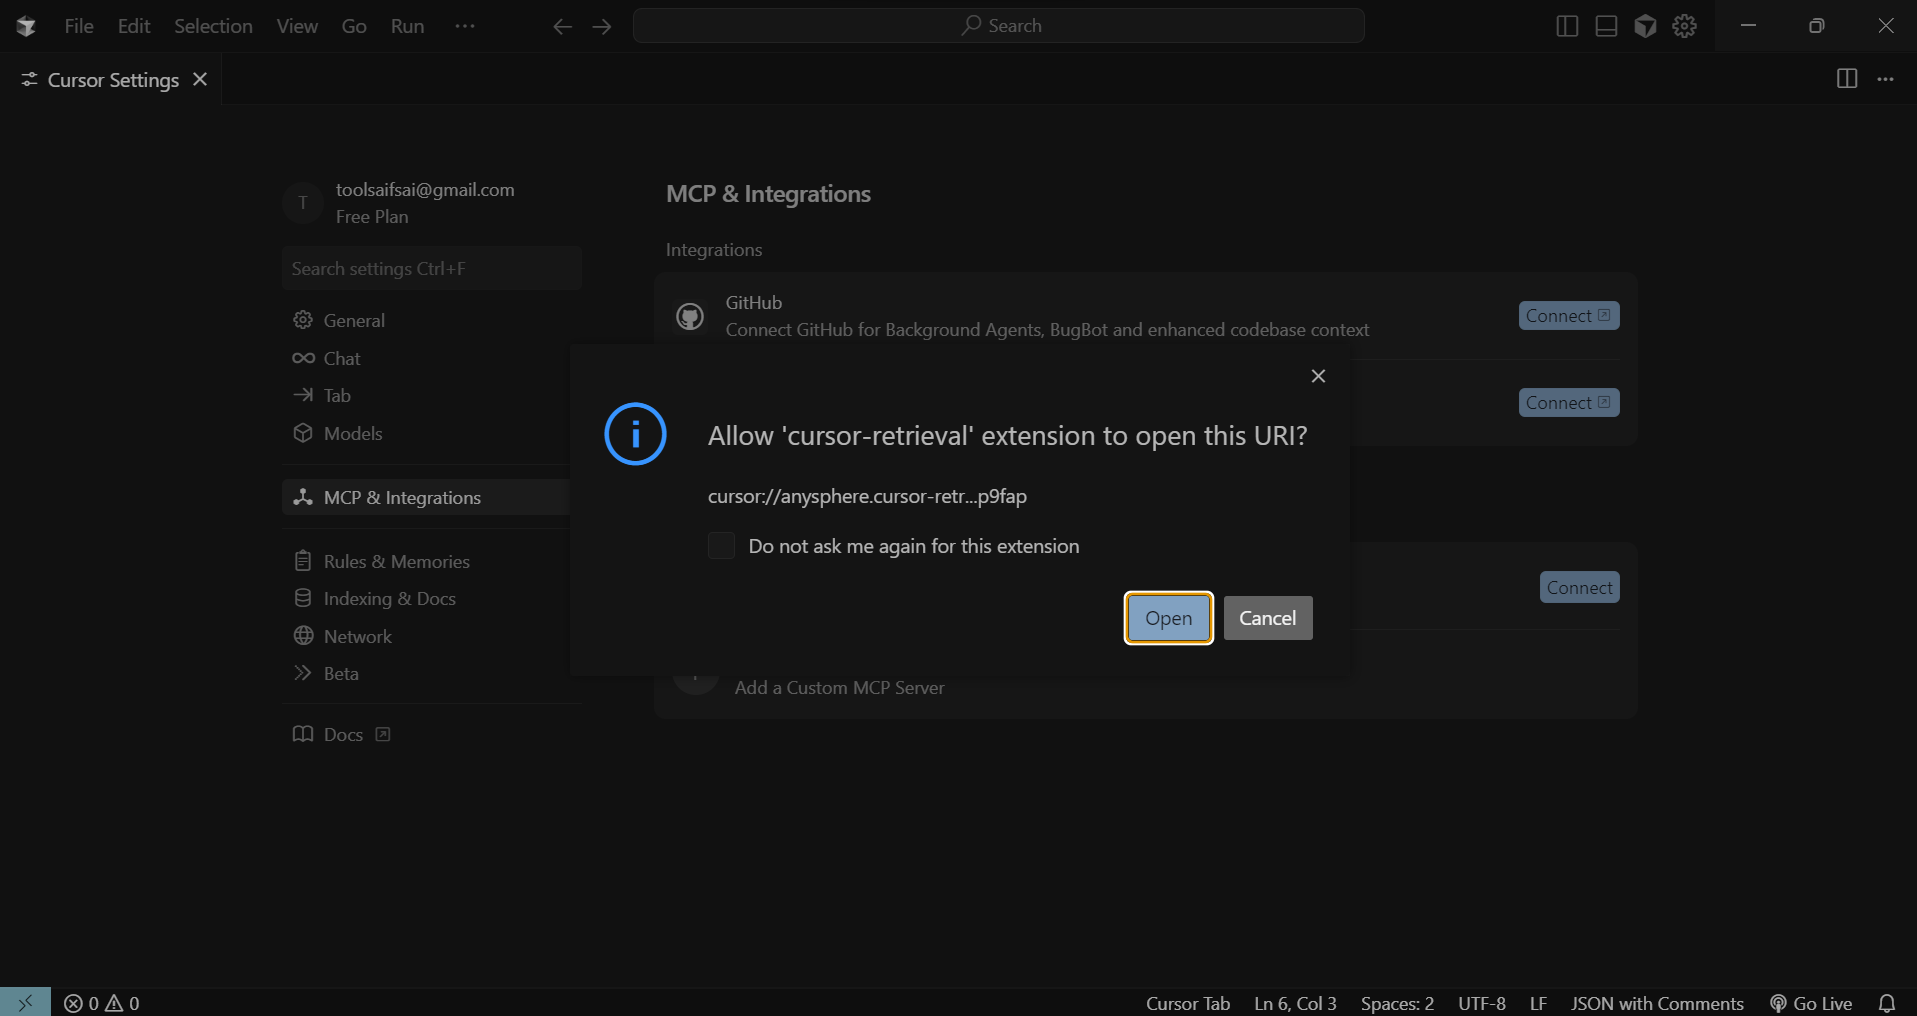
Complete authentication
After you sign in, a prompt will ask to finish the connection. Click Open to complete the MCP integration in Cursor.
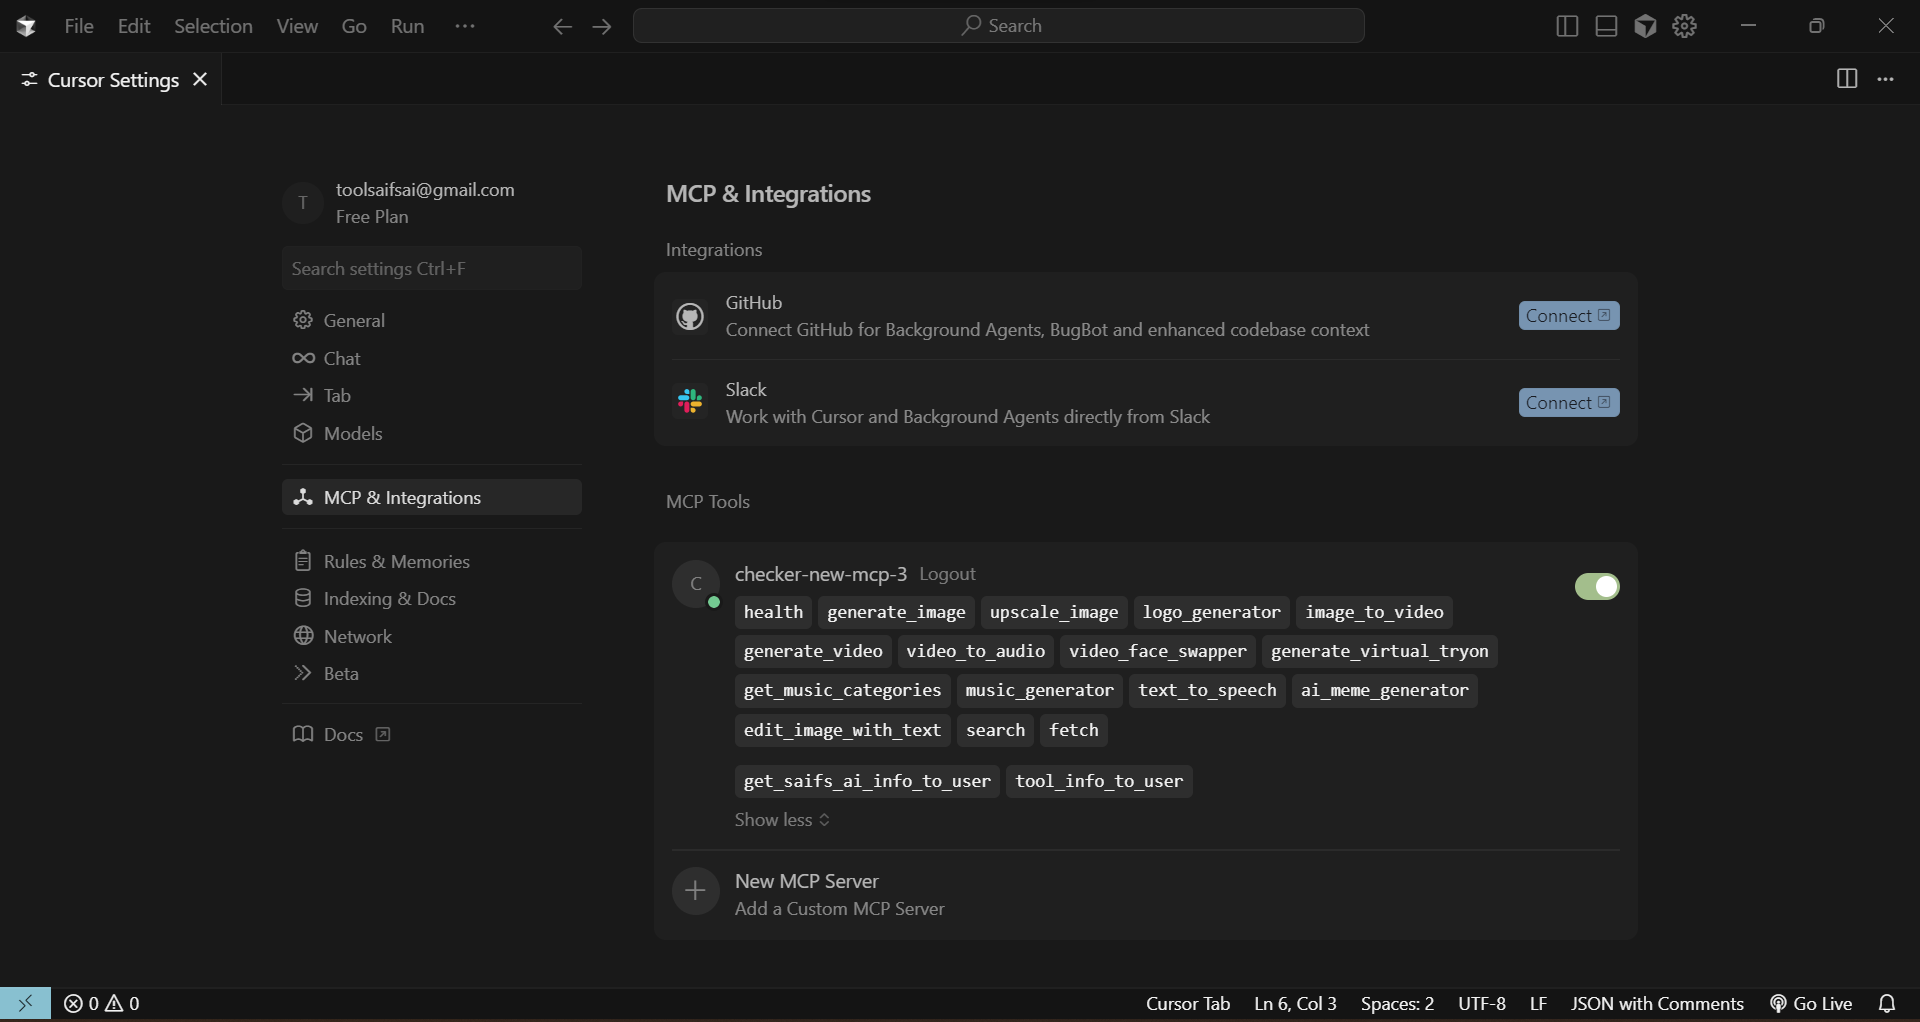
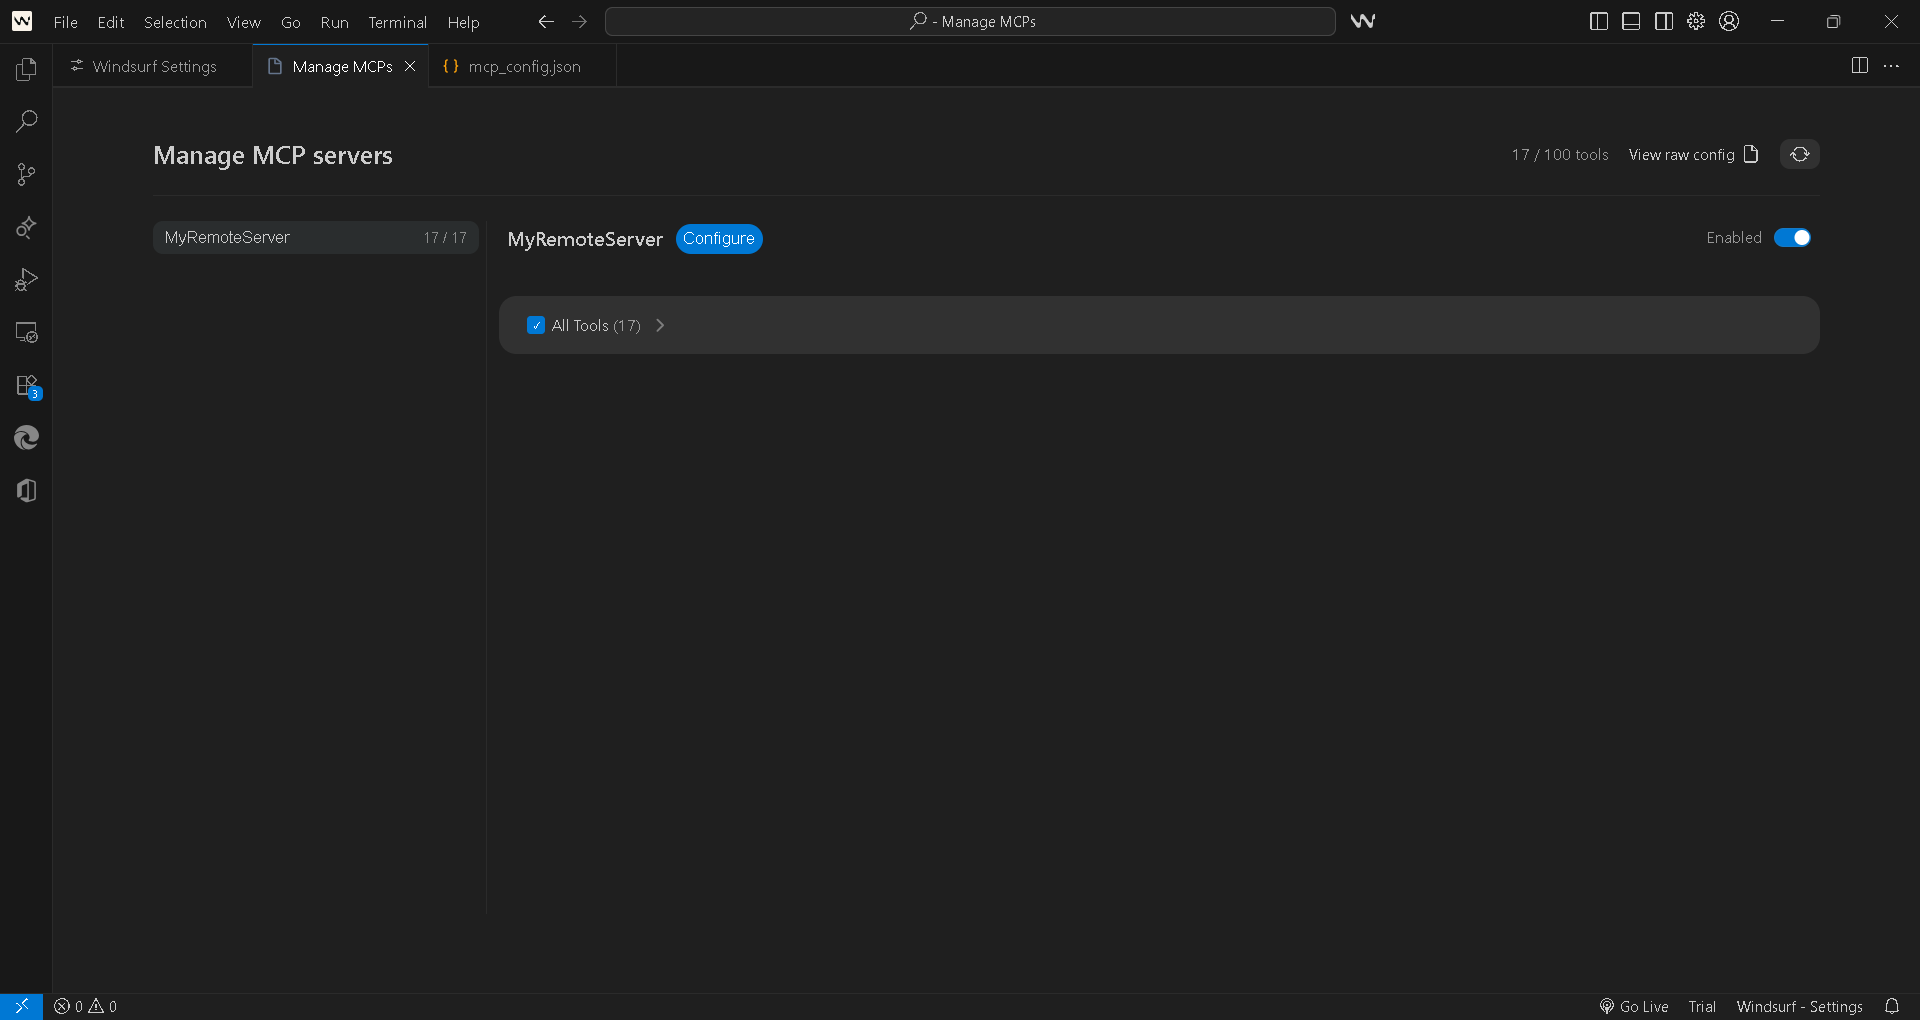
Verify the agent is on
The toggle should be ON. That confirms the Demand Forecasting Agent is connected.
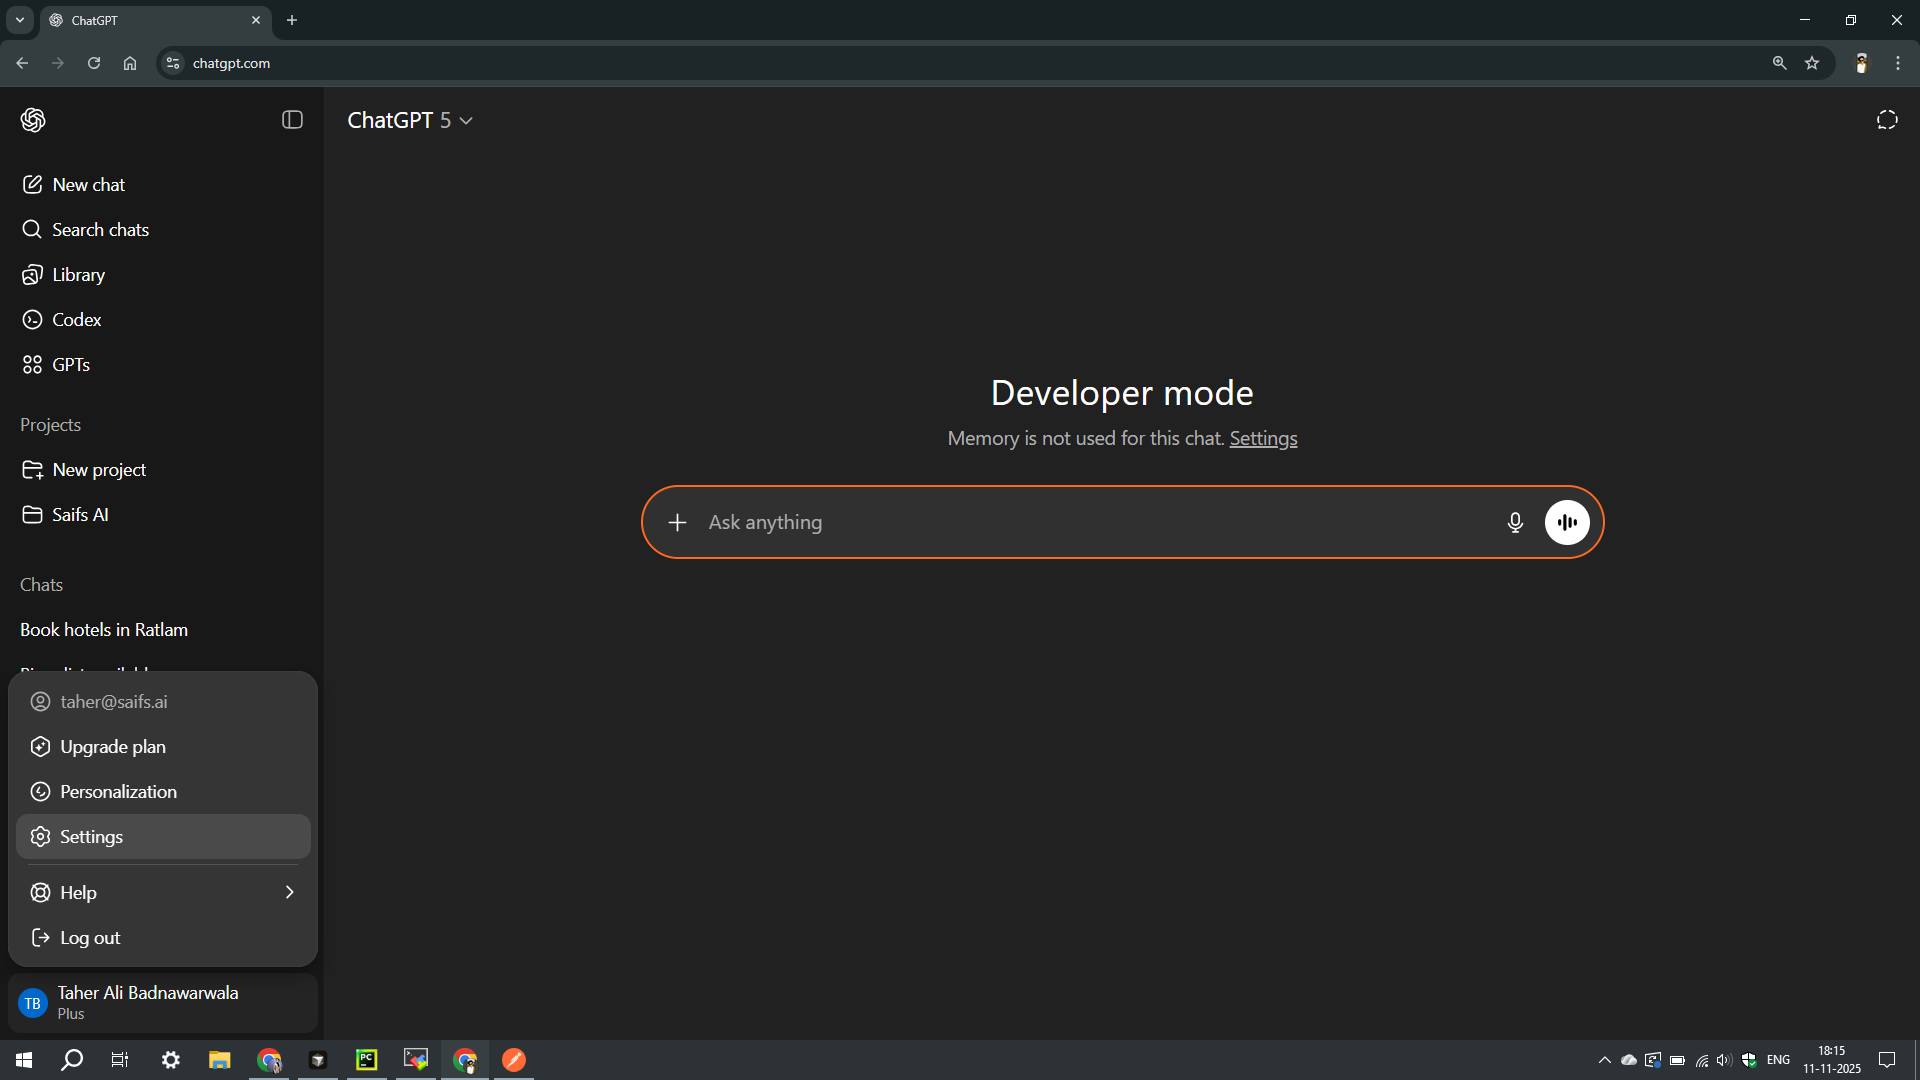
Open ChatGPT Settings
From the ChatGPT home page, go to Settings.
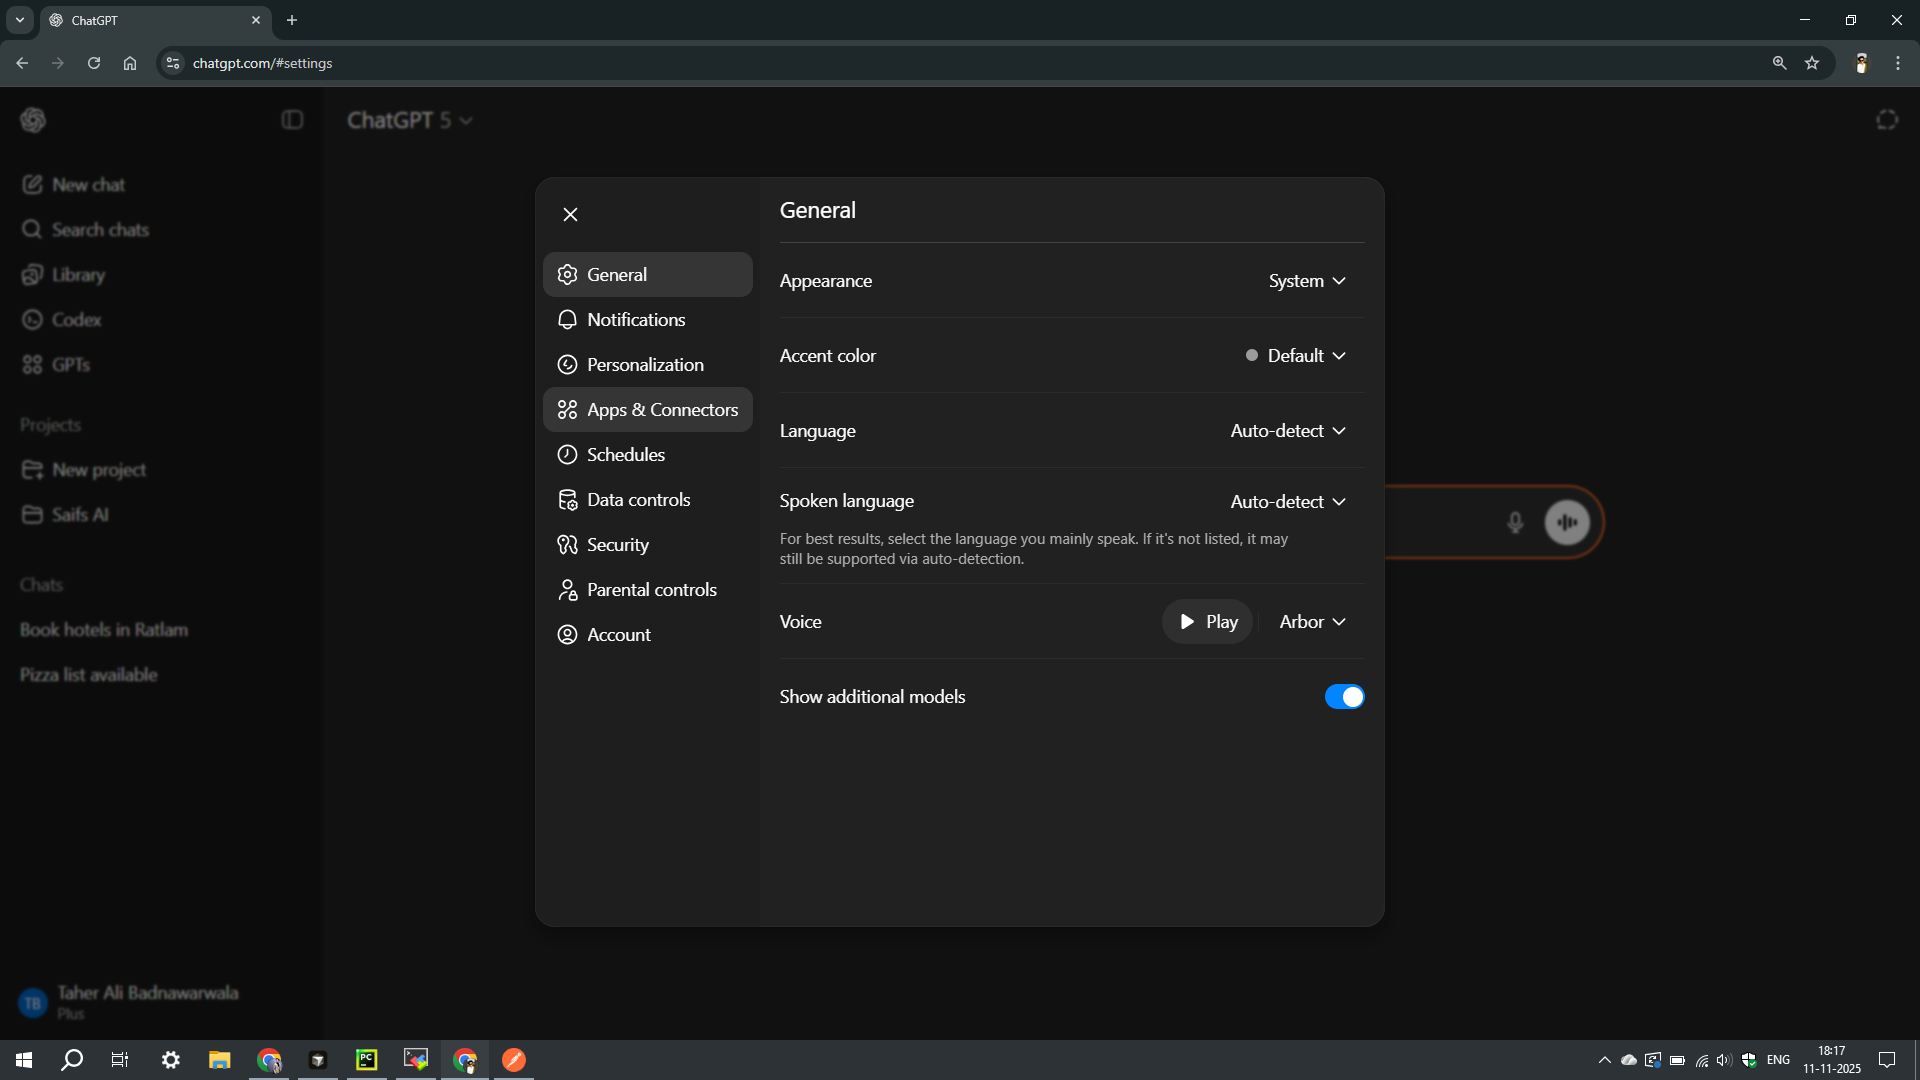
Open Connectors
Click Connectors in the settings menu.
Create a connector
Click Create in the browse connectors section.
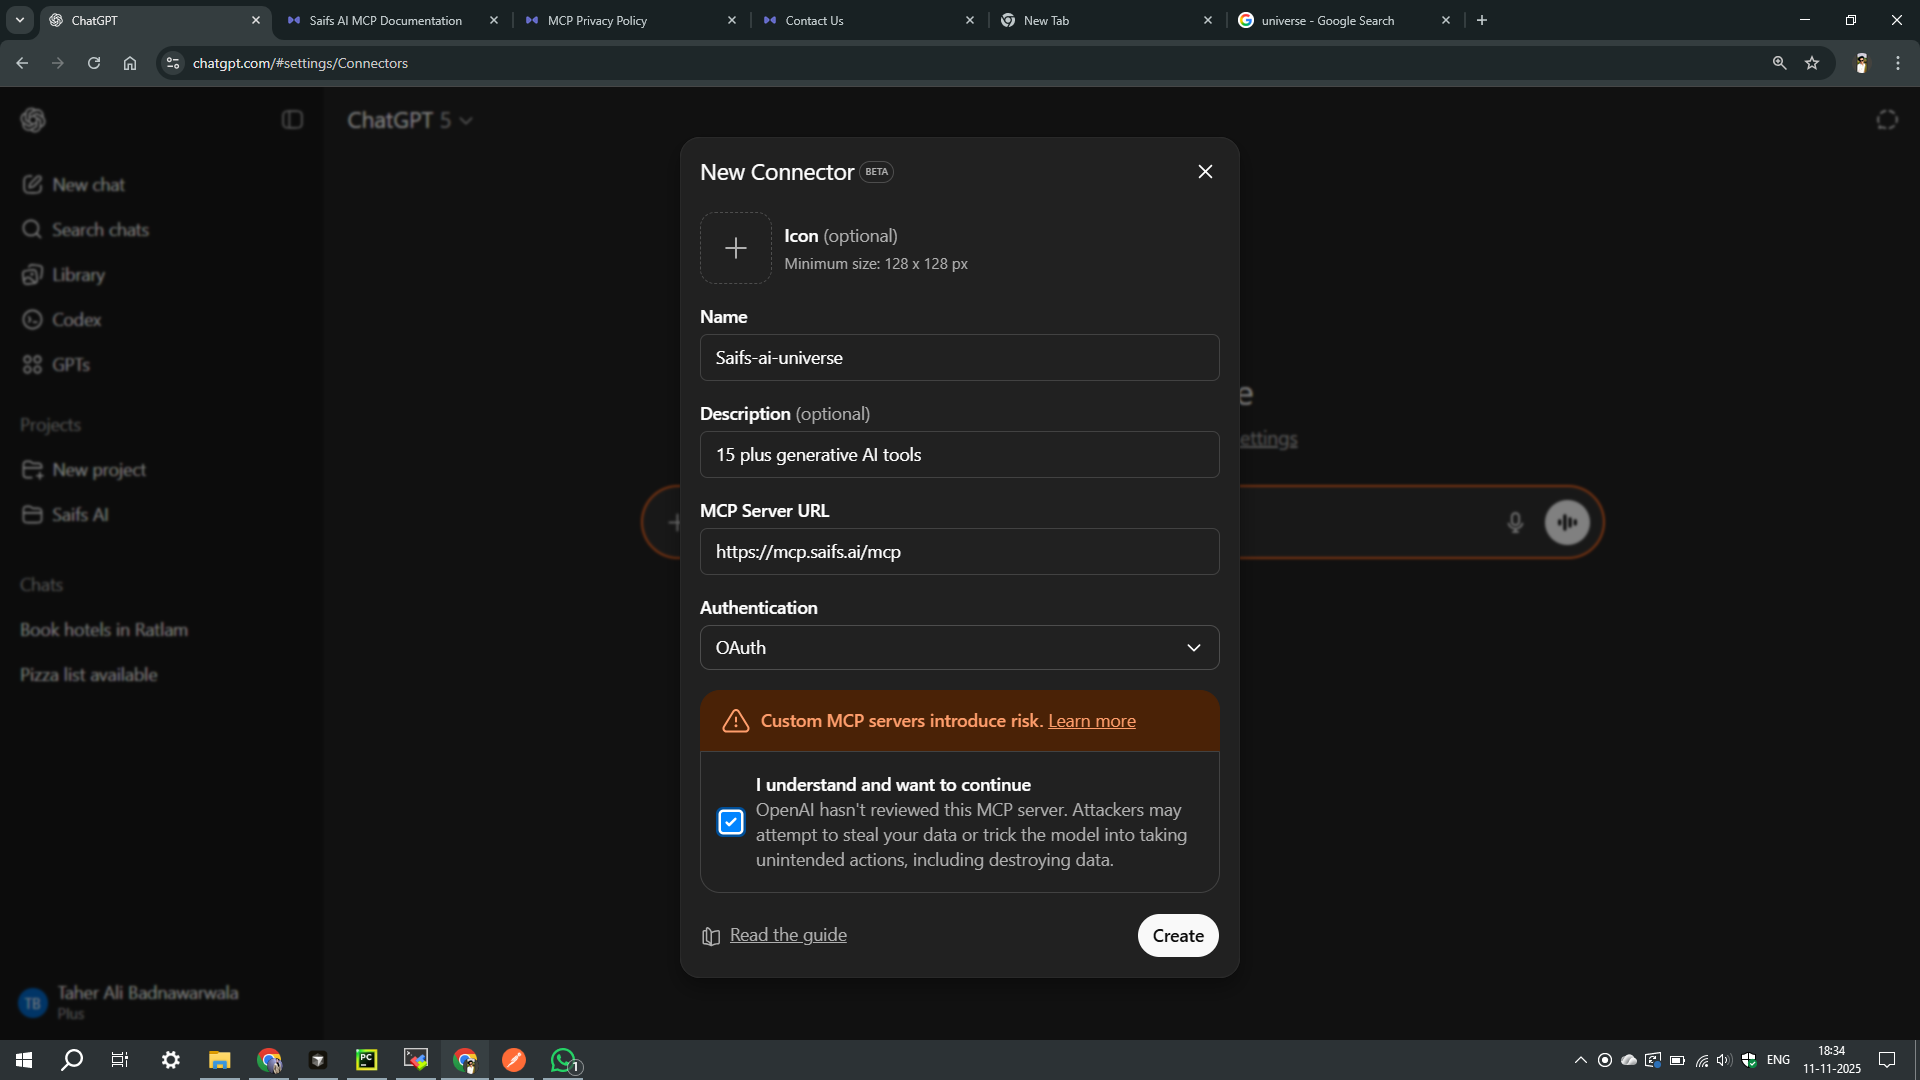
Add the Demand Forecasting MCP
Enter this server — not the generic Saifs AI MCP. This one is Demand Forecasting only. Then click Save.
Server URL: https://demand-forecaster-mcp.saifs.ai/mcp
Name: Demand Forecasting
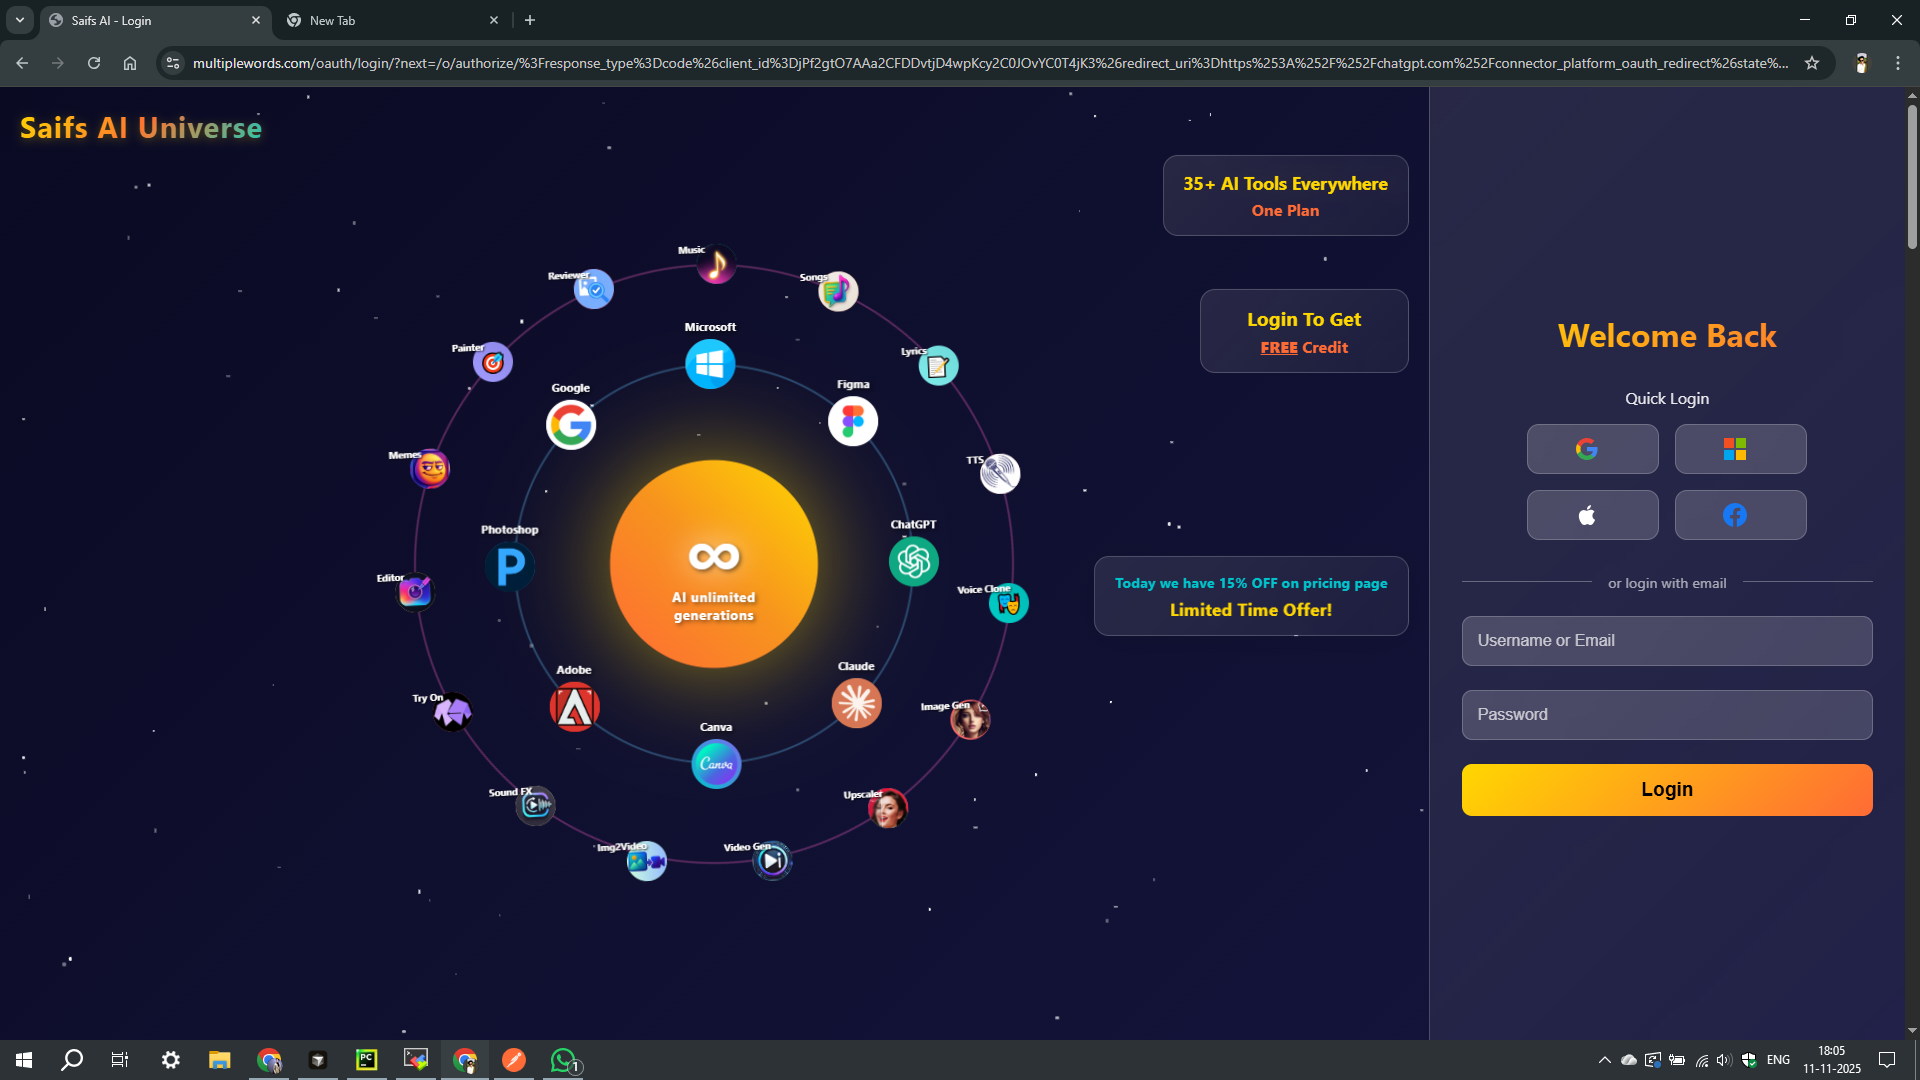
Save and start asking
Click Save. You can now ask what we will sell next in ChatGPT.
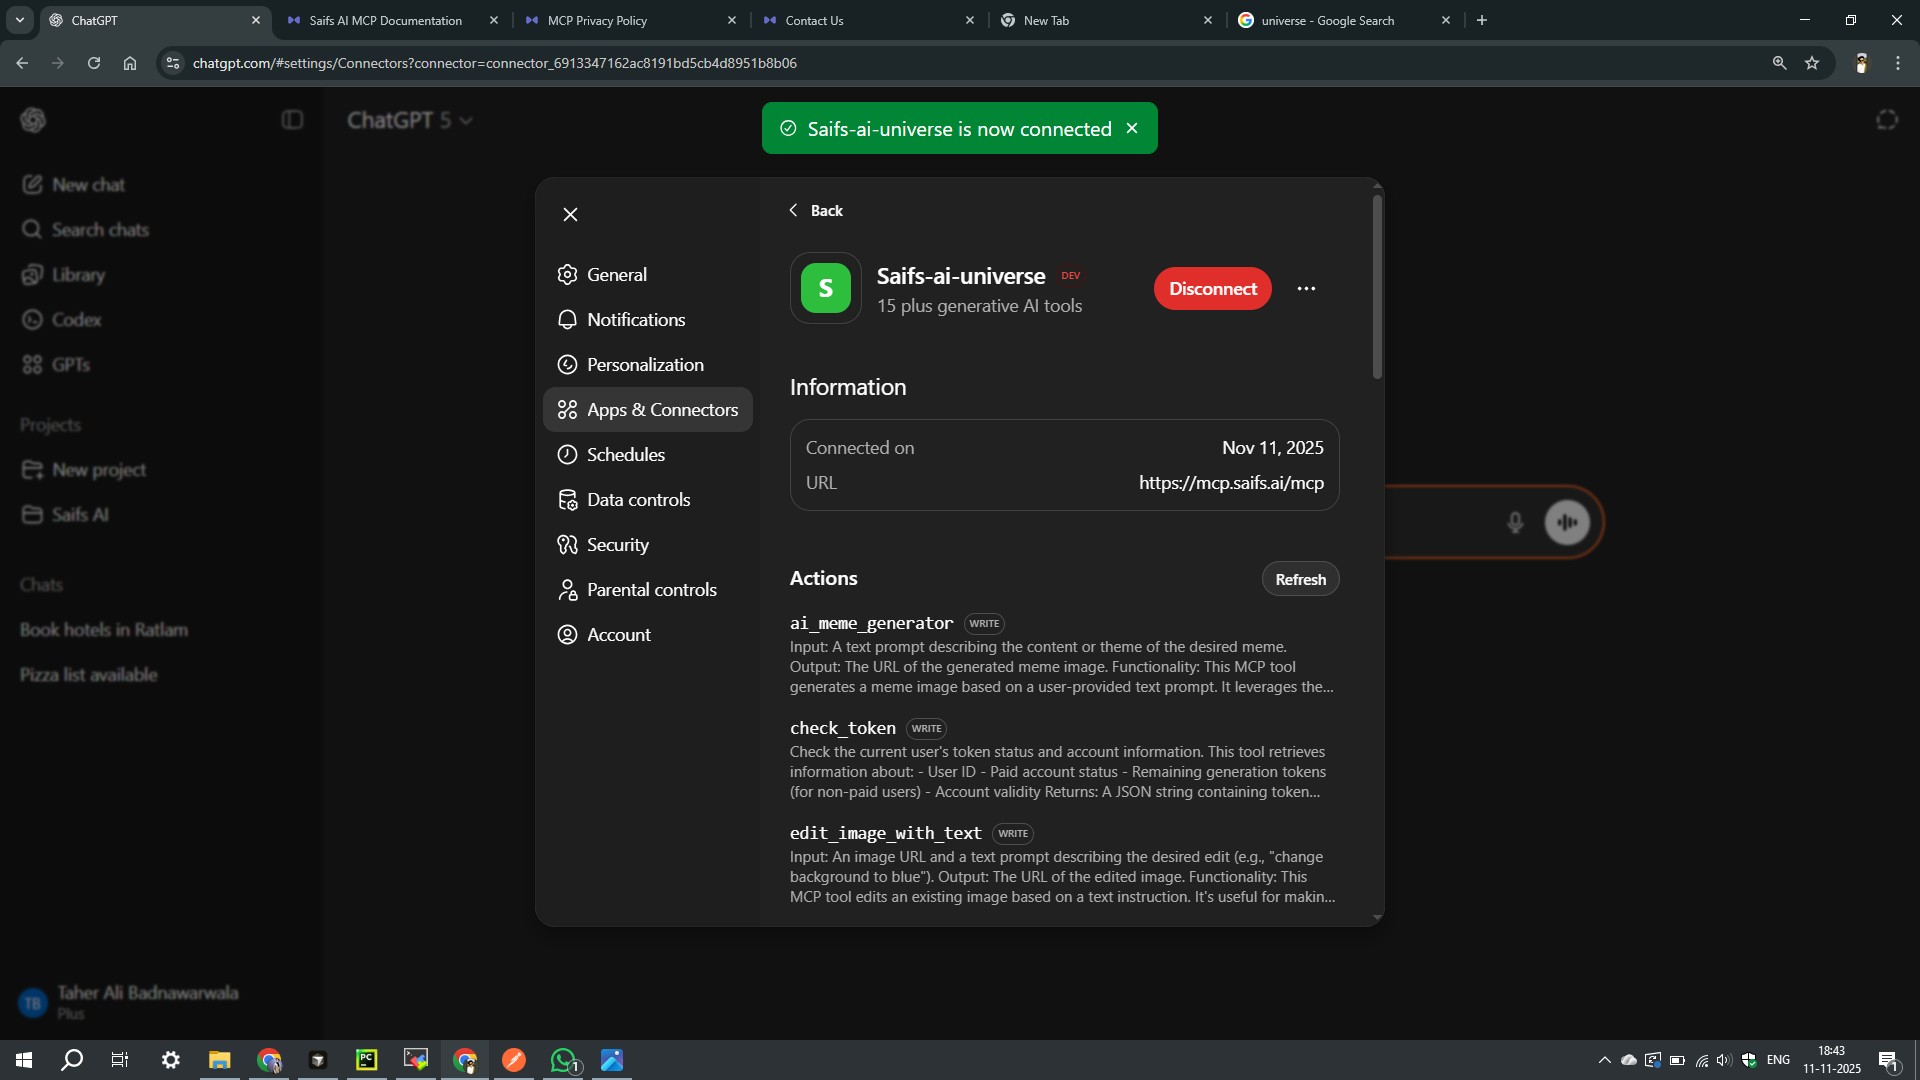
Install an MCP-compatible client
Open the VS Code marketplace and install an MCP-compatible client.
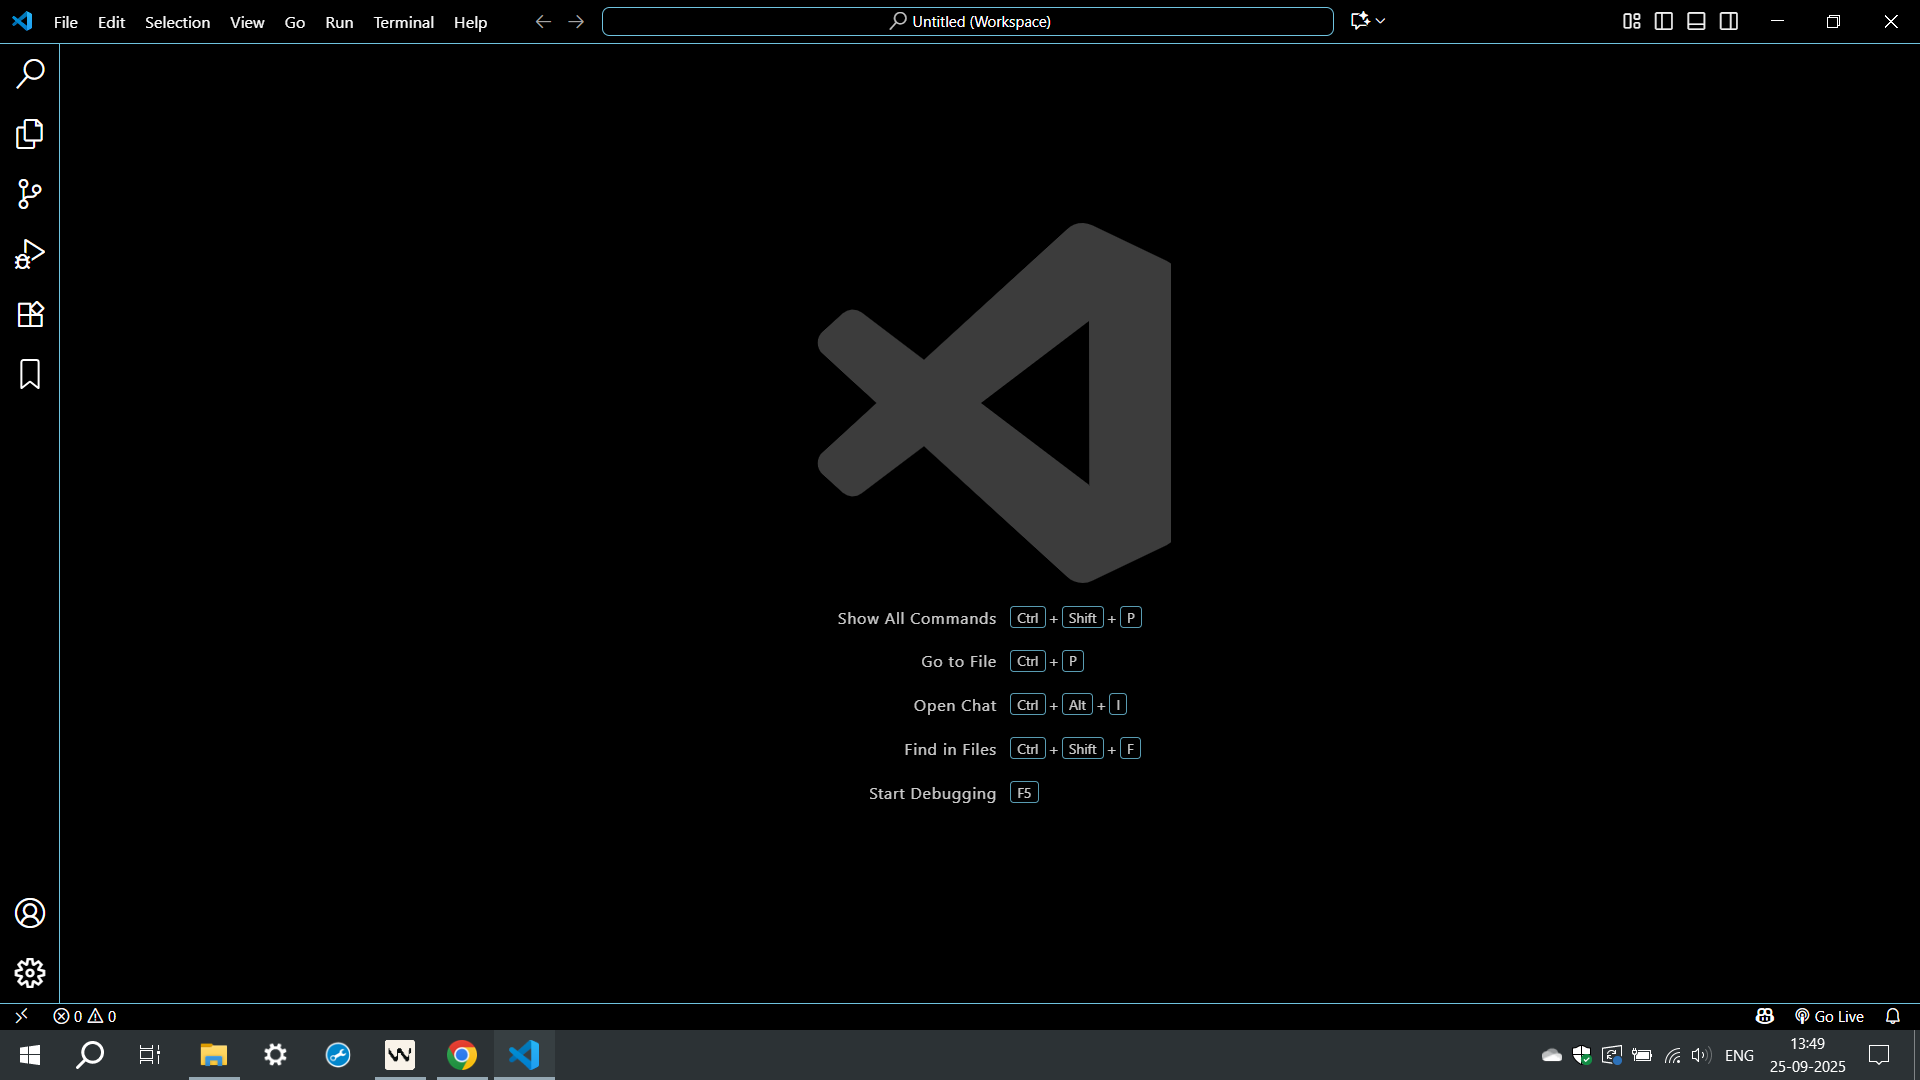
Open the command palette
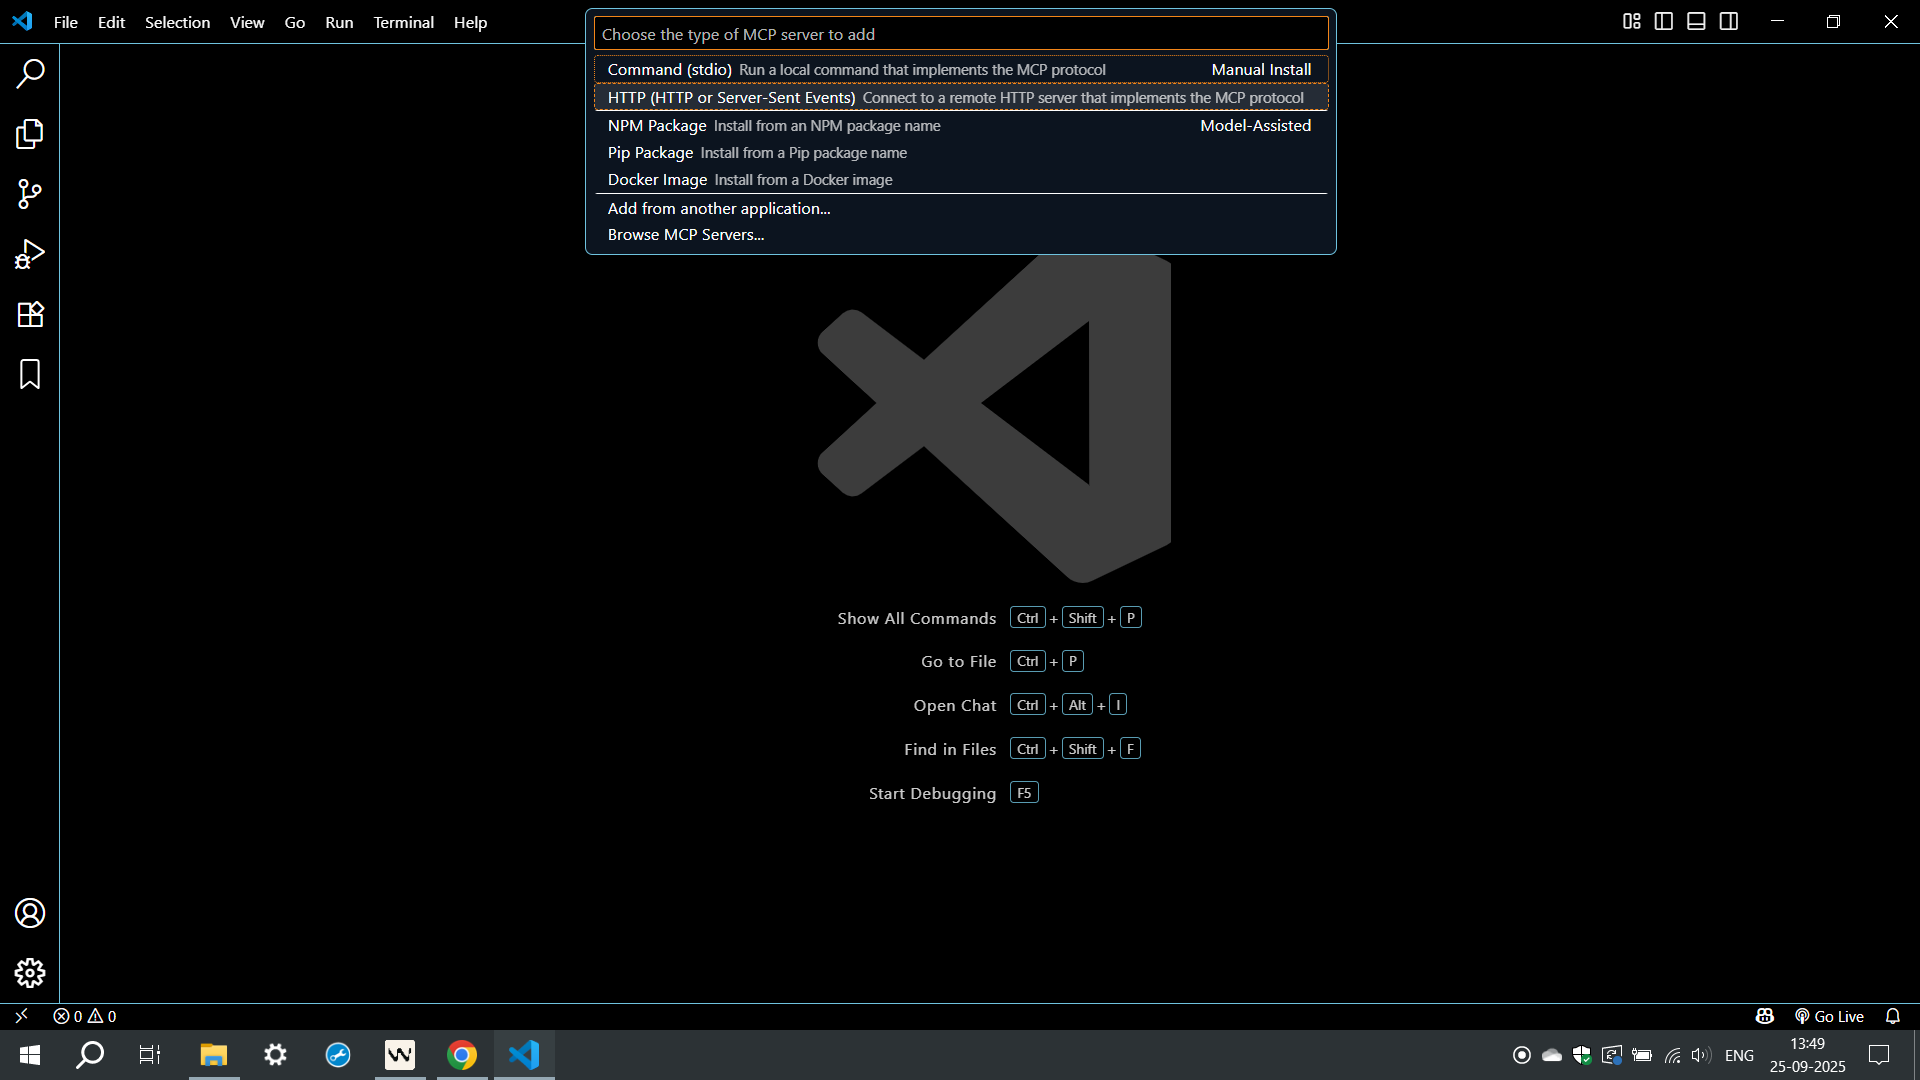
Open the command palette, type MCP: add, and select MCP: Add Server to start the wizard.
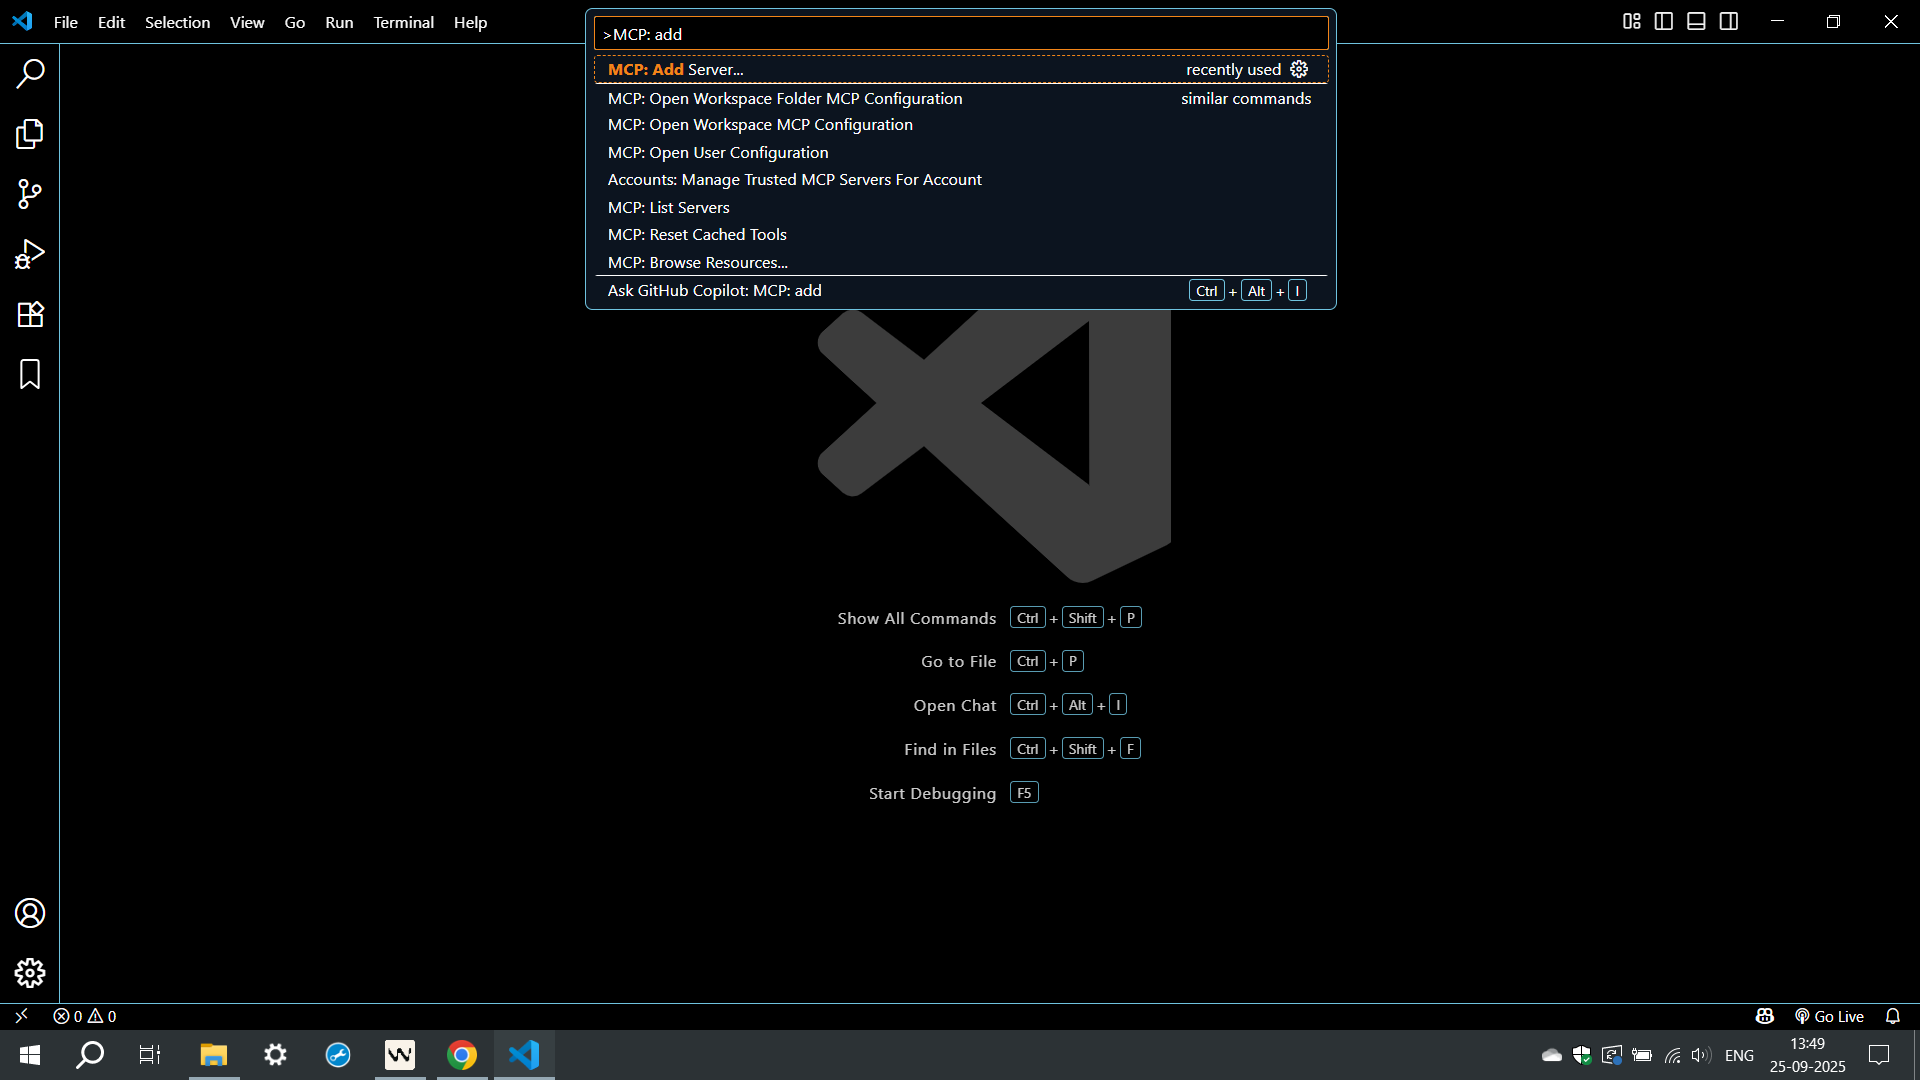
Choose HTTP server
Search MCP: Add Server and choose HTTP (HTTP or Server-Sent Events) to connect to a remote MCP server.
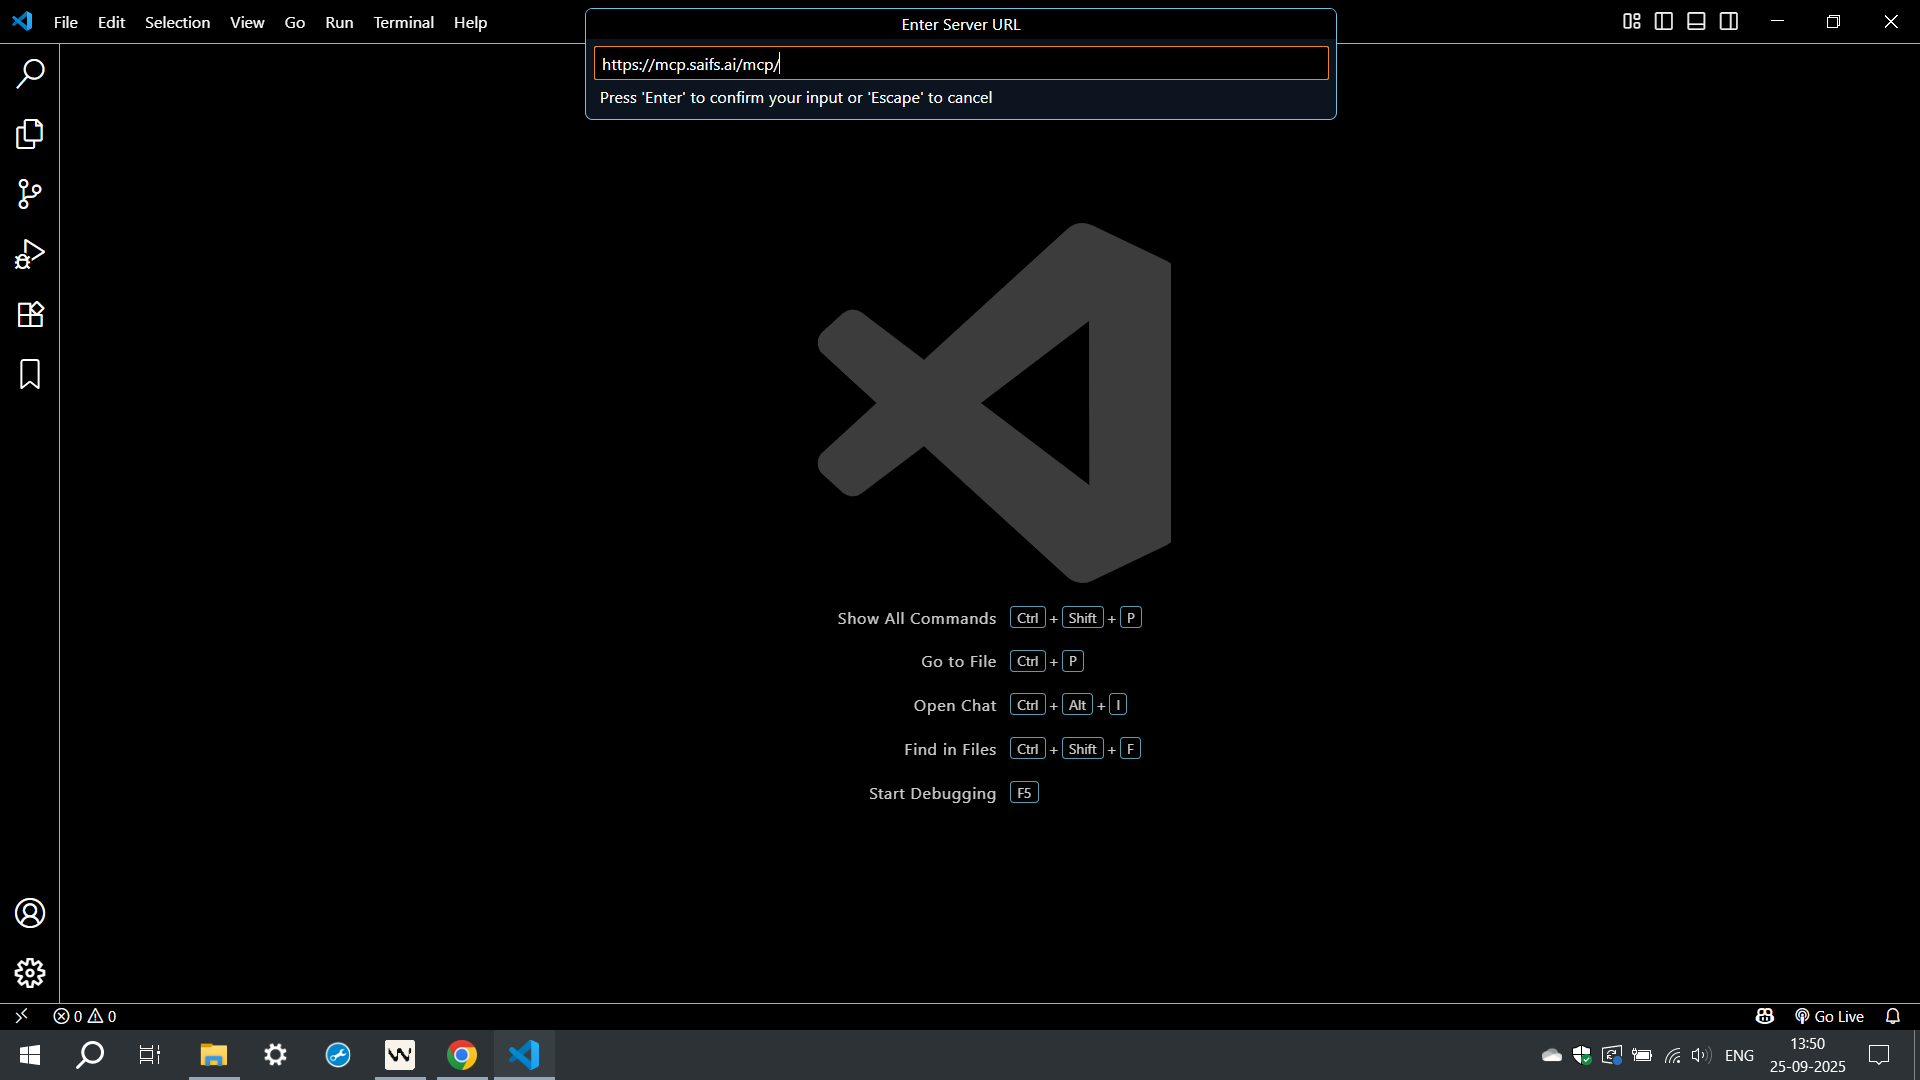
Enter the Demand Forecasting MCP URL
Input this server URL — not the generic Saifs AI MCP. This one is Demand Forecasting only. Press Enter to confirm.
https://demand-forecaster-mcp.saifs.ai/mcp
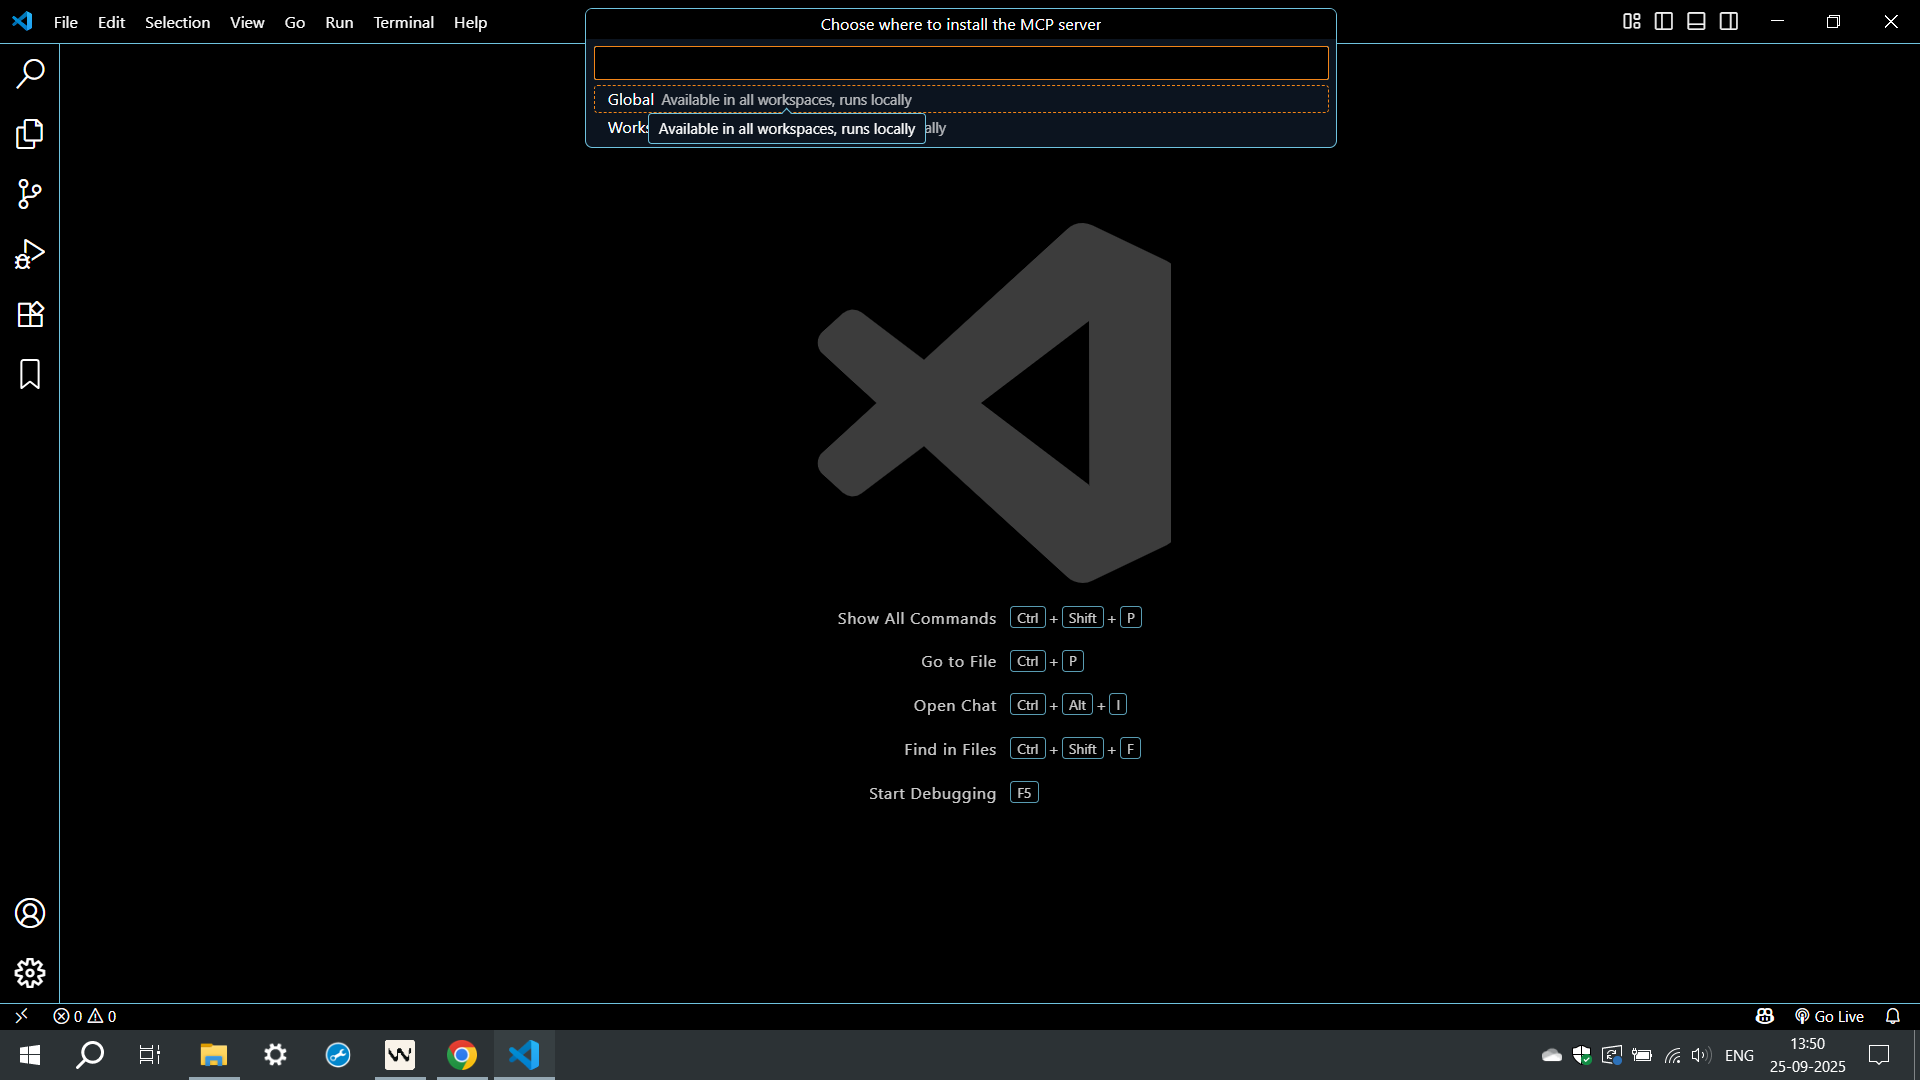
Choose installation scope
When prompted, choose Global (all workspaces) or Workspace (this workspace only).
Allow authentication
Allow the server to authenticate so VS Code can talk to the Demand Forecasting MCP.
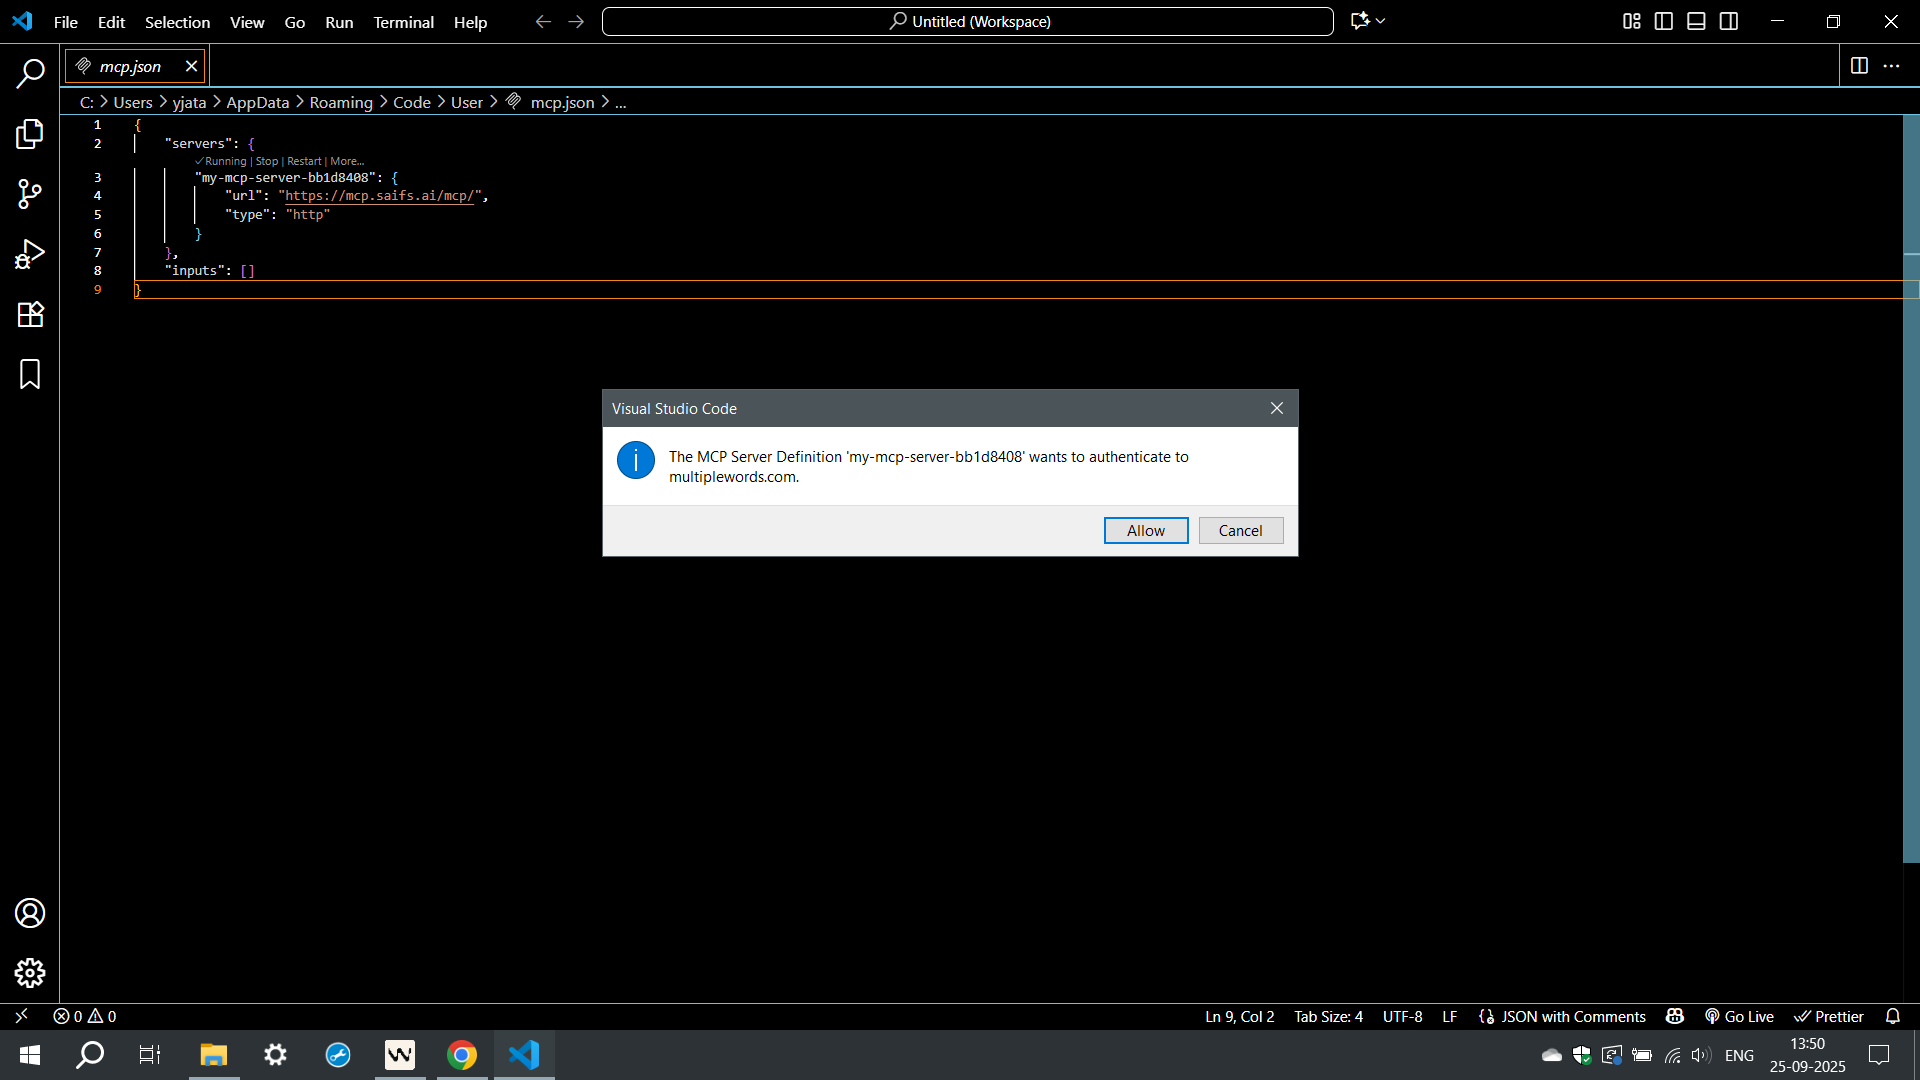
Verify the server is running
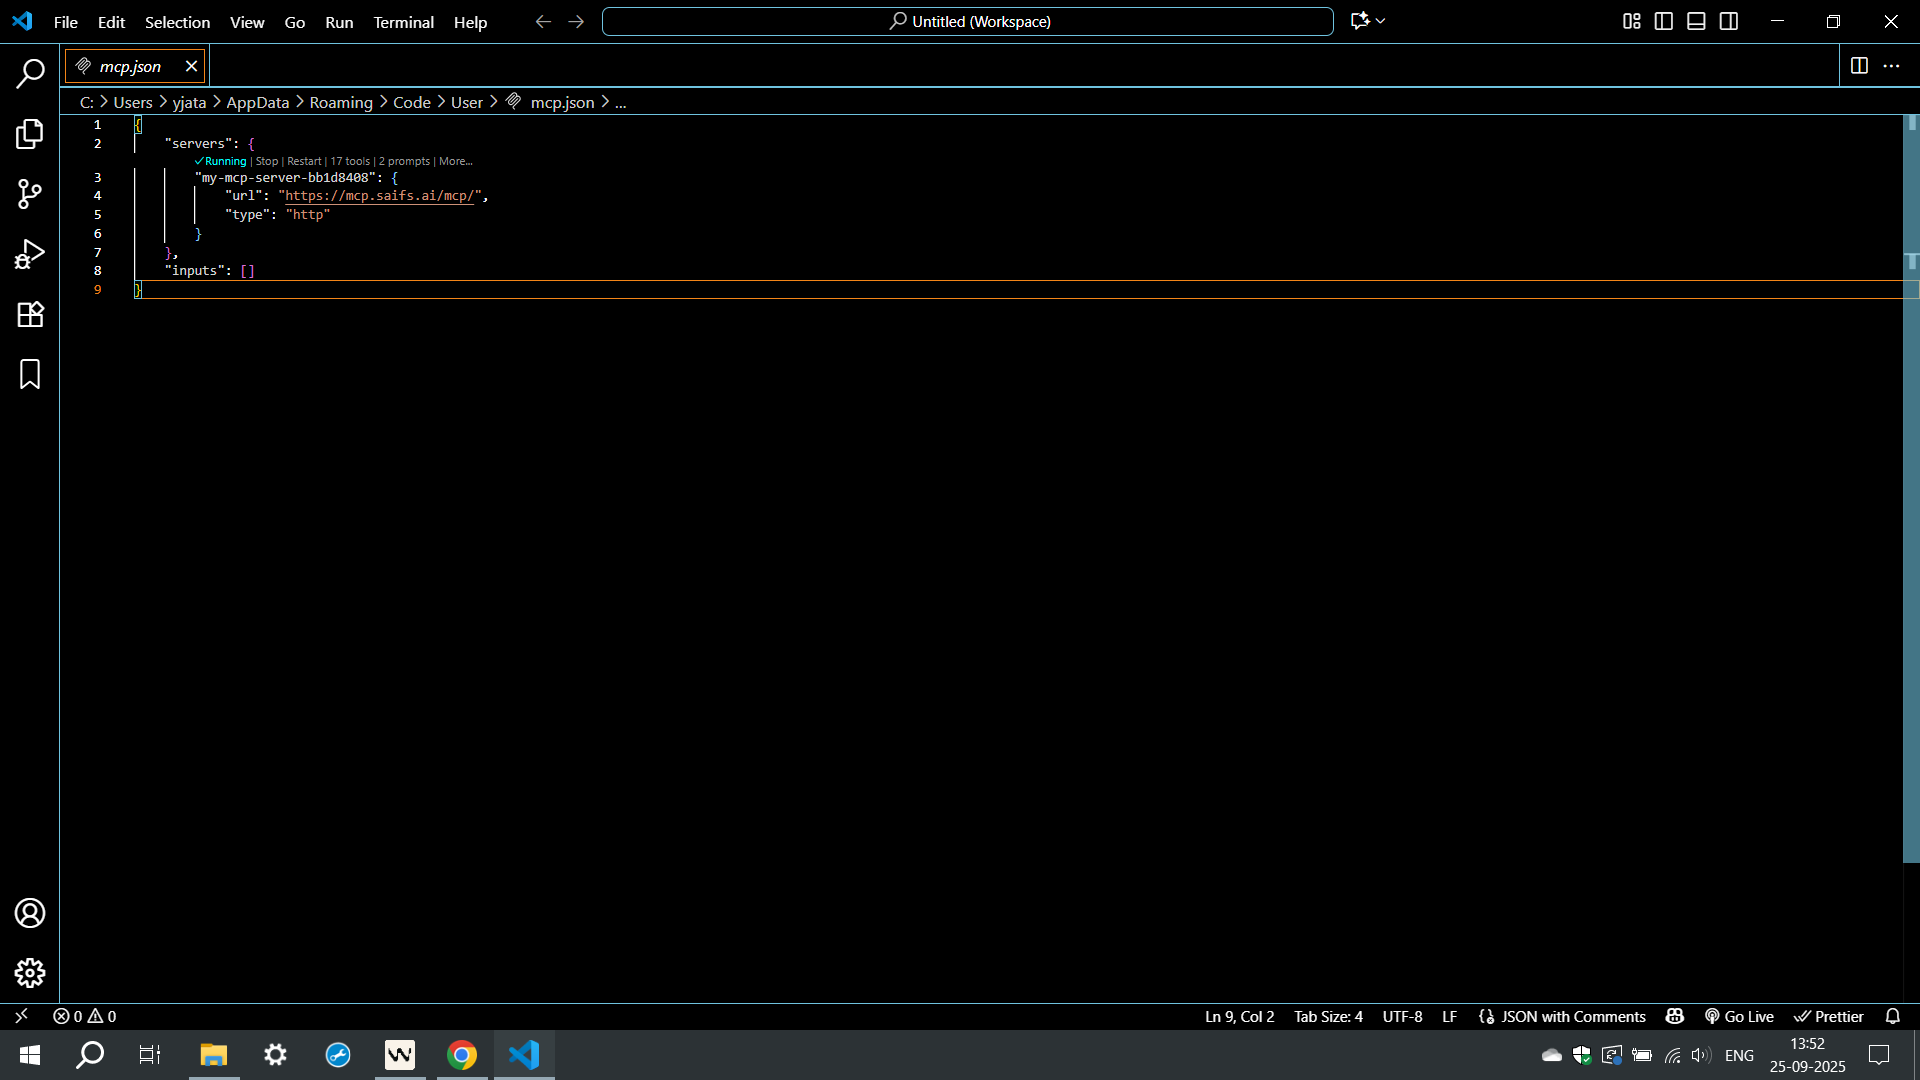
The MCP server should show as Running. That confirms the Demand Forecasting Agent is connected in VS Code.
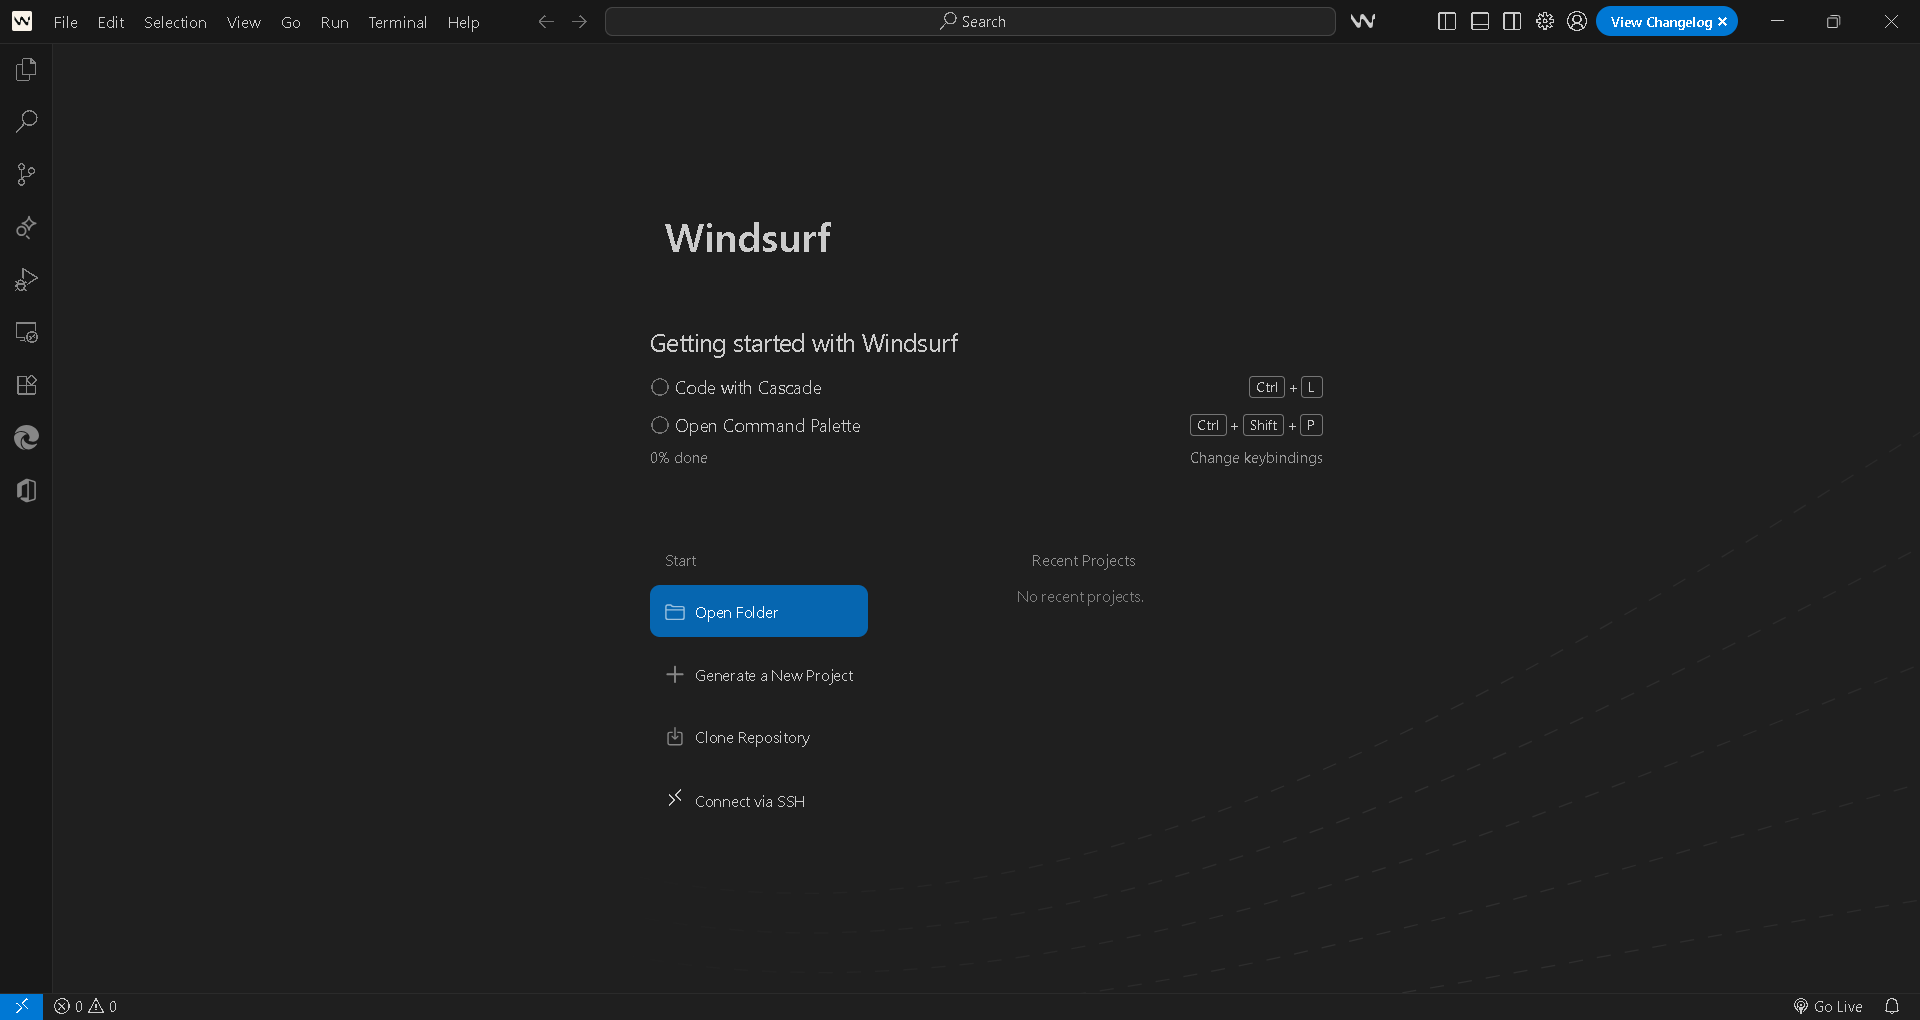
Open Windsurf
Launch Windsurf, then open an existing project folder or create a new one from the welcome screen.
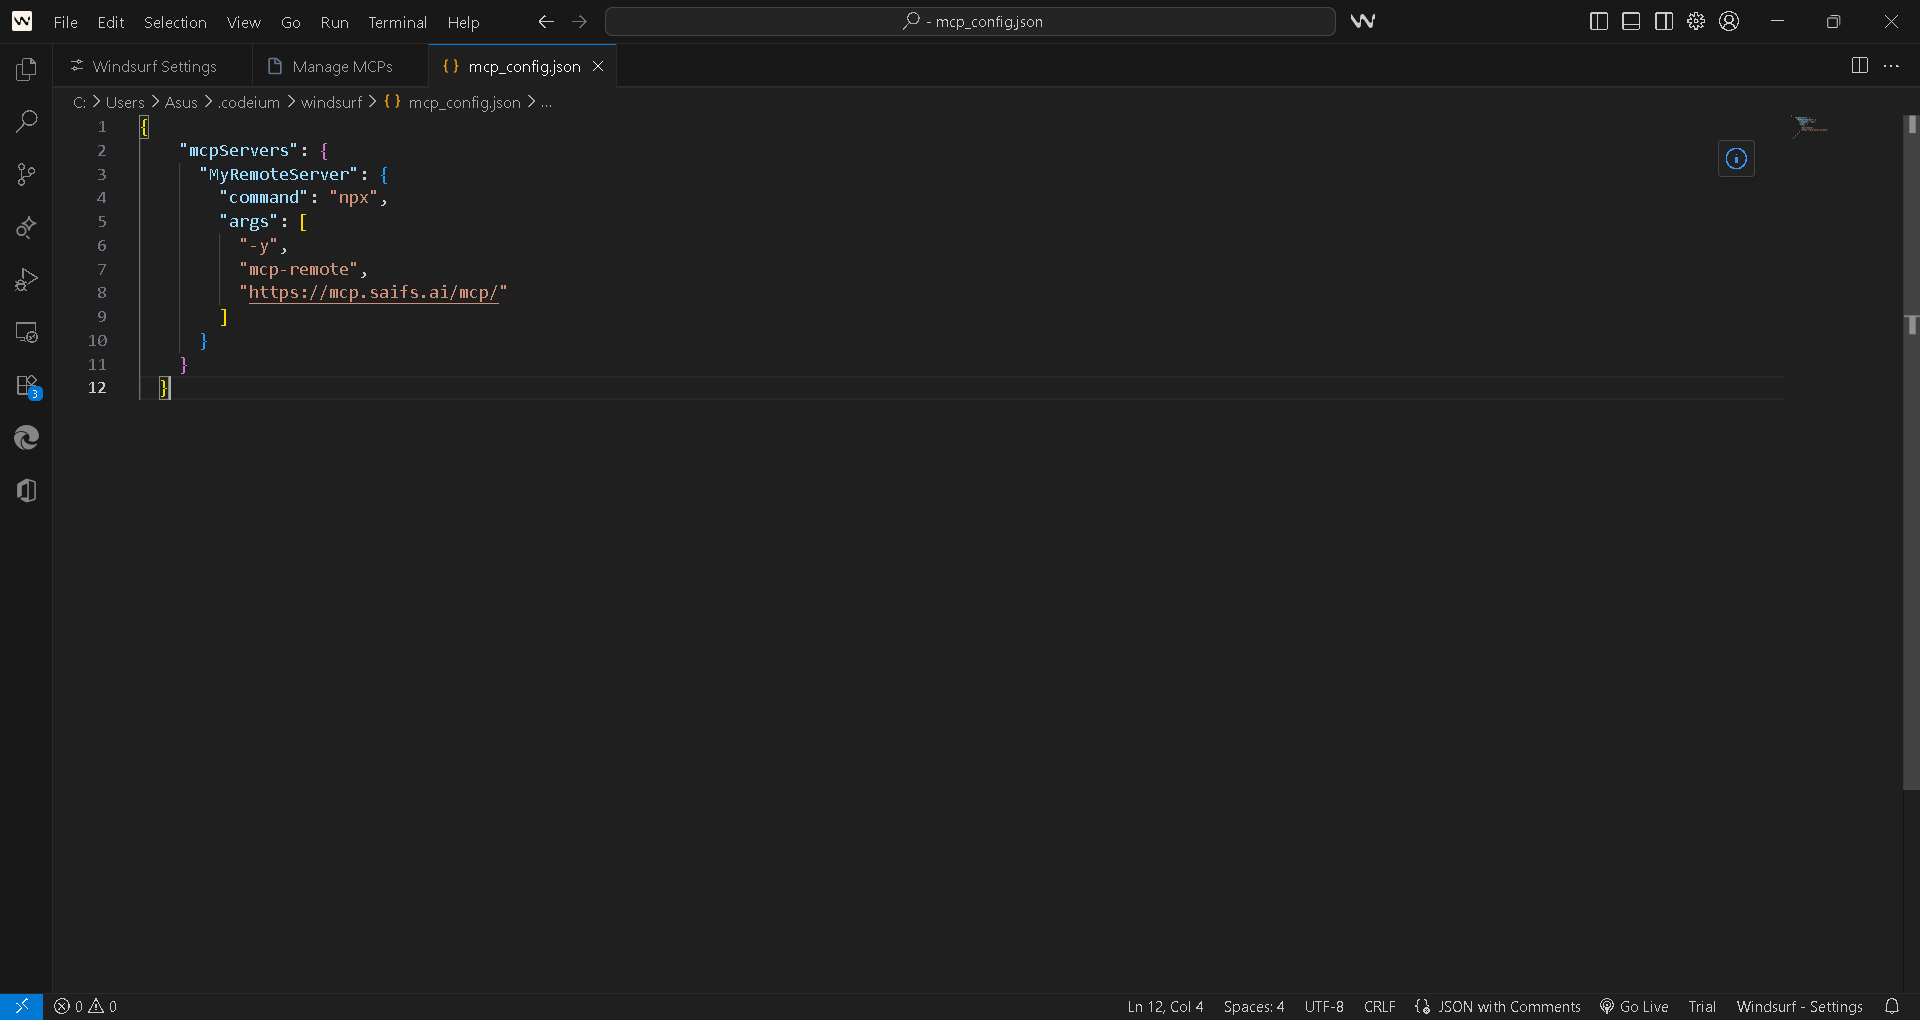
Configure the MCP server
Open or create mcp_config.json in your project or settings directory and add the server.
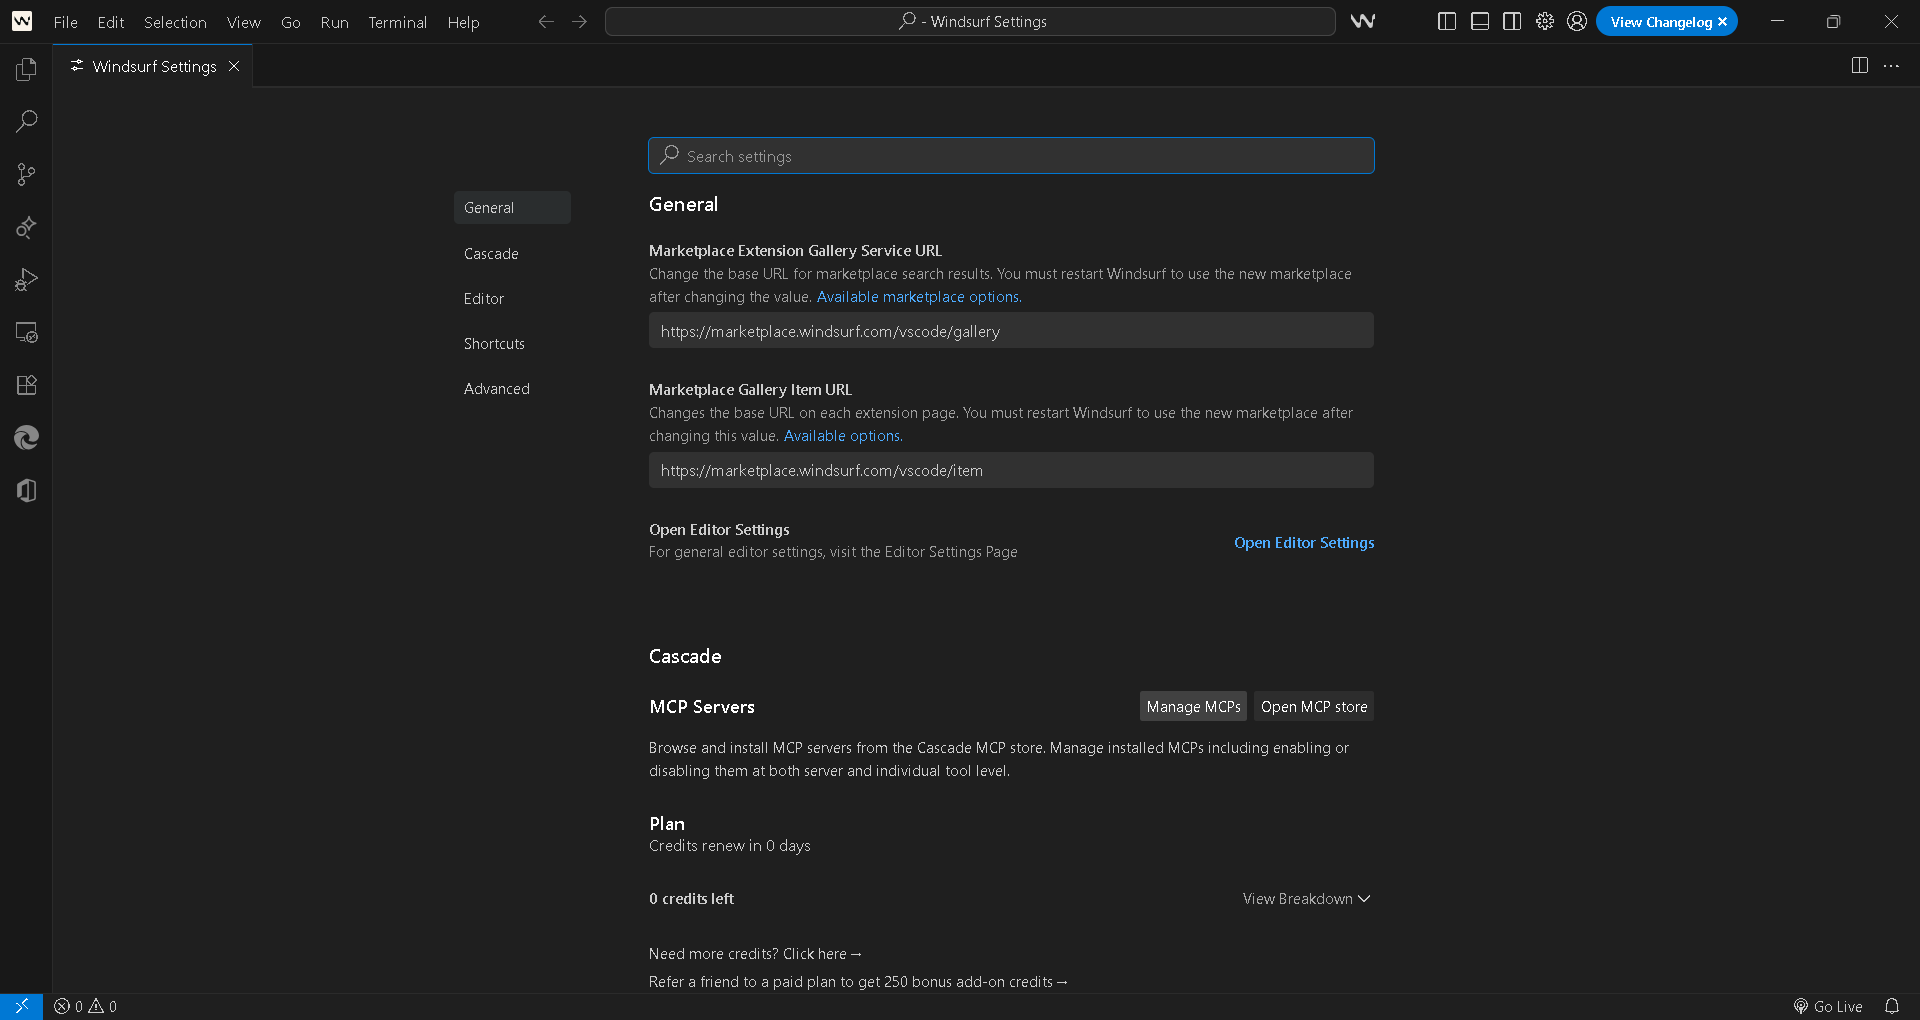
Access MCP server settings
Open Windsurf settings and go to Cascade or MCP Servers. Click Manage MCPs or Open MCP store.
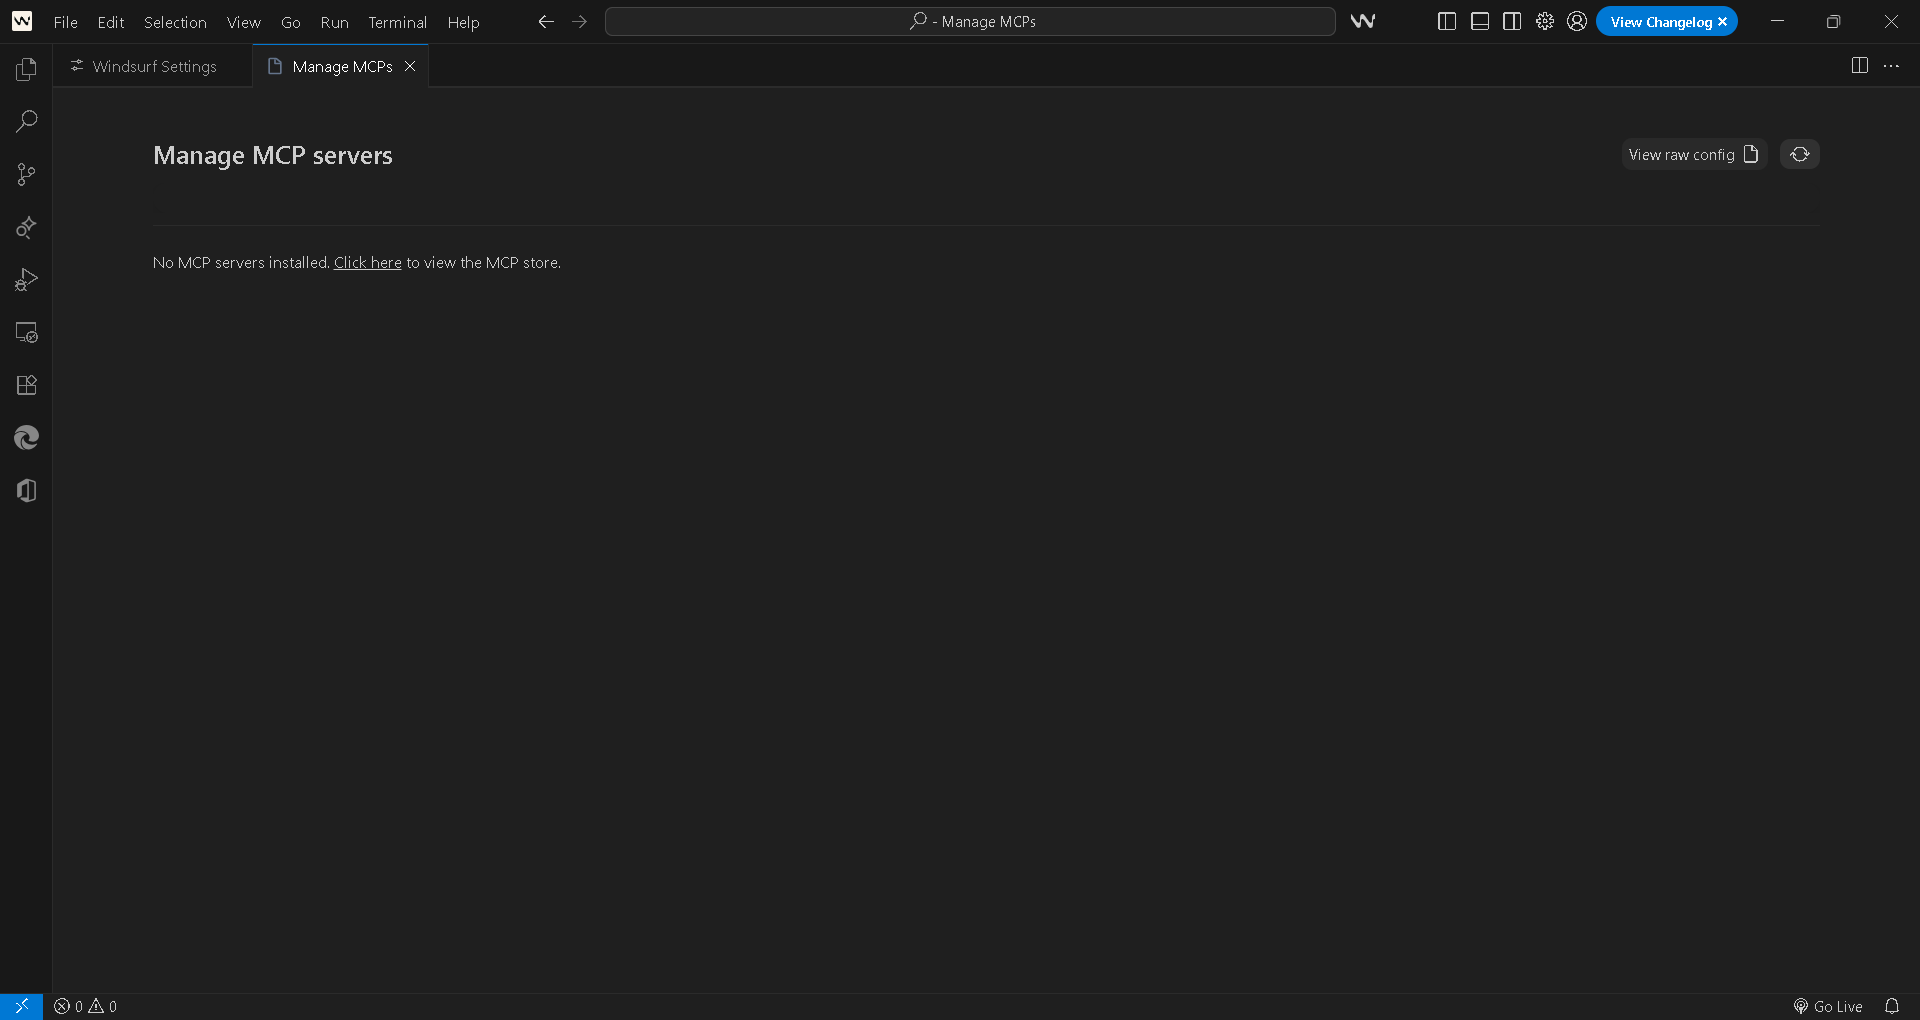
Add the Demand Forecasting MCP
Use Manage MCP servers or View raw config. Add this block — not the generic Saifs AI MCP. This one is Demand Forecasting only.
{
  "mcpServers": {
    "demand-forecasting": {
      "command": "npx",
      "args": [
        "-y",
        "mcp-remote",
        "https://demand-forecaster-mcp.saifs.ai/mcp"
      ]
    }
  }
}
Verify the agent is on
The toggle next to the server should be ON. That confirms the Demand Forecasting Agent is connected in Windsurf.
What Our AI Agent Can Actually Do
Once connected, our AI Agent isn't answering from a static file — it's querying live, calculated intelligence every time. Here's what that looks like in practice.
Say you send this week's sales history. Date and quantity are enough. SKU, region, and lead time help if you have them. The agent scores that file. It does not watch sales overnight, and it does not remember last month's forecast.
- Each product gets a forecast with a range. Not "you'll sell 240 next month," but "240 next month, 180–320 range." A bare number is a bluff. A range is a decision.
- The agent flags what last year's average would miss. Demand that already stepped up or down — even if the jump is months old — gets called out. Last year's average will keep lying. This file will not.
- Confidence matches the width of the range. SKU-112: 180–320 next quarter, medium confidence. SKU-440: history too short — the agent will not invent a figure for that product.
- You ask our AI Agent a plain question. In Cursor, Copilot Studio, or wherever the agent lives, you type: "What will we sell next quarter?" Our AI Agent queries the MCP in real time and answers: "SKU-112 — 180 to 320, medium confidence. SKU-440 — insufficient history; don't treat a guess as a plan."
- The agent explains itself when asked. You follow up: "Why SKU-112?" It shows which signals produced the number, and why that fit won — not a black box, and not a named recipe from a textbook.
- You plan the buy before the season, not after. A range you can defend is the difference between ordering three weeks early and finding out you under-ordered after the season was already over.
That's the shift: from last year plus 10%, to a forecast with a range on this file, when you send it. Then you know what to plan for next — and how unsure the model is.
"Here's this week's sales history — what will we sell next quarter?"
"SKU-112 jumped months ago. Last year's average still looks fine — is 180–320 the real range?"
"SKU-440 barely has history. Don't invent a figure — tell me what we can actually plan on."
Why Connect Our MCP
Deterministic Data
Same input, same output, every time. The numbers you get are calculated by proven statistical models, not generated as a plausible-sounding guess.
Privacy
Full SOC 2 compliance. Your sales history never leaves your premises — no third-party export, no black-box vendor holding your file. Large sales books can run locally, on your machine.
Less Token Usage
Purpose-built models do the heavy lifting instead of an LLM re-processing your entire dataset on every query — cheap enough to run on every SKU.
Battle-Tested
Built on statistical models with decades of published, peer-reviewed use — not a new algorithm hoping it works on your sales book.
Connect MCP for Creating Demand Forecasting AI Agent
You've seen how it works — deterministic, private, battle-tested, and ready to run on the platform you already use. Connecting takes minutes. After that, every sales export becomes a forecast with a range — not last year plus 10%.
Connect Our MCP →No credit card. No data science team. Just your CSV and a few minutes.