How to Build Your Synthetic Data Generator Agent
Building the agent isn't a development project — it's four decisions. Here's exactly how it works.
Pick the builder you already use, connect our Random Users MCP, and ask for fake people. The agent calls random_users and returns complete synthetic profiles — name, email, location, phone, and photo — with no real PII.
Step 1: Find an Agent Builder
Pick the platform you already use, or the one your team is standardizing on. Common choices:
- Microsoft Copilot Studio
- AWS Bedrock
- Google Gemini Enterprise
- Salesforce Agentforce
- Cursor, Claude, and more platforms being added as they gain adoption
You're not locked in — the same underlying generator connects to whichever builder your organization runs on. The screenshots below use Cursor as the worked example.
Step 2: Add a Data Source
Every agent builder needs a source of people-shaped data. For this agent, you should not upload a real customer book. There are two paths — only one is the right one:
CSV / Excel of real customers
Fast, but the wrong source here. A production export puts real names, emails, and phones into a demo. Skip it.
MCP
Connect through a standard protocol built for secure, structured access. The agent asks random_users for fake profiles instead of inventing them — or pasting real PII.
What Is MCP, and How Does It Work?
MCP (Model Context Protocol) is an open standard that lets an AI agent connect directly to a live tool — instead of you inventing names in chat and hoping the email still validates.
- Your agent builder (Copilot Studio, Bedrock, Gemini Enterprise, Agentforce, Cursor, etc.) acts as the client.
- Our MCP acts as the server — it exposes synthetic profiles (name, gender, location, email, login, dob, phone, picture, nationality) in a structured format the agent can query directly.
- When your agent needs people — "give me 5 demo contacts" — it asks the MCP server directly, in real time, instead of guessing from a static list someone typed weeks ago.
- Because it's a standard protocol, not a custom integration, it works the same way across every agent builder — connect once per platform, and every query after that pulls complete fake records.
The result: your agent isn't reading a snapshot of real customers. It's asking a live, governed generator every time — which is what keeps the fields complete and the people fake.
Step 3: Choose MCP Where Possible
Inventing names in chat works once. MCP is the preferable path — it's the secure, standardized way for an agent to request live synthetic profiles, rather than a paragraph of dummy users that fails your signup form the moment you paste it.
Step 4: Connect Our MCP
This is the step that turns a generic agent builder into a Synthetic Data Generator Agent. Connecting our MCP is what makes every profile structured — not a guess dressed up as a user, a complete fake record you can drop into a form.
Pick your platform below. Connecting our MCP is the same idea on each one — you add it once, then sign in with your Saifs AI account.
Steps to Enable MCP on AI Platforms
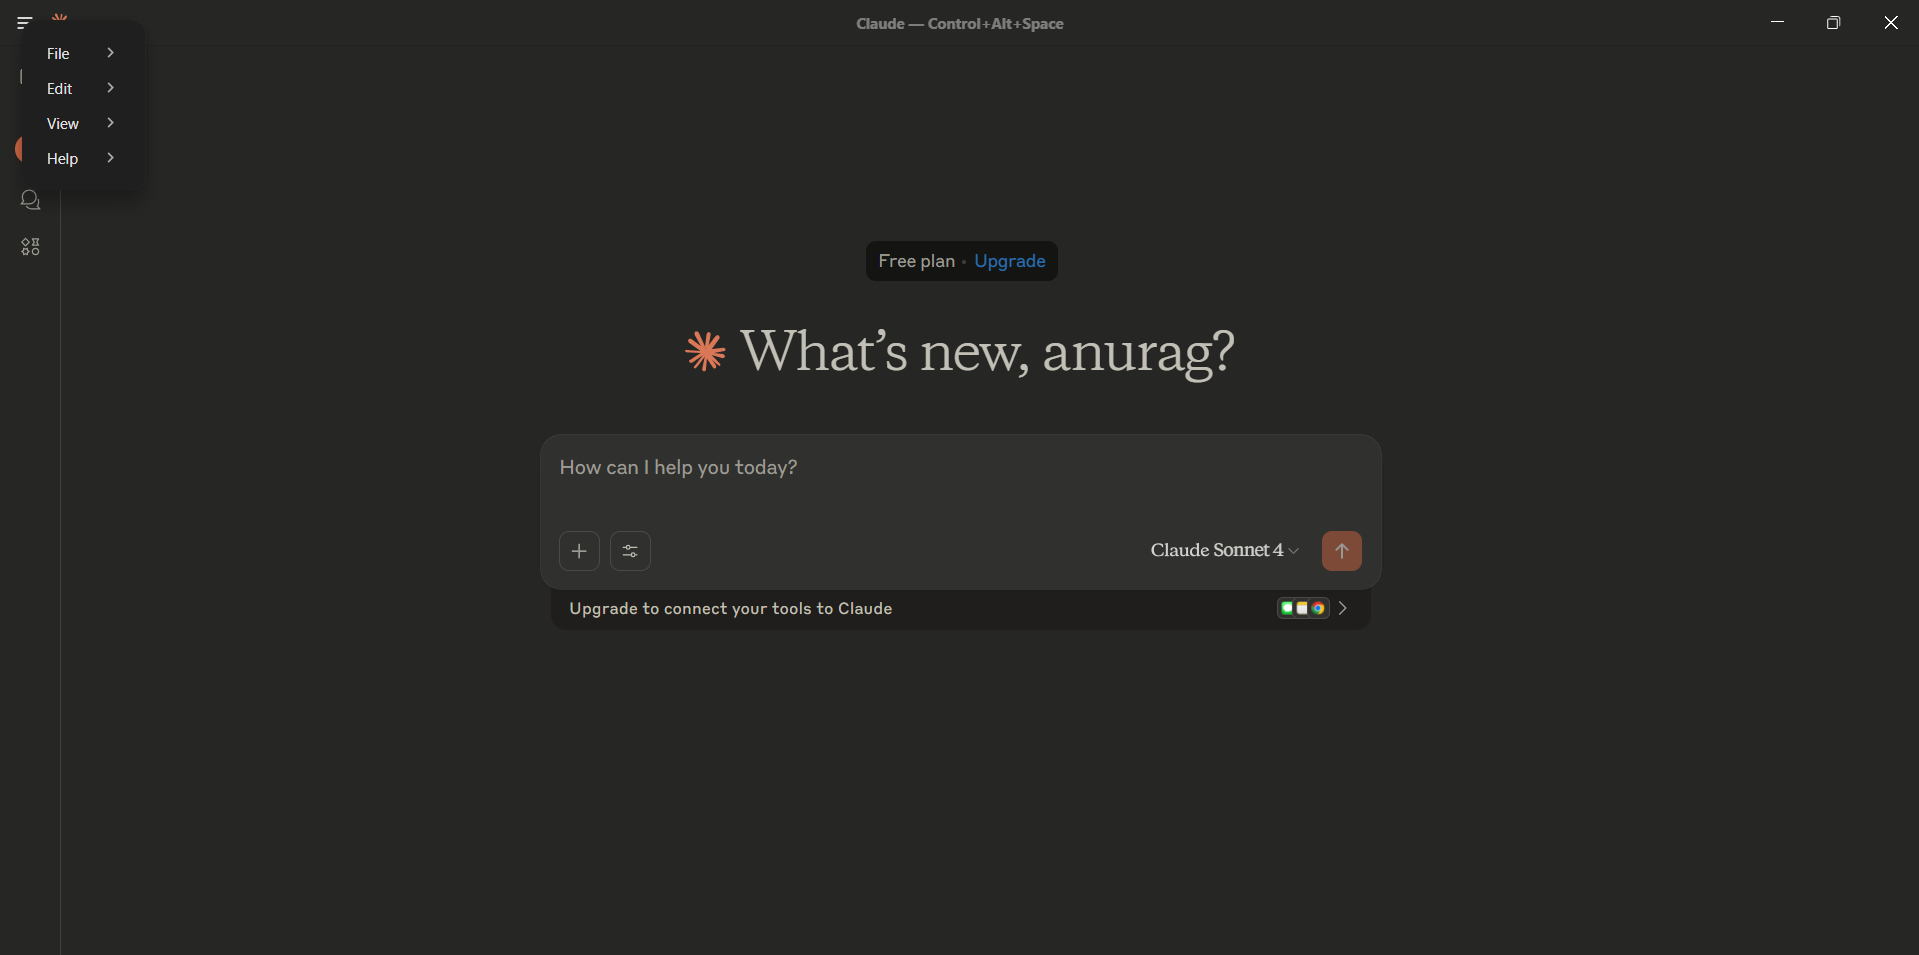
Open Claude and reveal the main menu
Launch Claude Desktop. In the top-left corner, click the three-dot menu to open the app's main menu.
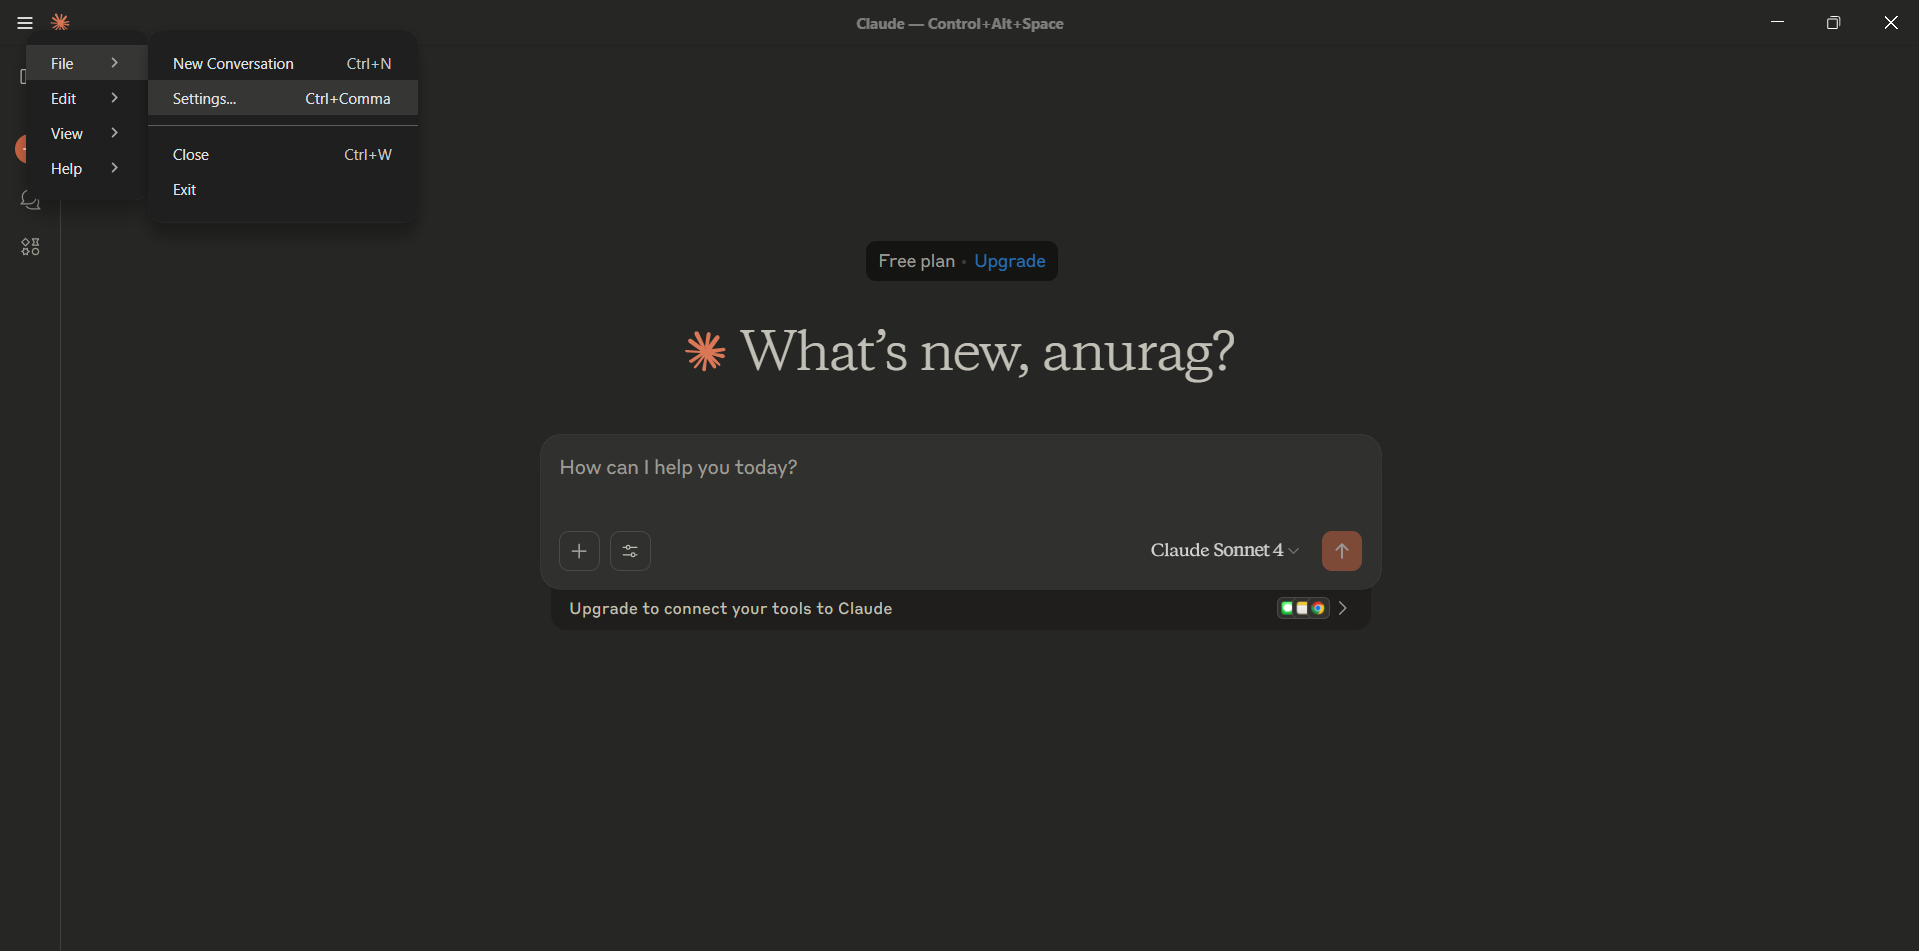
Go to Settings
From the three-dot menu, hover over File. Click Settings (or press Ctrl + Comma).
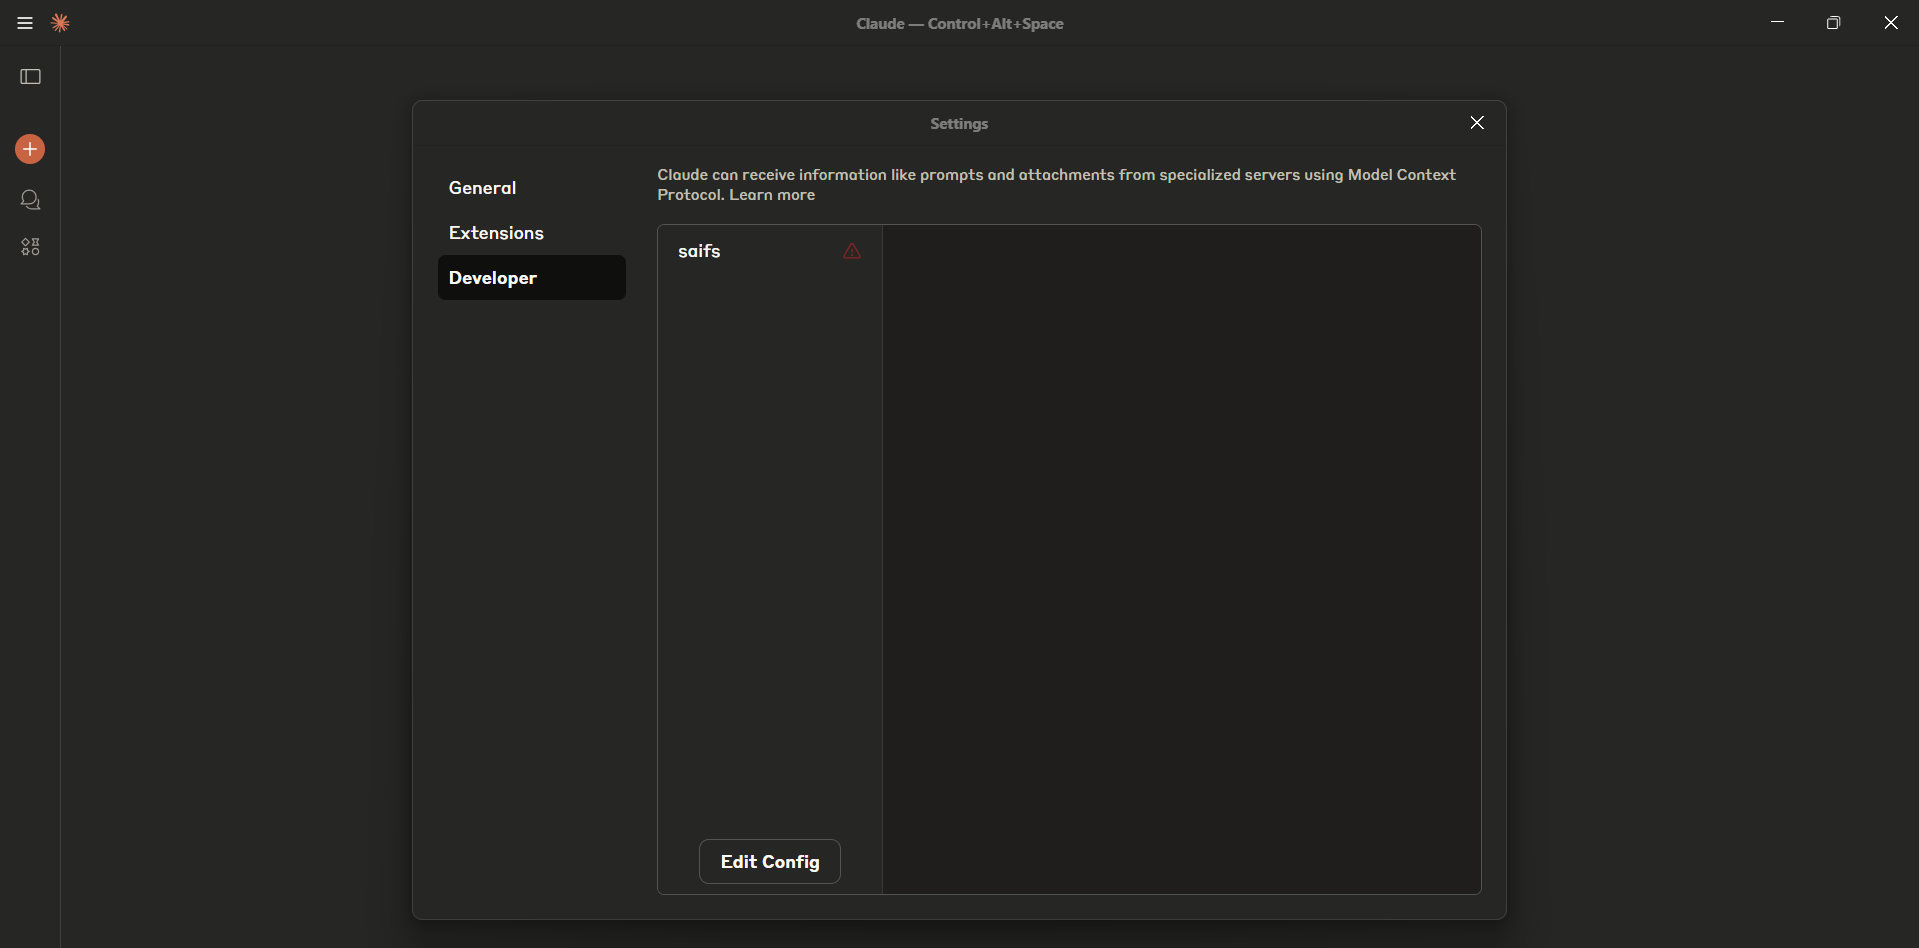
Open the Developer config editor
In Settings, select the Developer tab. Click Edit Config at the bottom of the panel.
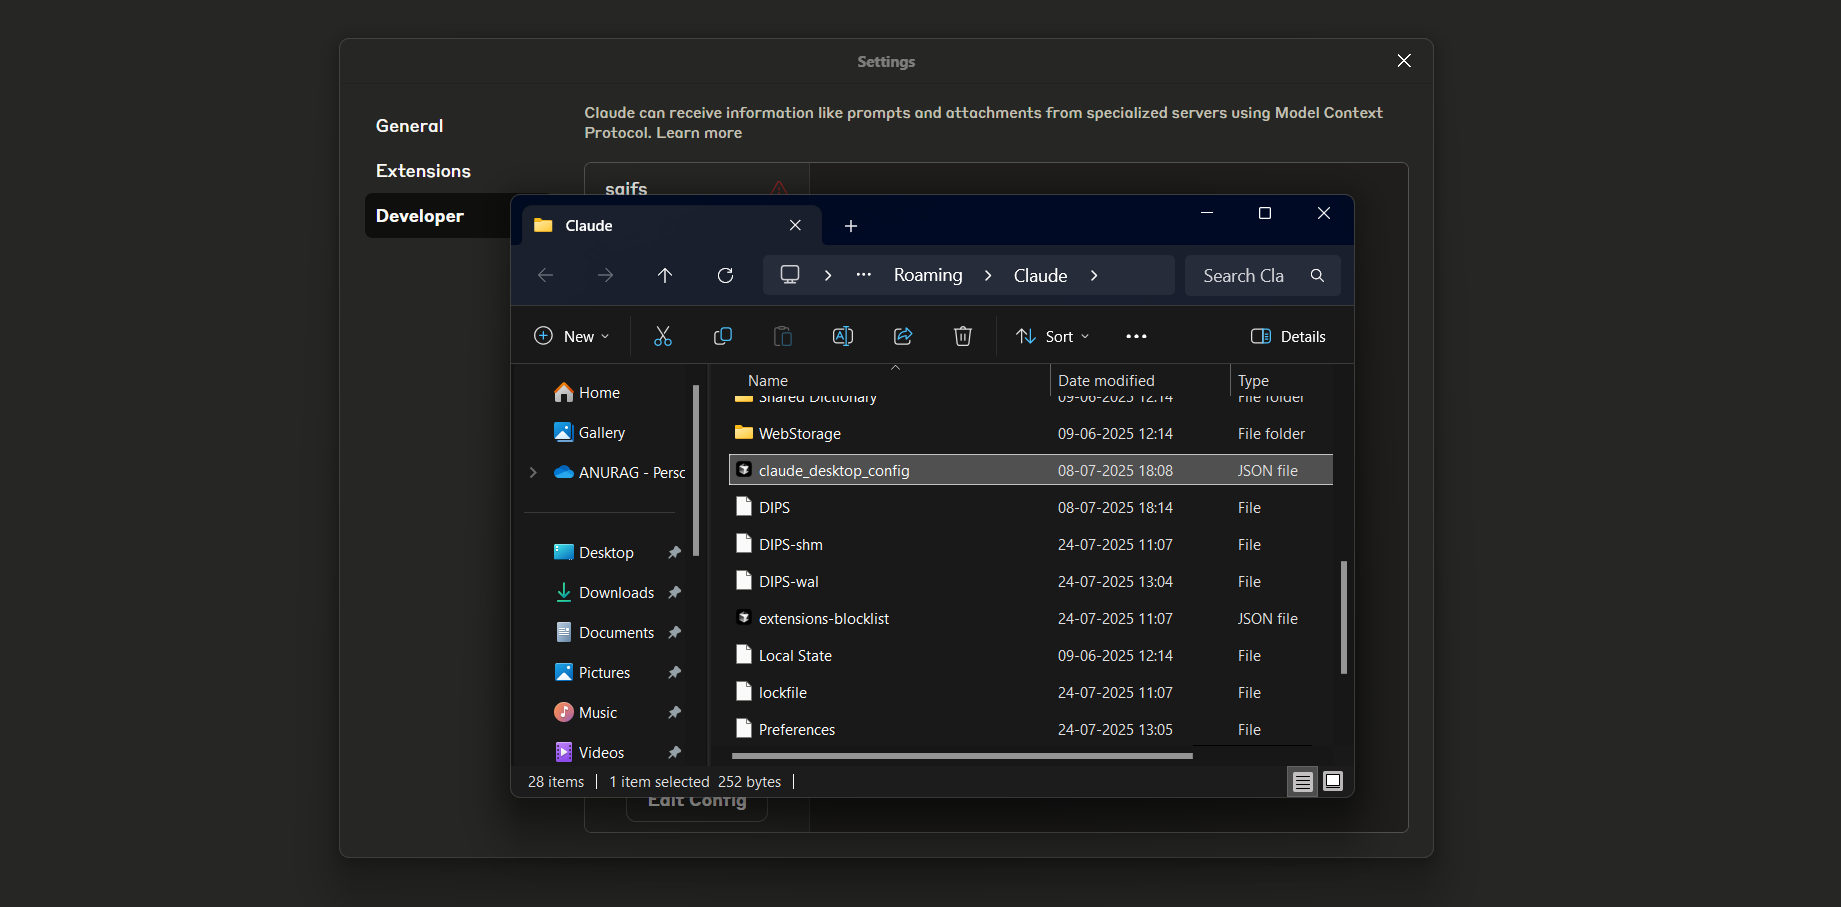
Locate the config file
A File Explorer window will open at the Claude config folder. Click to select claude_desktop_config.json.
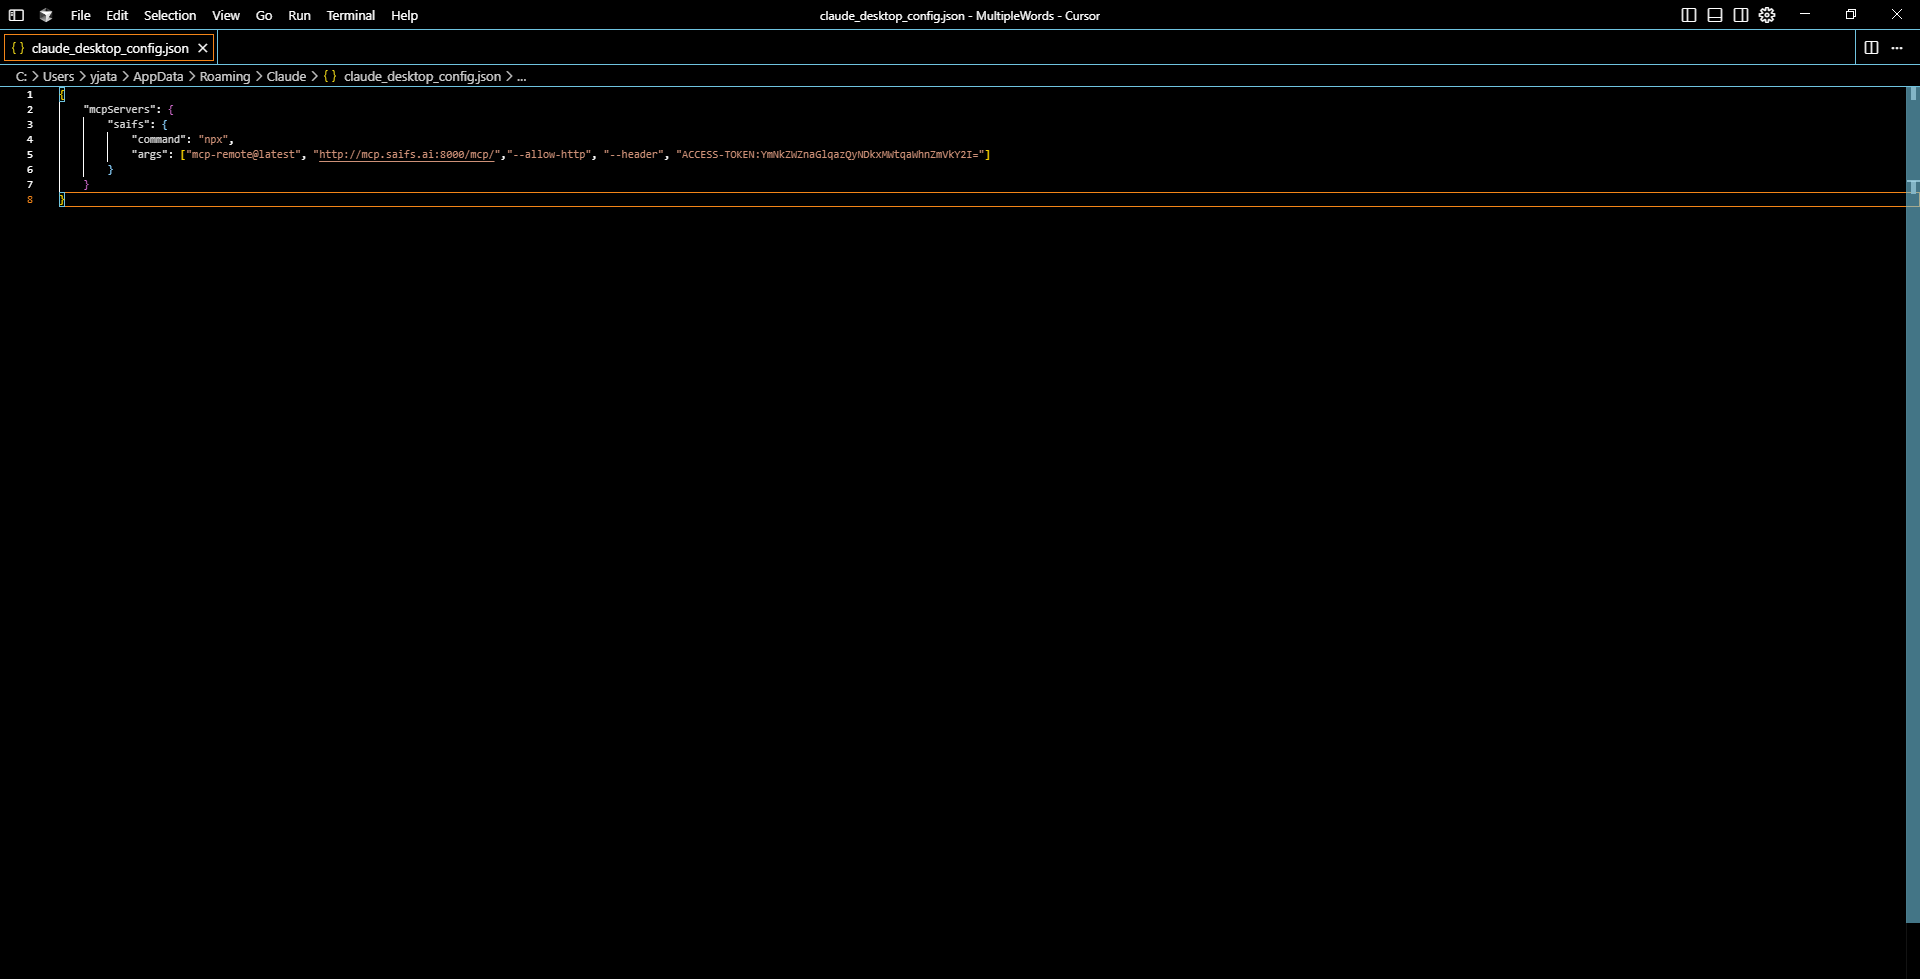
Paste the Synthetic Data Generator MCP
With the config file open, add this server — not the generic Saifs AI MCP. This one is Synthetic Data Generator only. Then restart Claude.
{
  "mcpServers": {
    "synthetic-data-generator": {
      "command": "npx",
      "args": [
        "-y",
        "mcp-remote",
        "https://synthetic-mint-mcp.saifs.ai/mcp"
      ]
    }
  }
}
Launch Cursor
Open the Cursor application on your desktop. On the home screen, choose Open project, Clone repo, or Connect via SSH to begin working on a project.

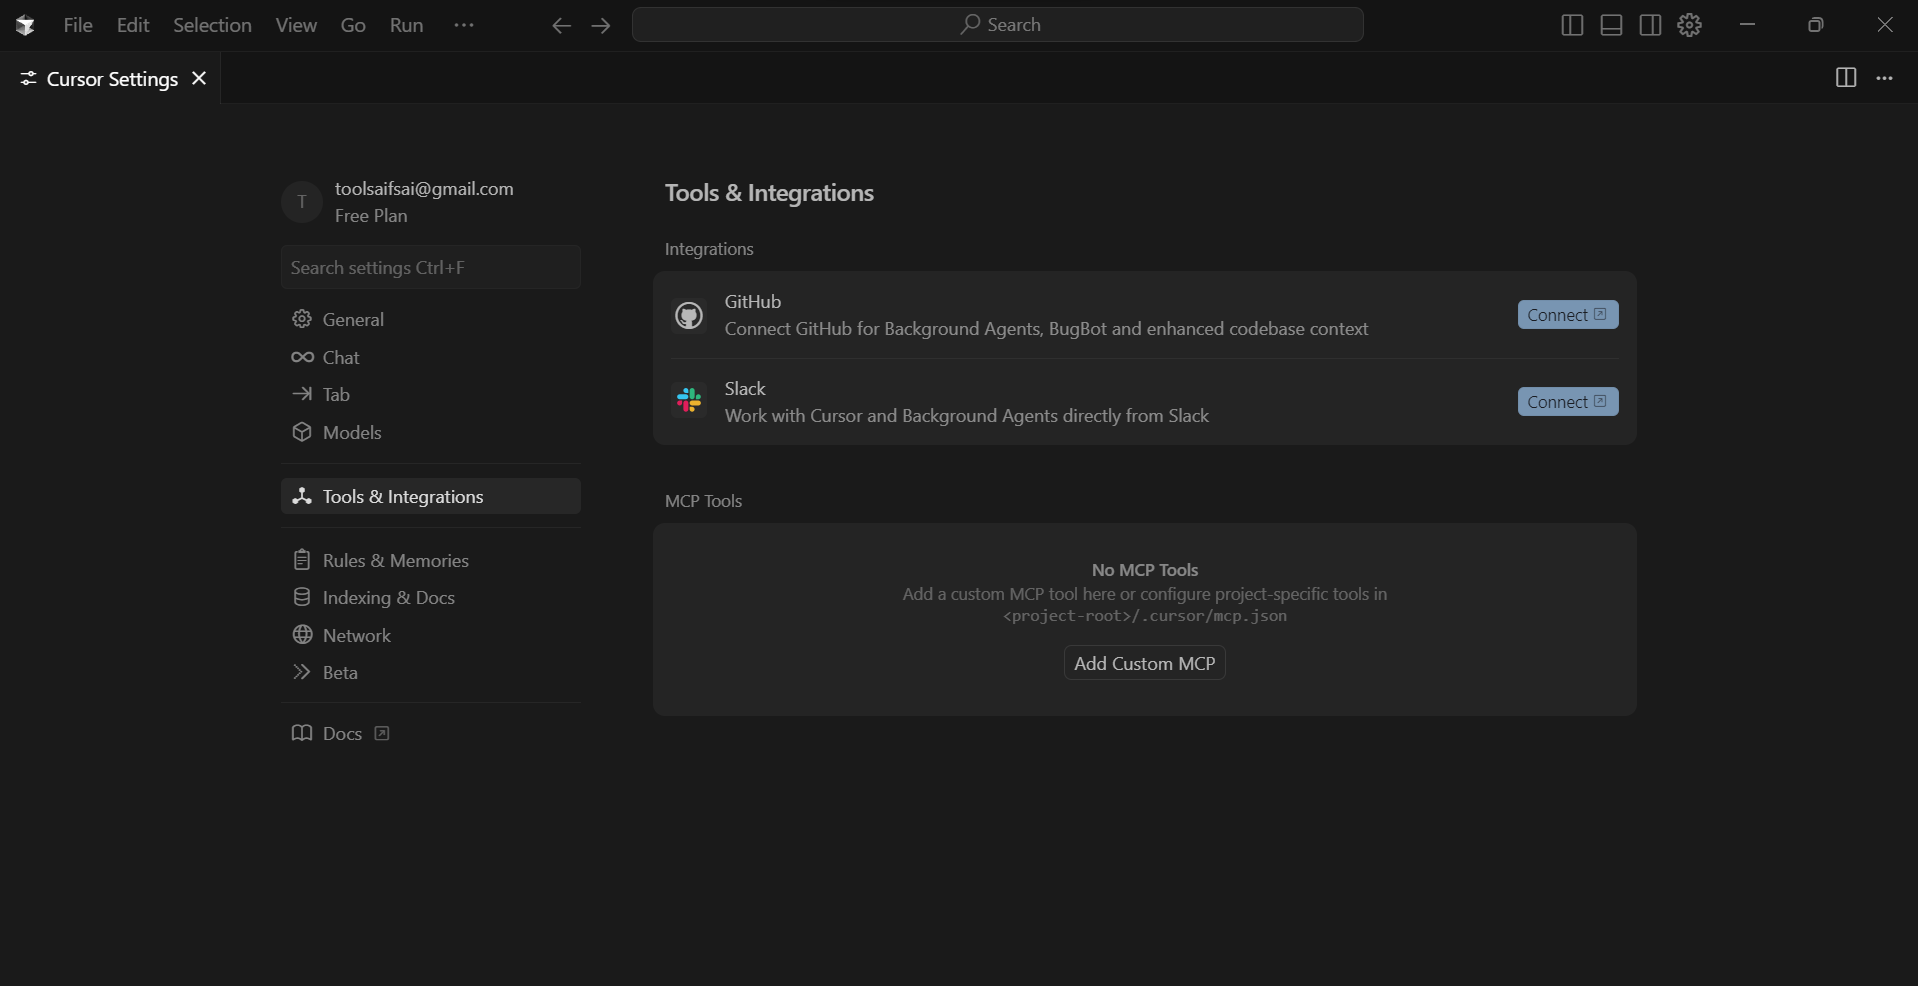
Settings → Tools & Integrations
Click the gear icon (top right) or go to File → Settings. In the left panel, click Tools & Integrations. Scroll to MCP Tools and click Add Custom MCP.
Add the Synthetic Data Generator MCP
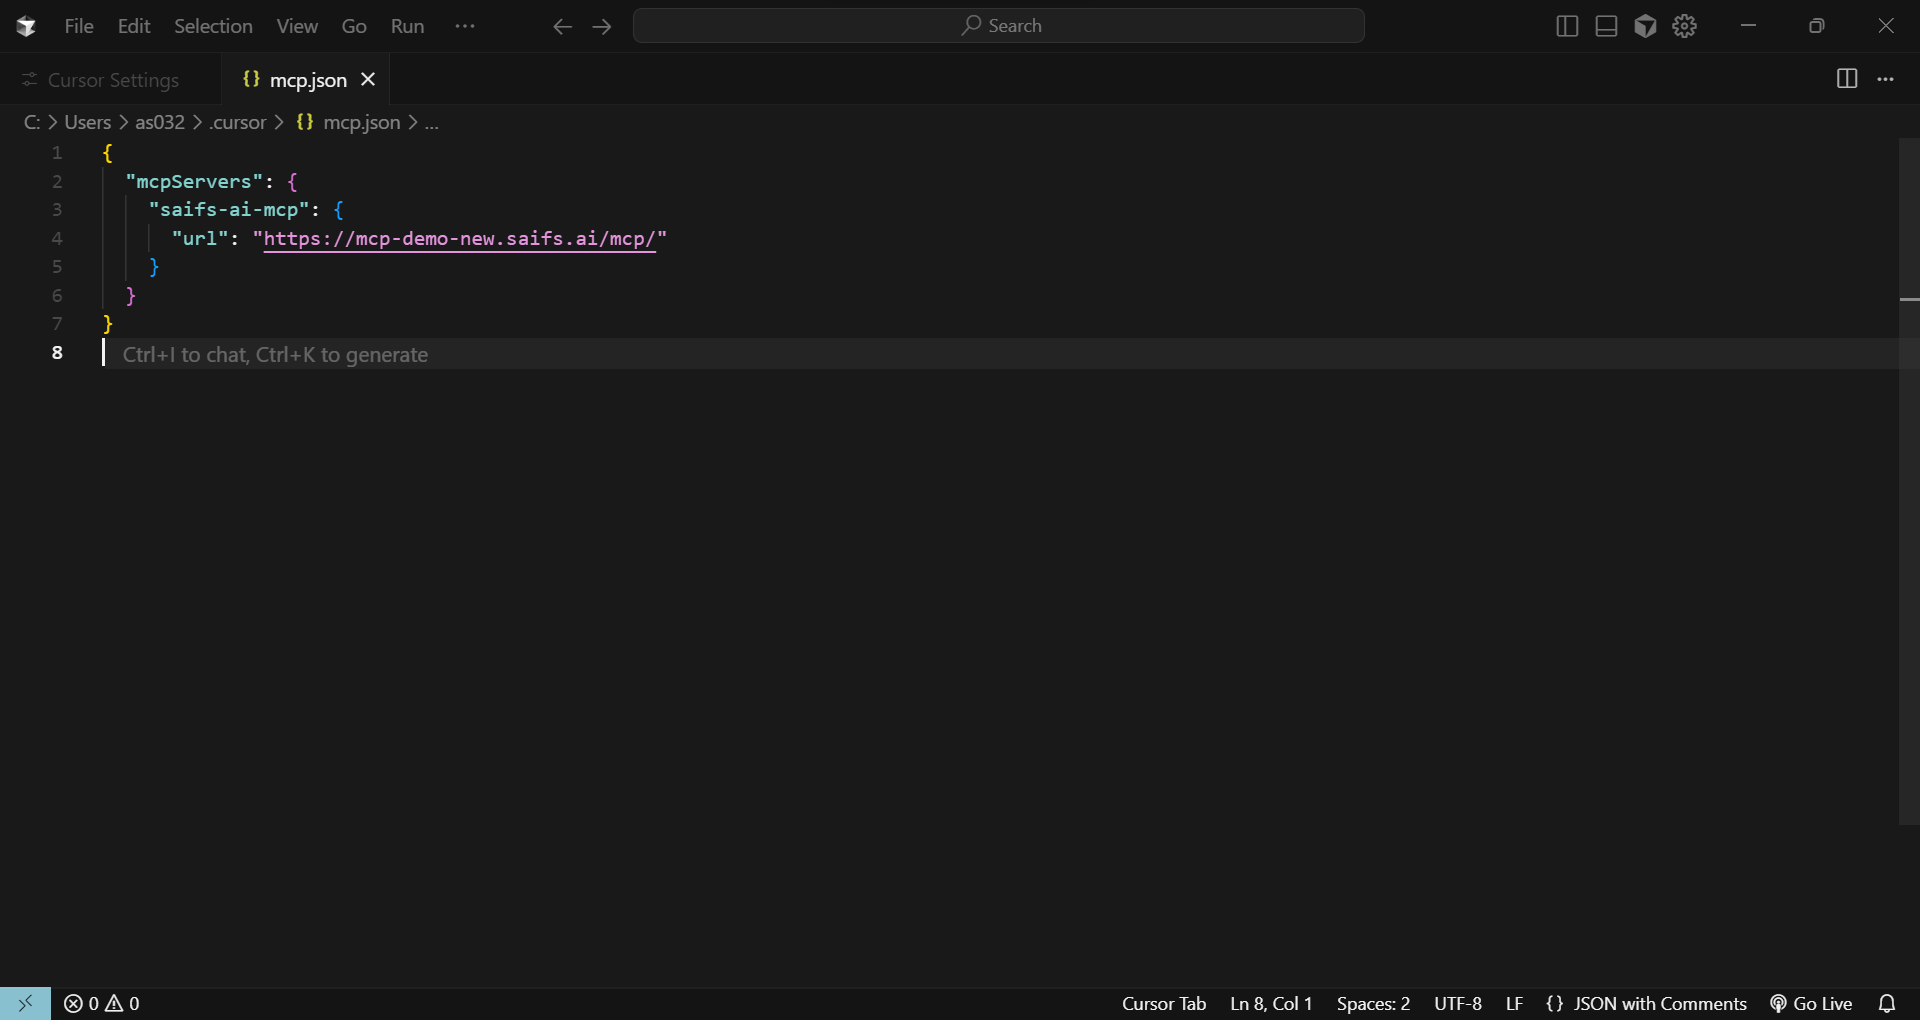
After clicking Add Custom MCP, Cursor opens the MCP config file. Add this server — not the generic Saifs AI MCP. This one is Synthetic Data Generator only.
{
  "mcpServers": {
    "synthetic-data-generator": {
      "url": "https://synthetic-mint-mcp.saifs.ai/mcp"
    }
  }
}
Click Connect
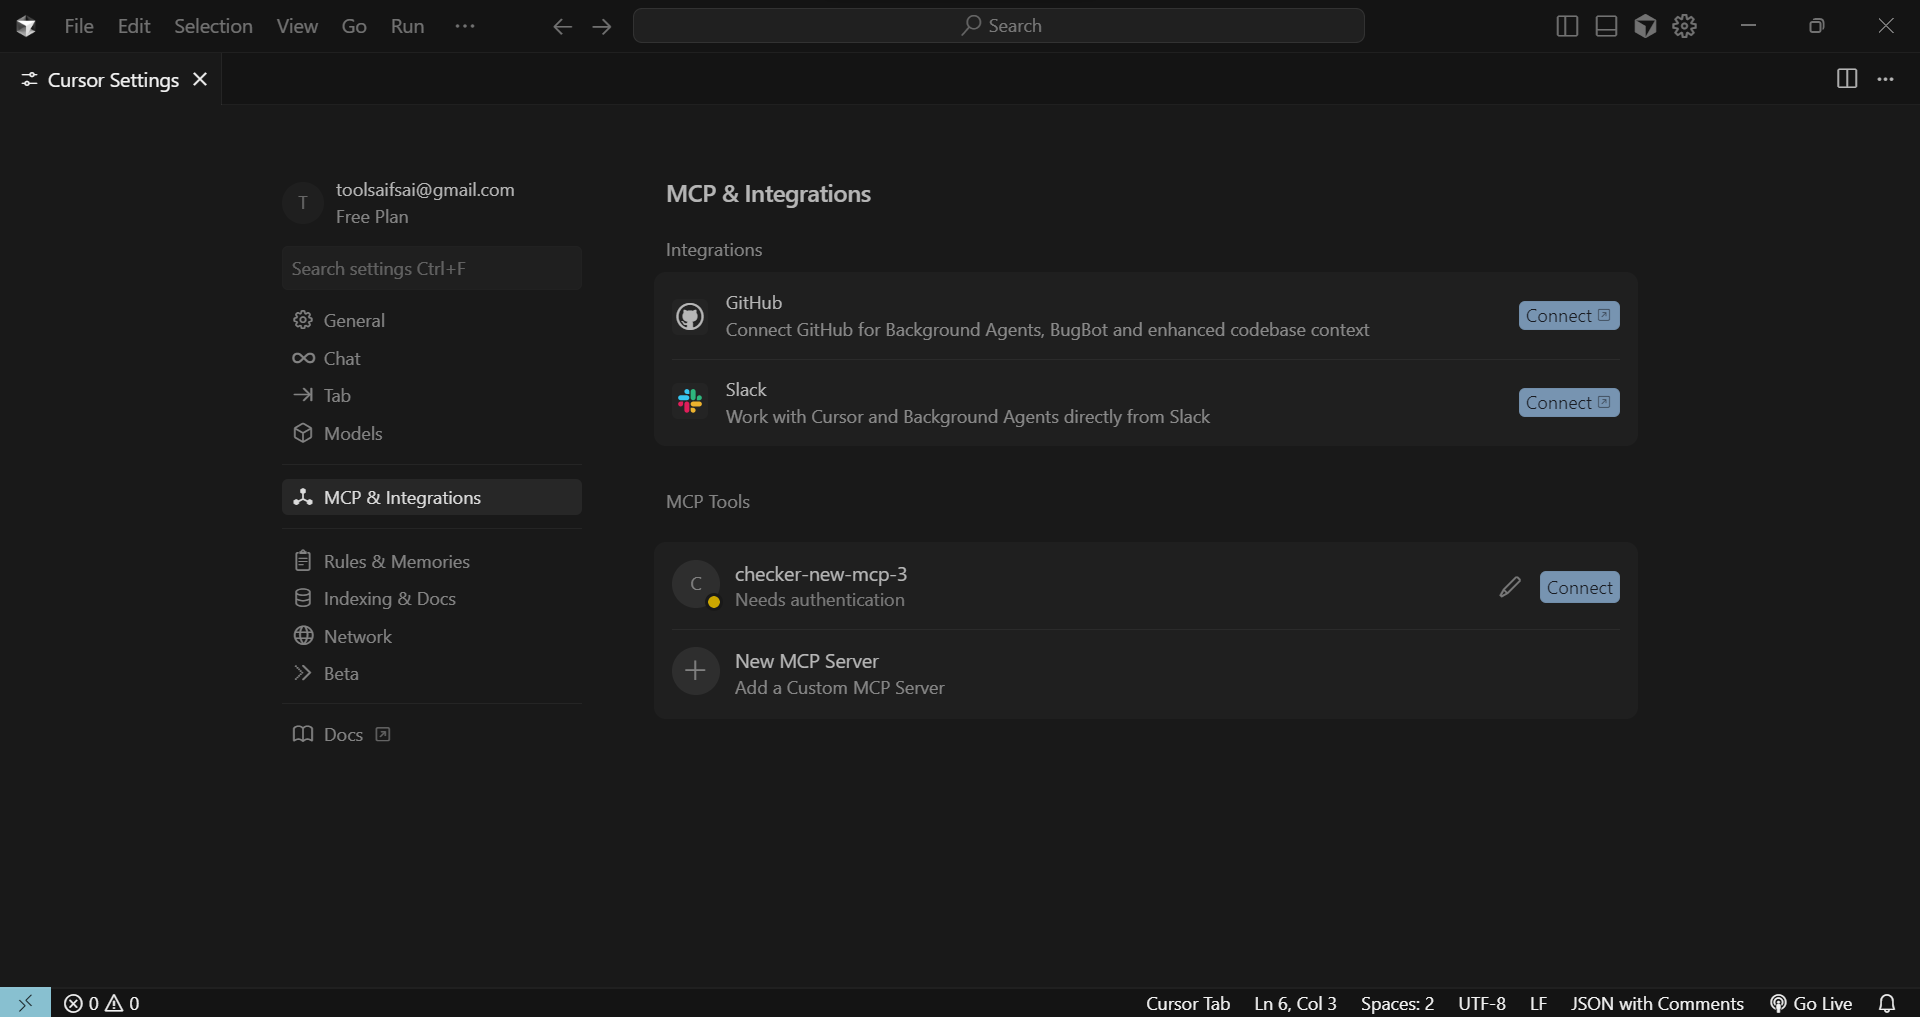
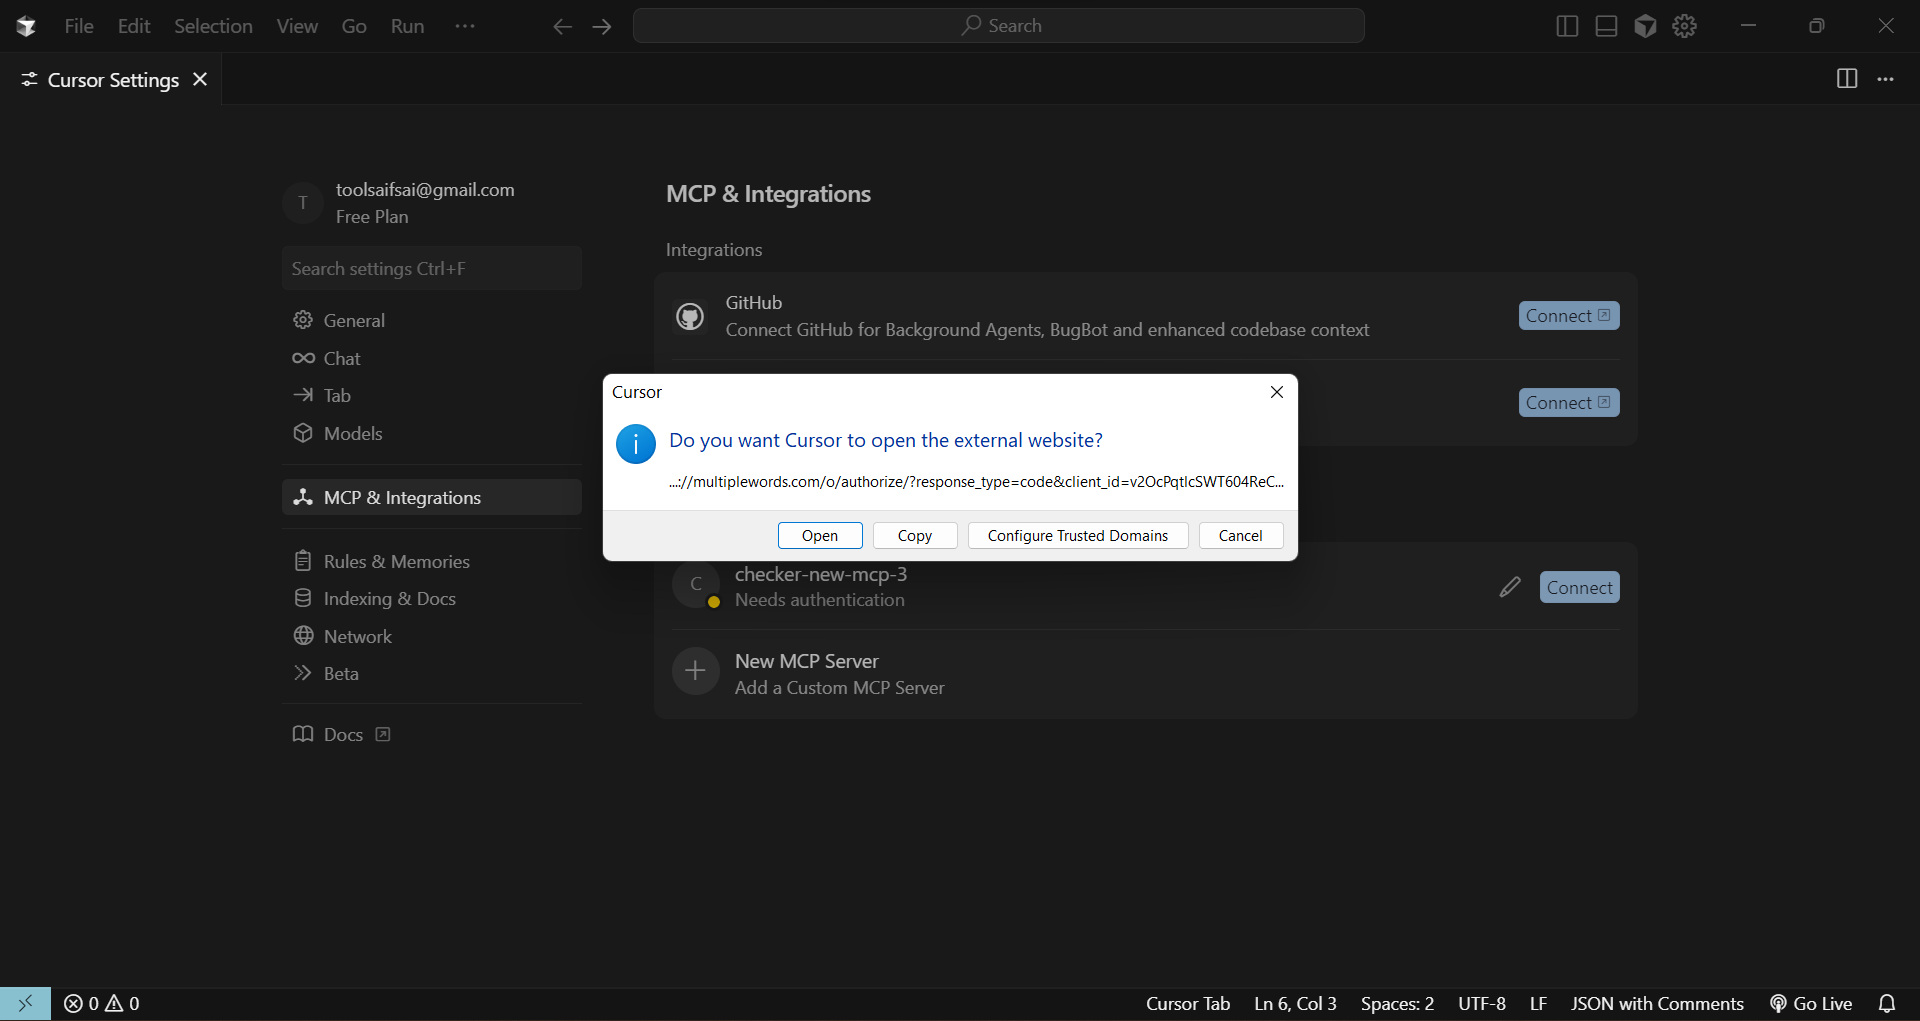
Click Connect next to the new MCP server under MCP Tools to start the integration.
Allow extension access
When prompted, select Open so Cursor can process the URI and start the login flow.
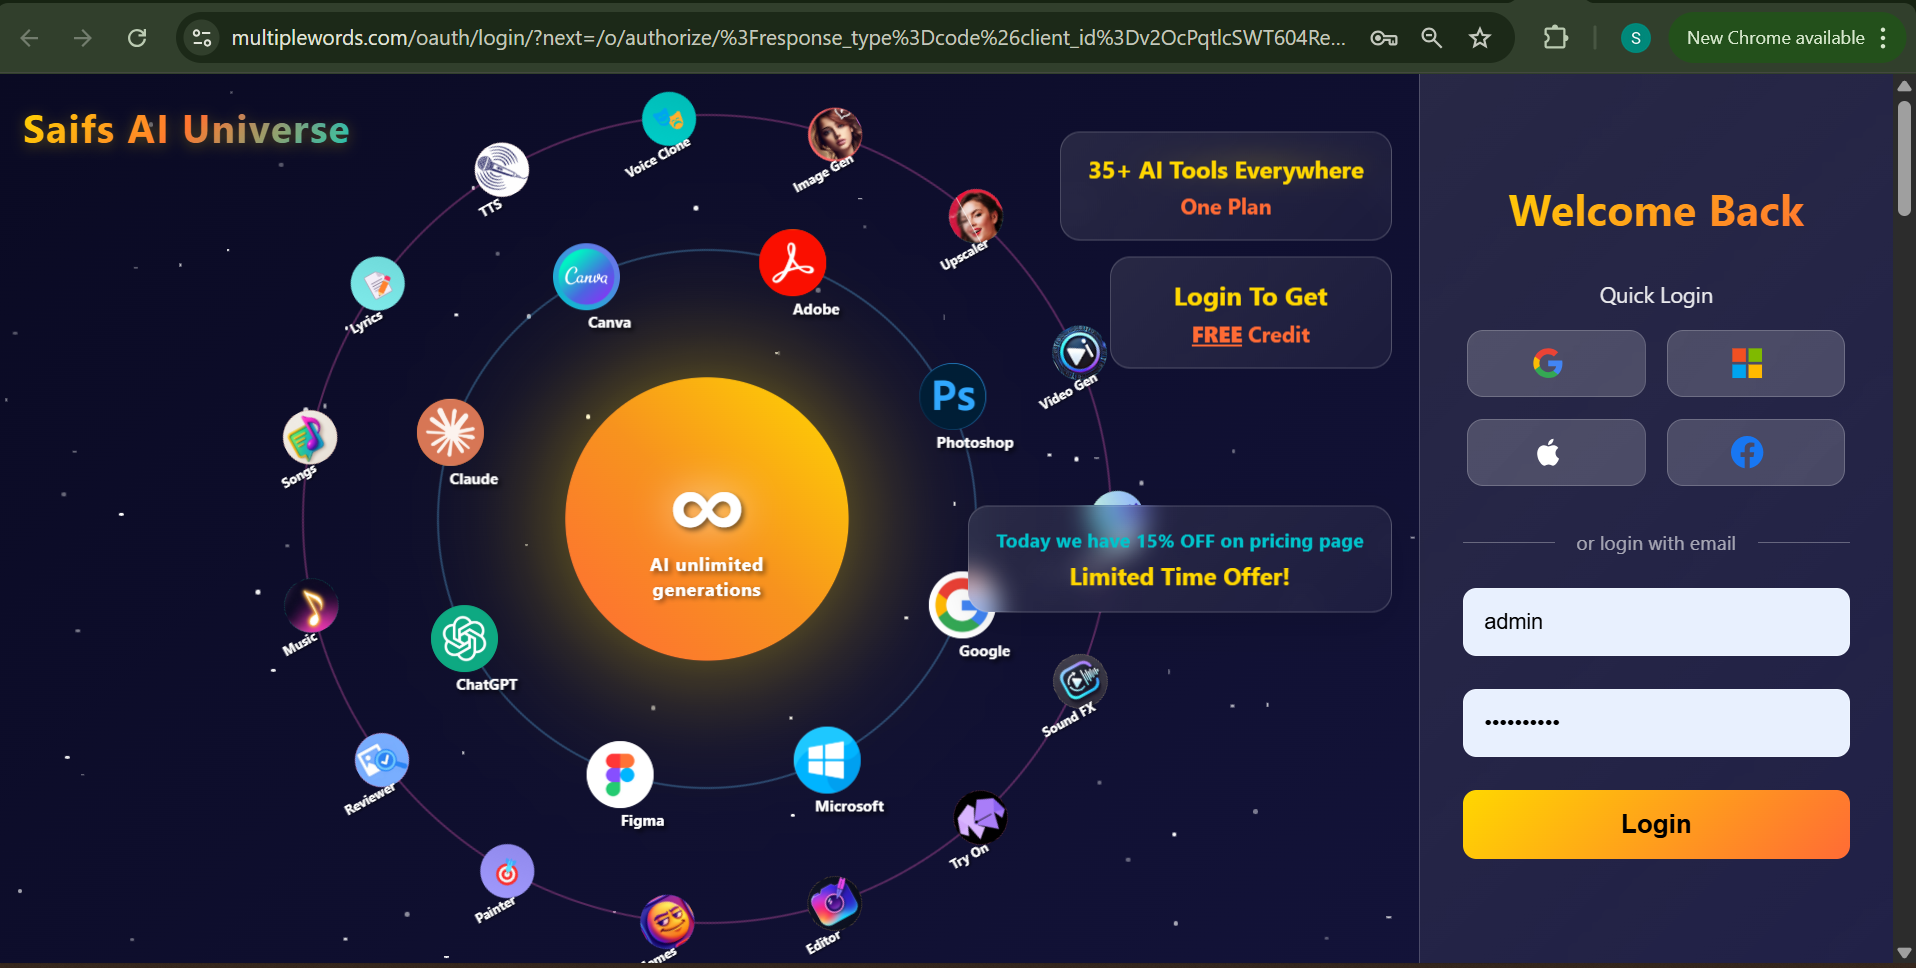
Choose a login method
On the authentication page, sign in with Google, Microsoft, Apple, or Facebook — the same Saifs AI account you already use.
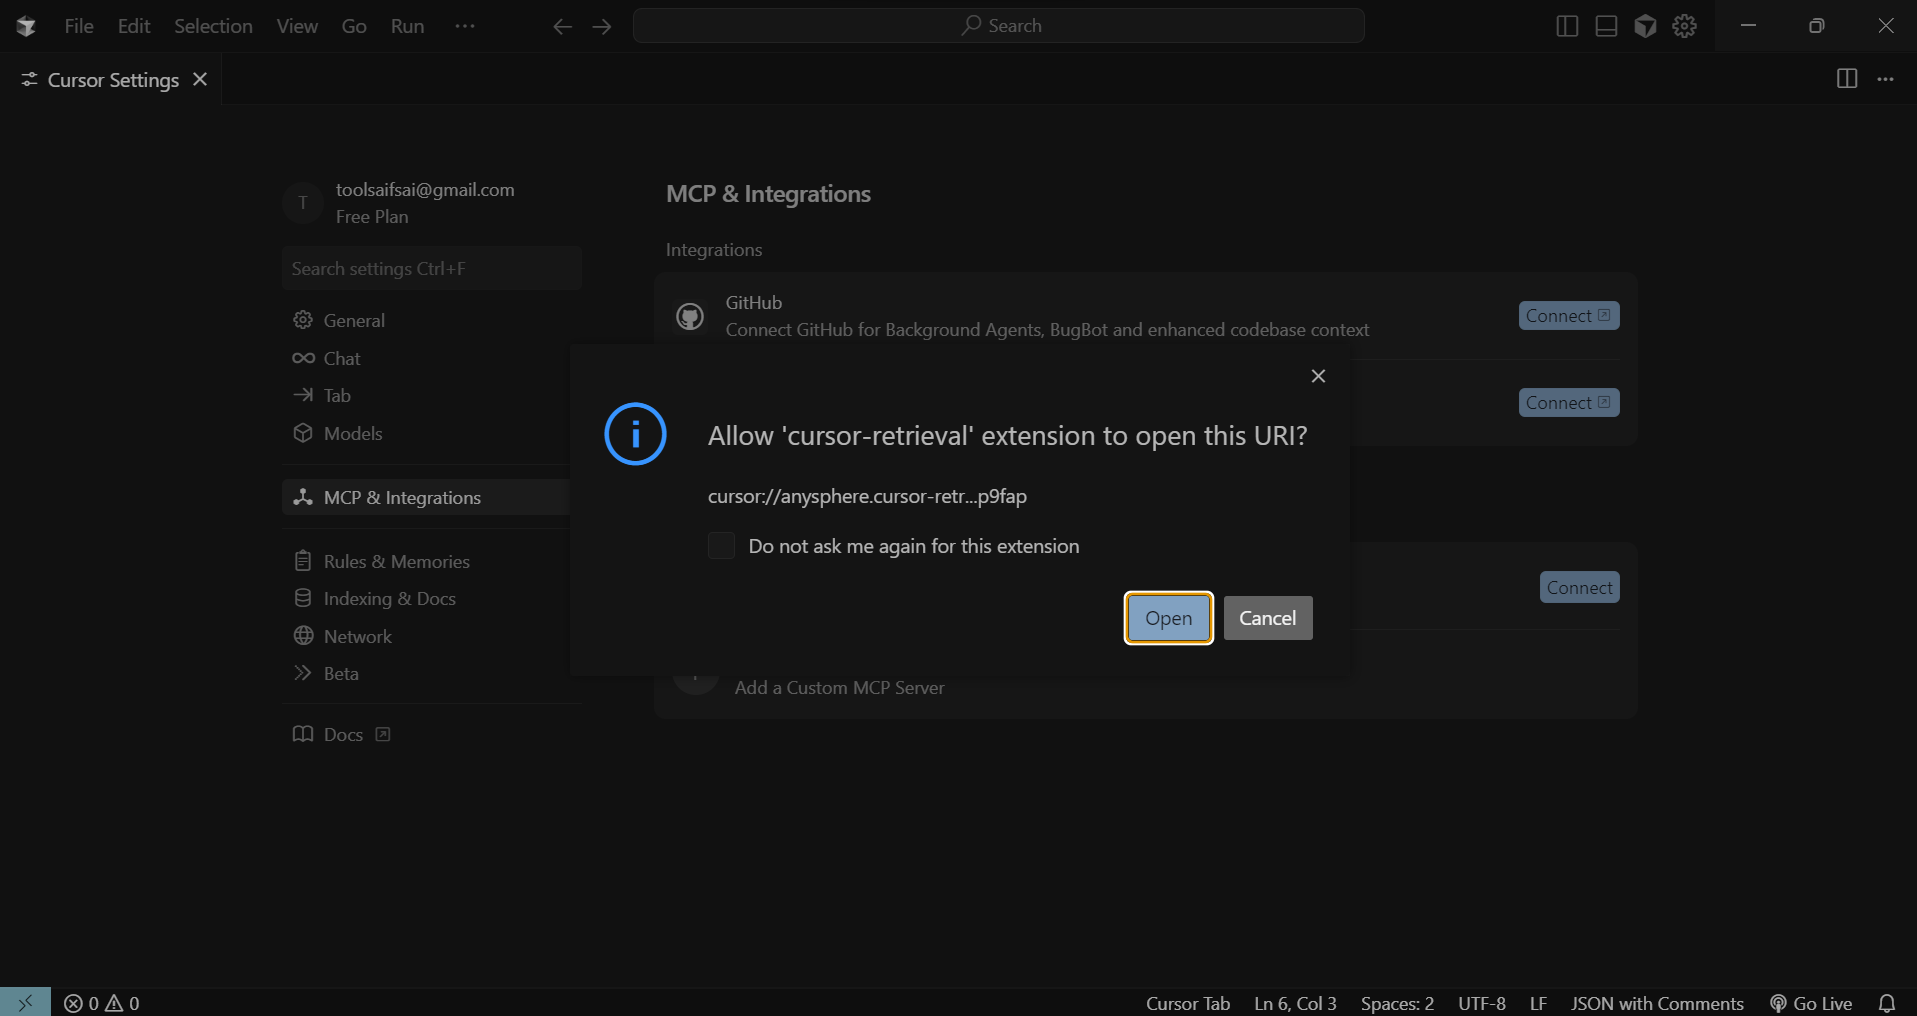
Complete authentication
After you sign in, a prompt will ask to finish the connection. Click Open to complete the MCP integration in Cursor.
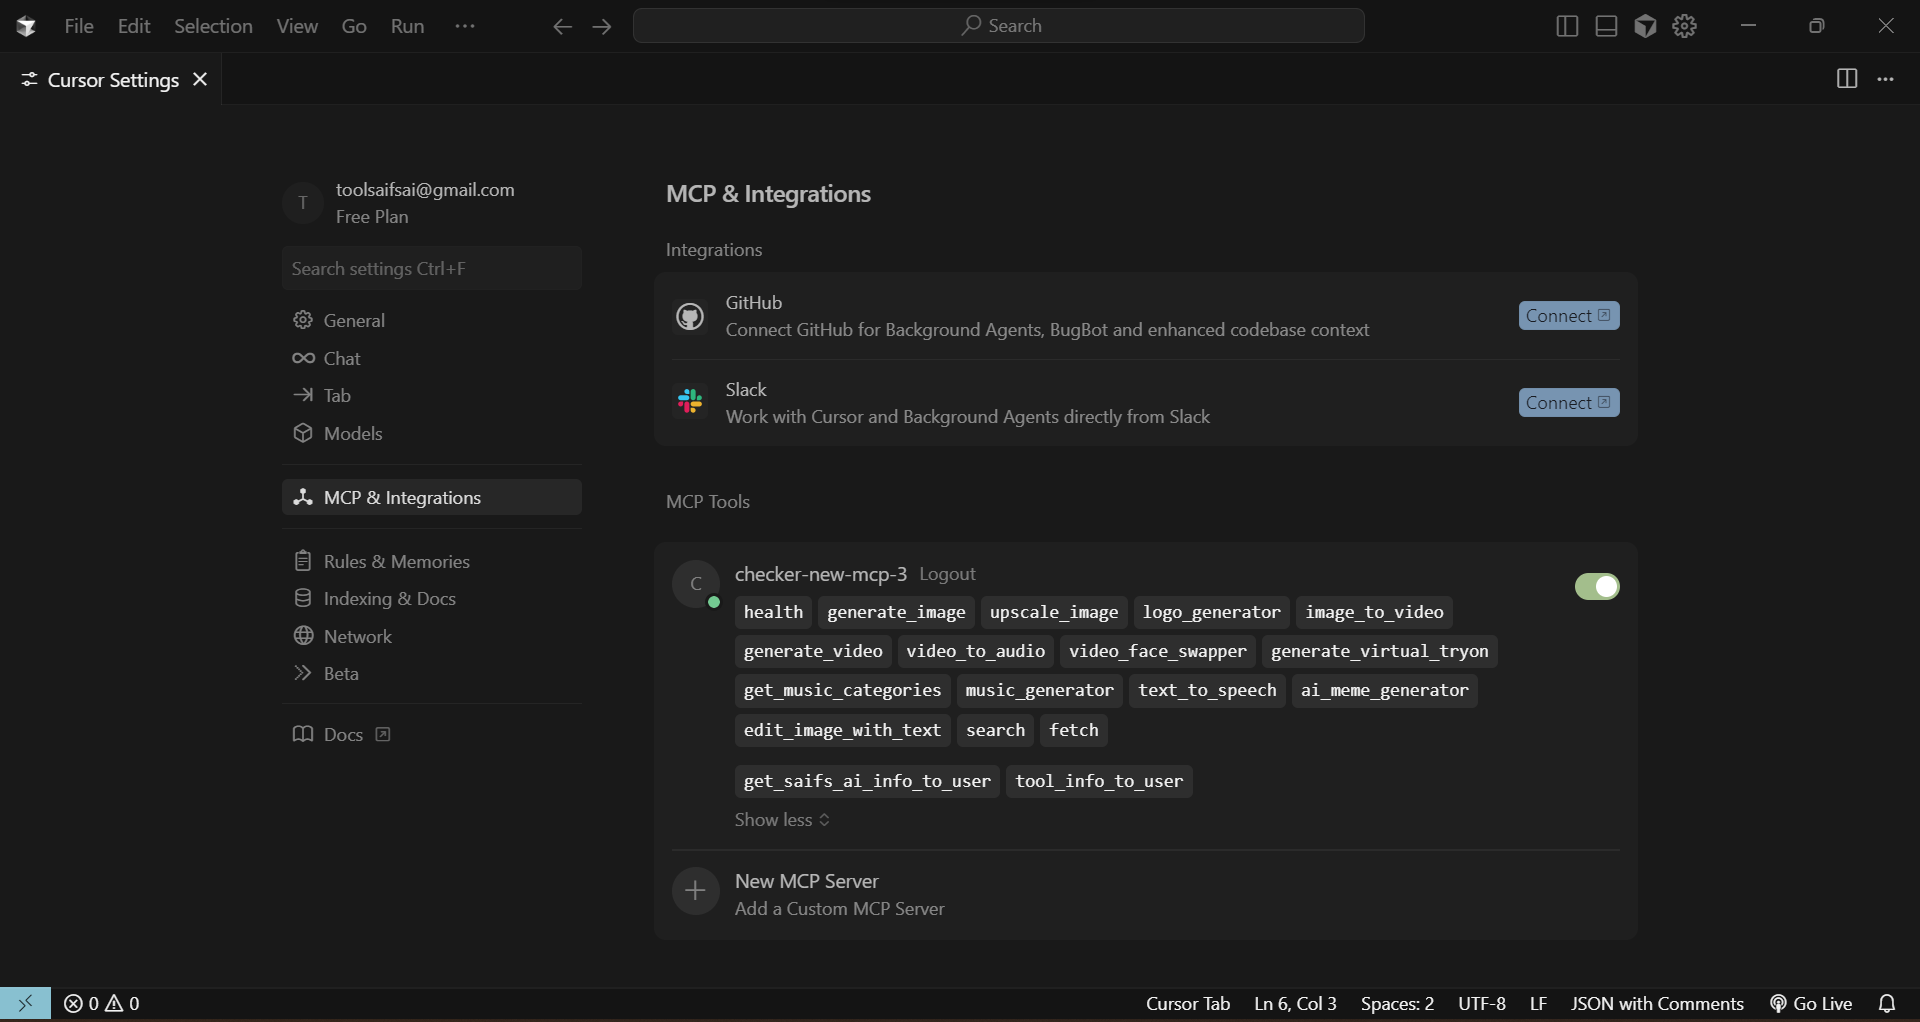
Verify the agent is on
The toggle should be ON. That confirms the Synthetic Data Generator Agent is connected.
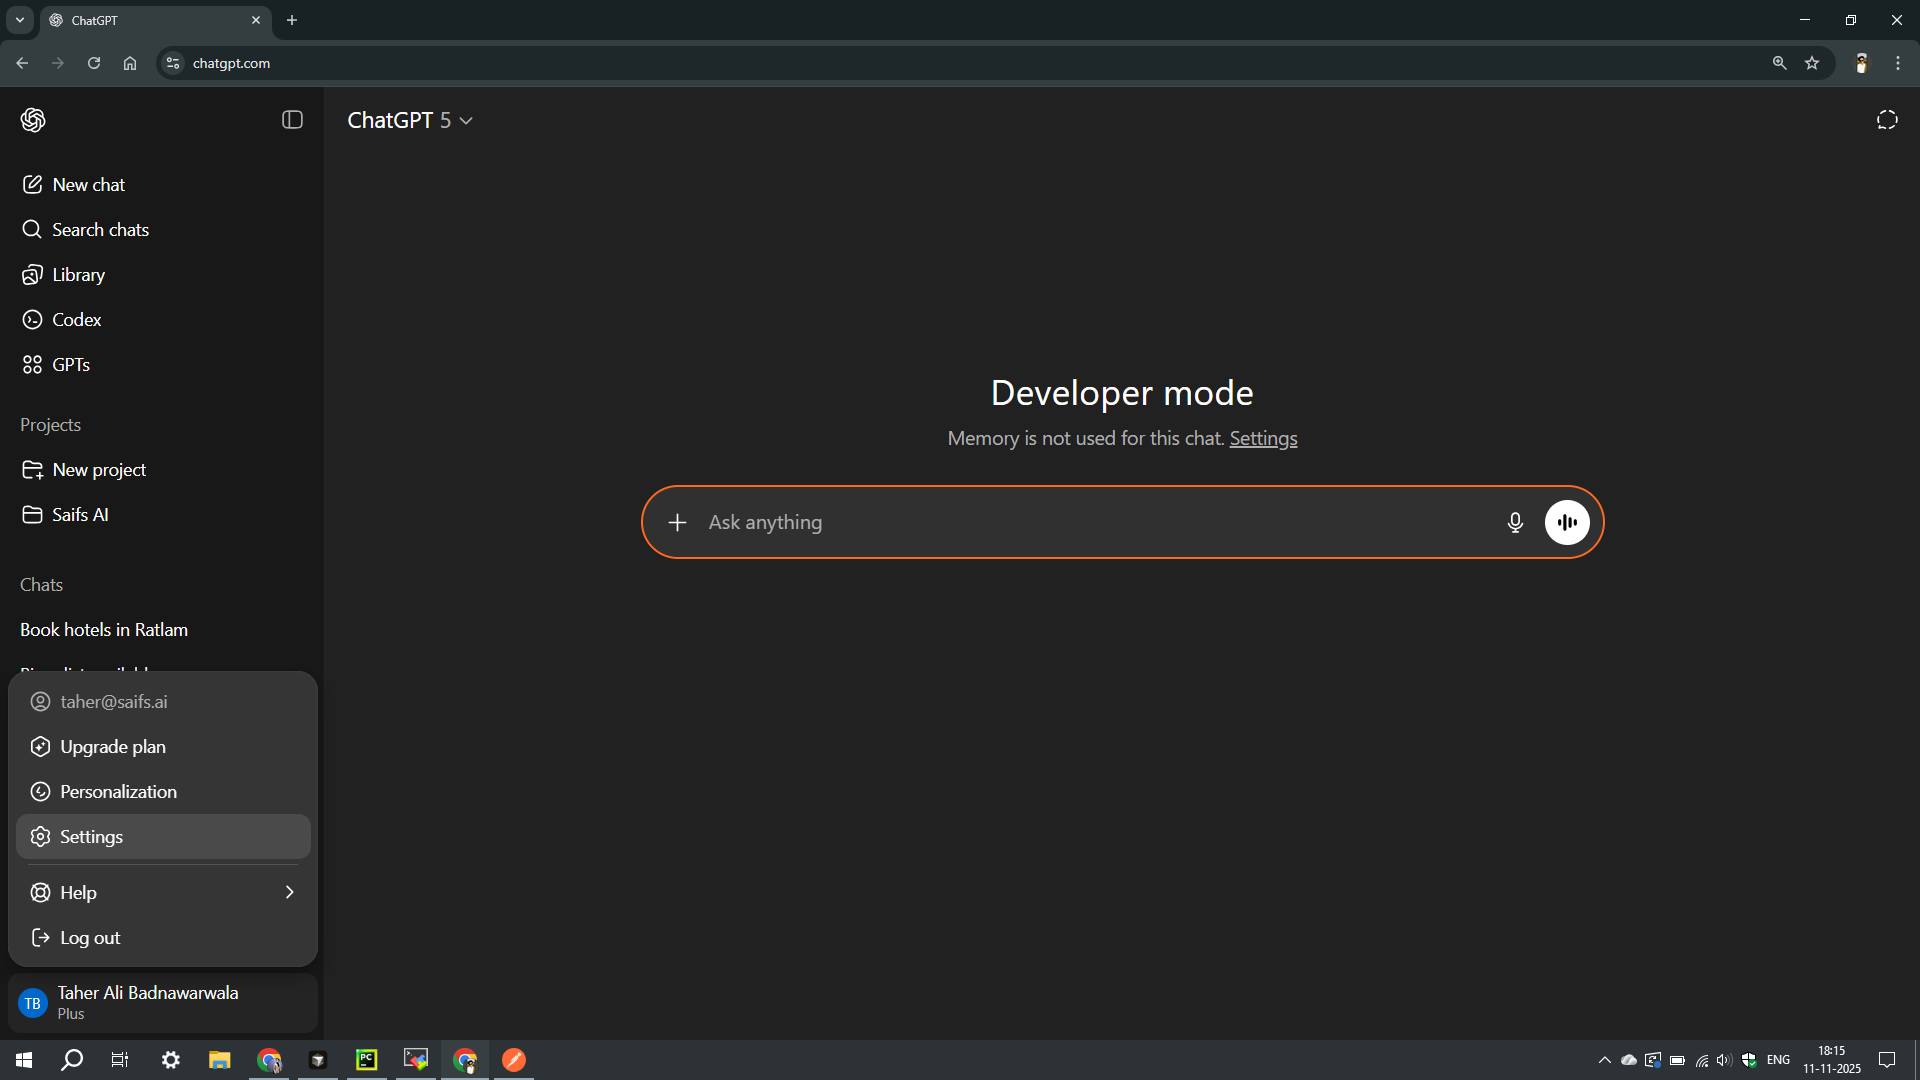
Open ChatGPT Settings
From the ChatGPT home page, go to Settings.
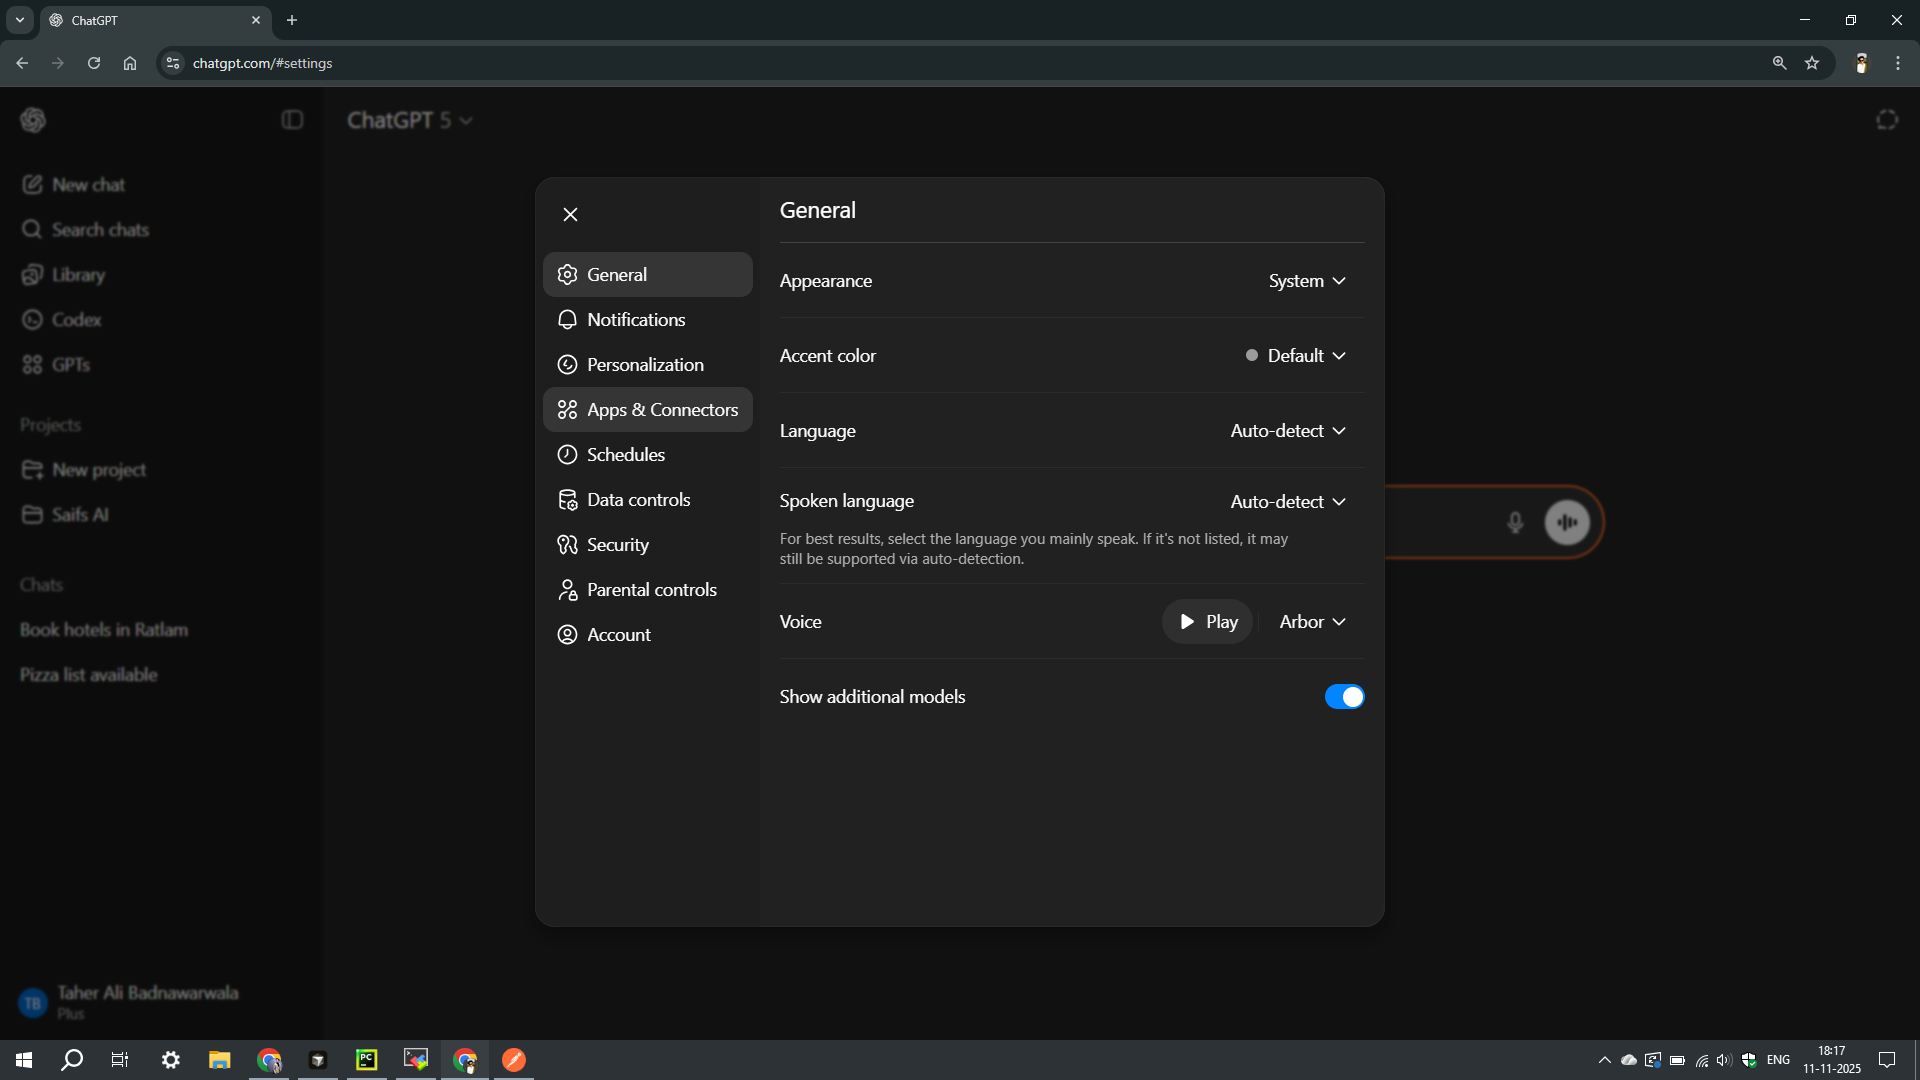
Open Connectors
Click Connectors in the settings menu.
Create a connector
Click Create in the browse connectors section.
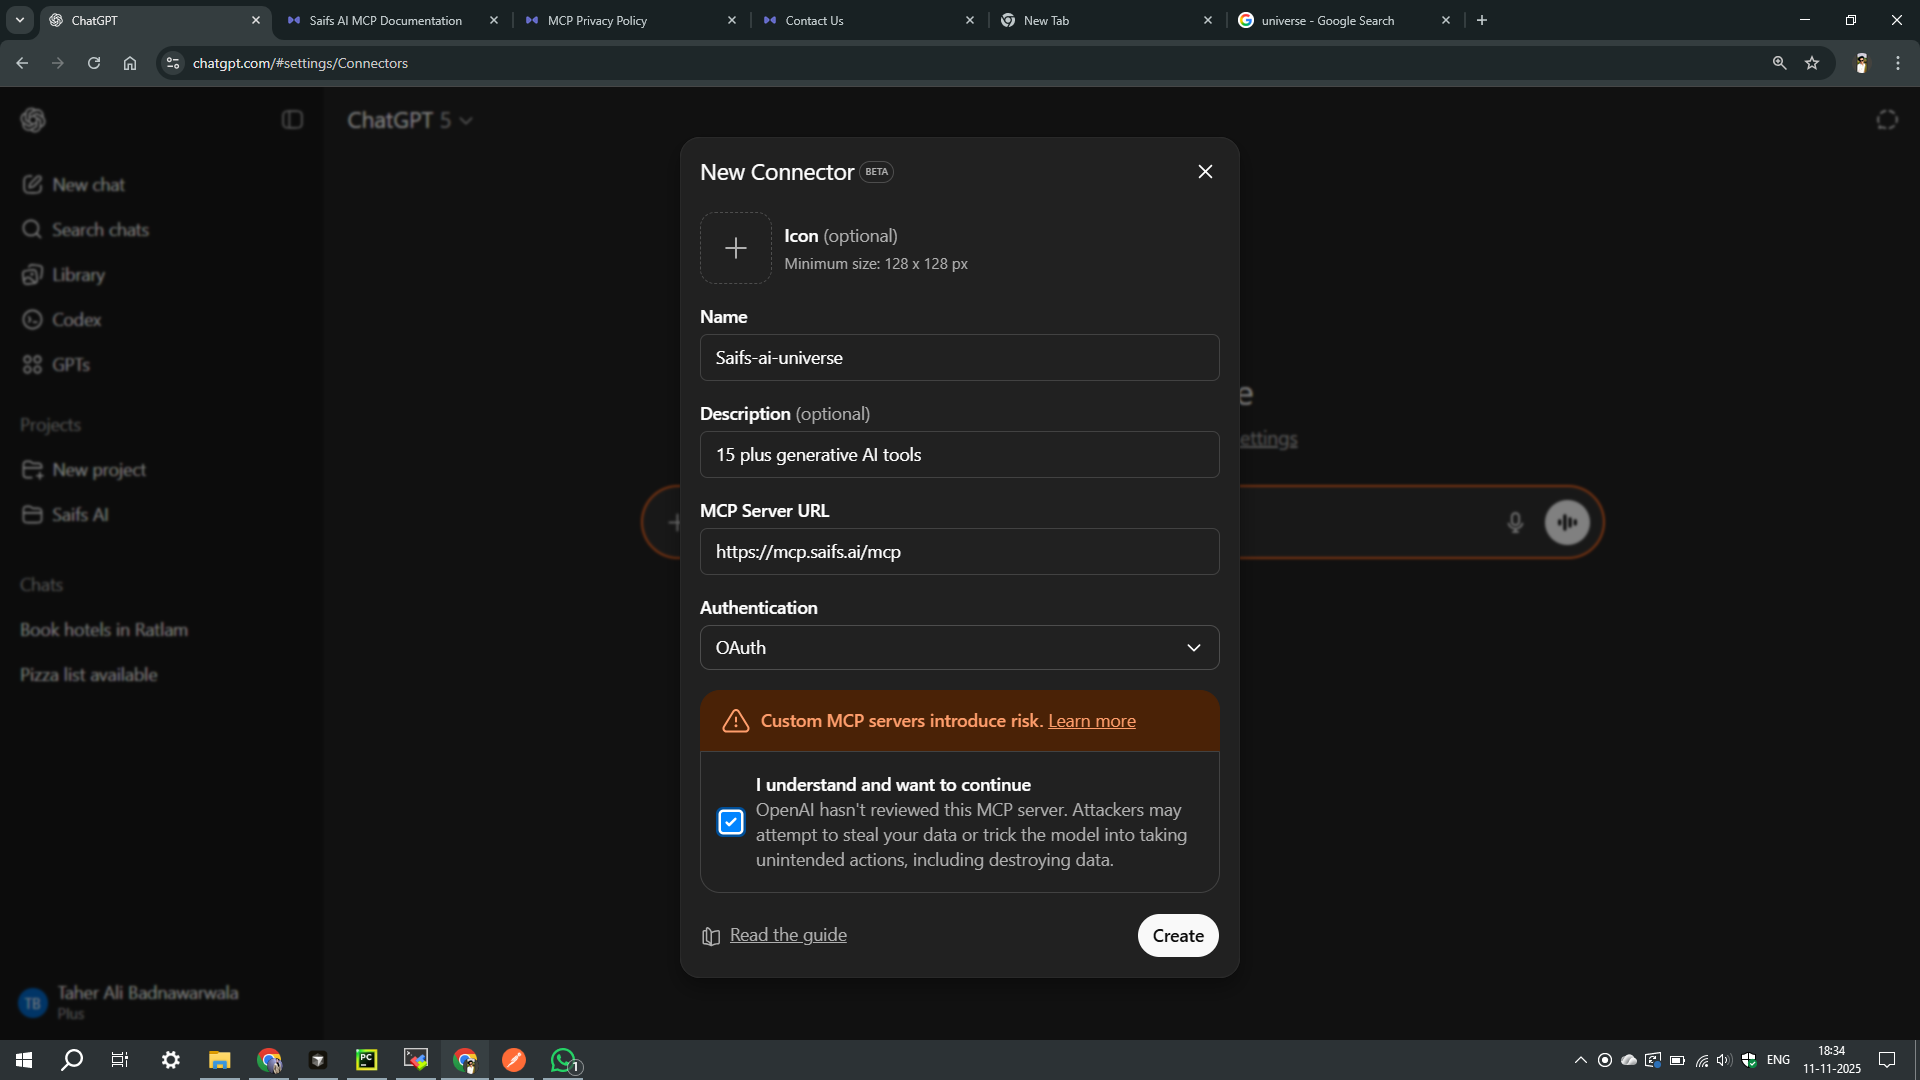
Add the Synthetic Data Generator MCP
Enter this server — not the generic Saifs AI MCP. This one is Synthetic Data Generator only. Then click Save.
Server URL: https://synthetic-mint-mcp.saifs.ai/mcp
Name: Synthetic Data Generator
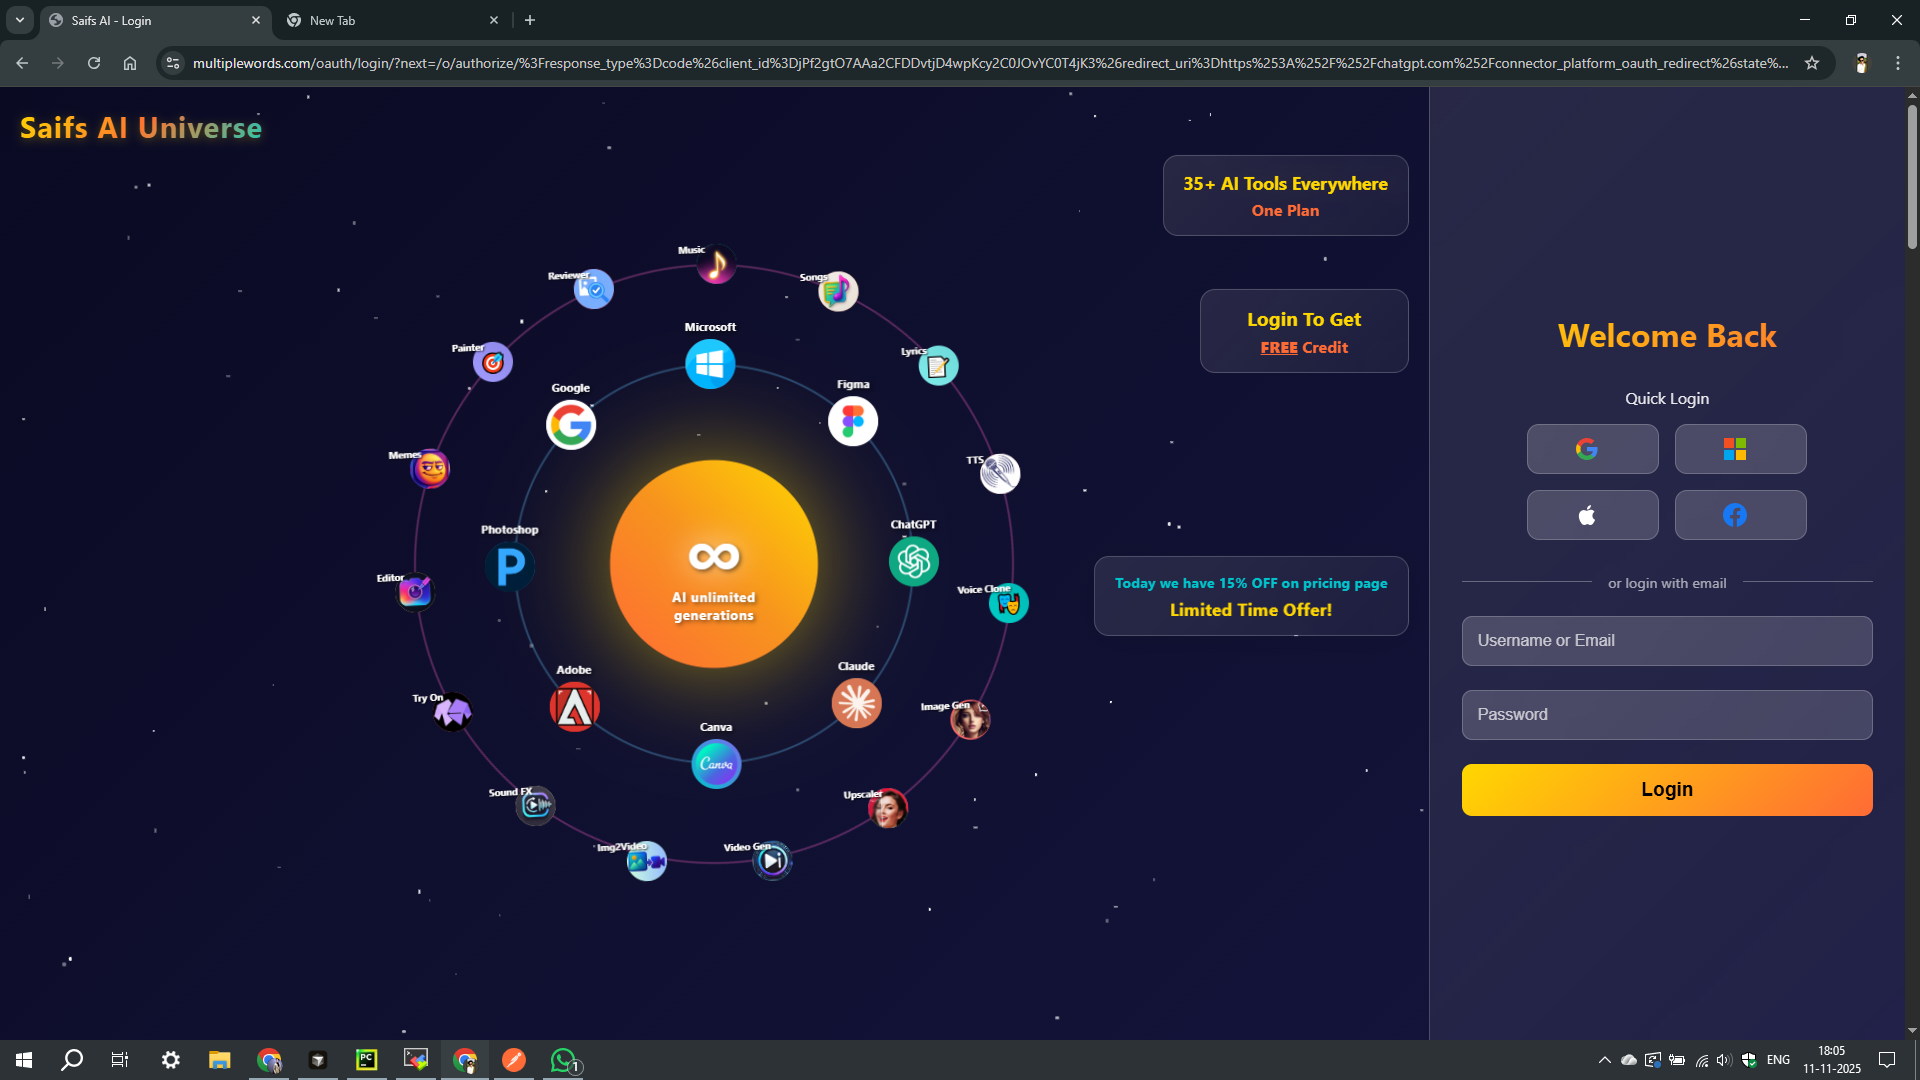
Save and start asking
Click Save. You can now ask for fake people — complete profiles, no real PII — in ChatGPT.
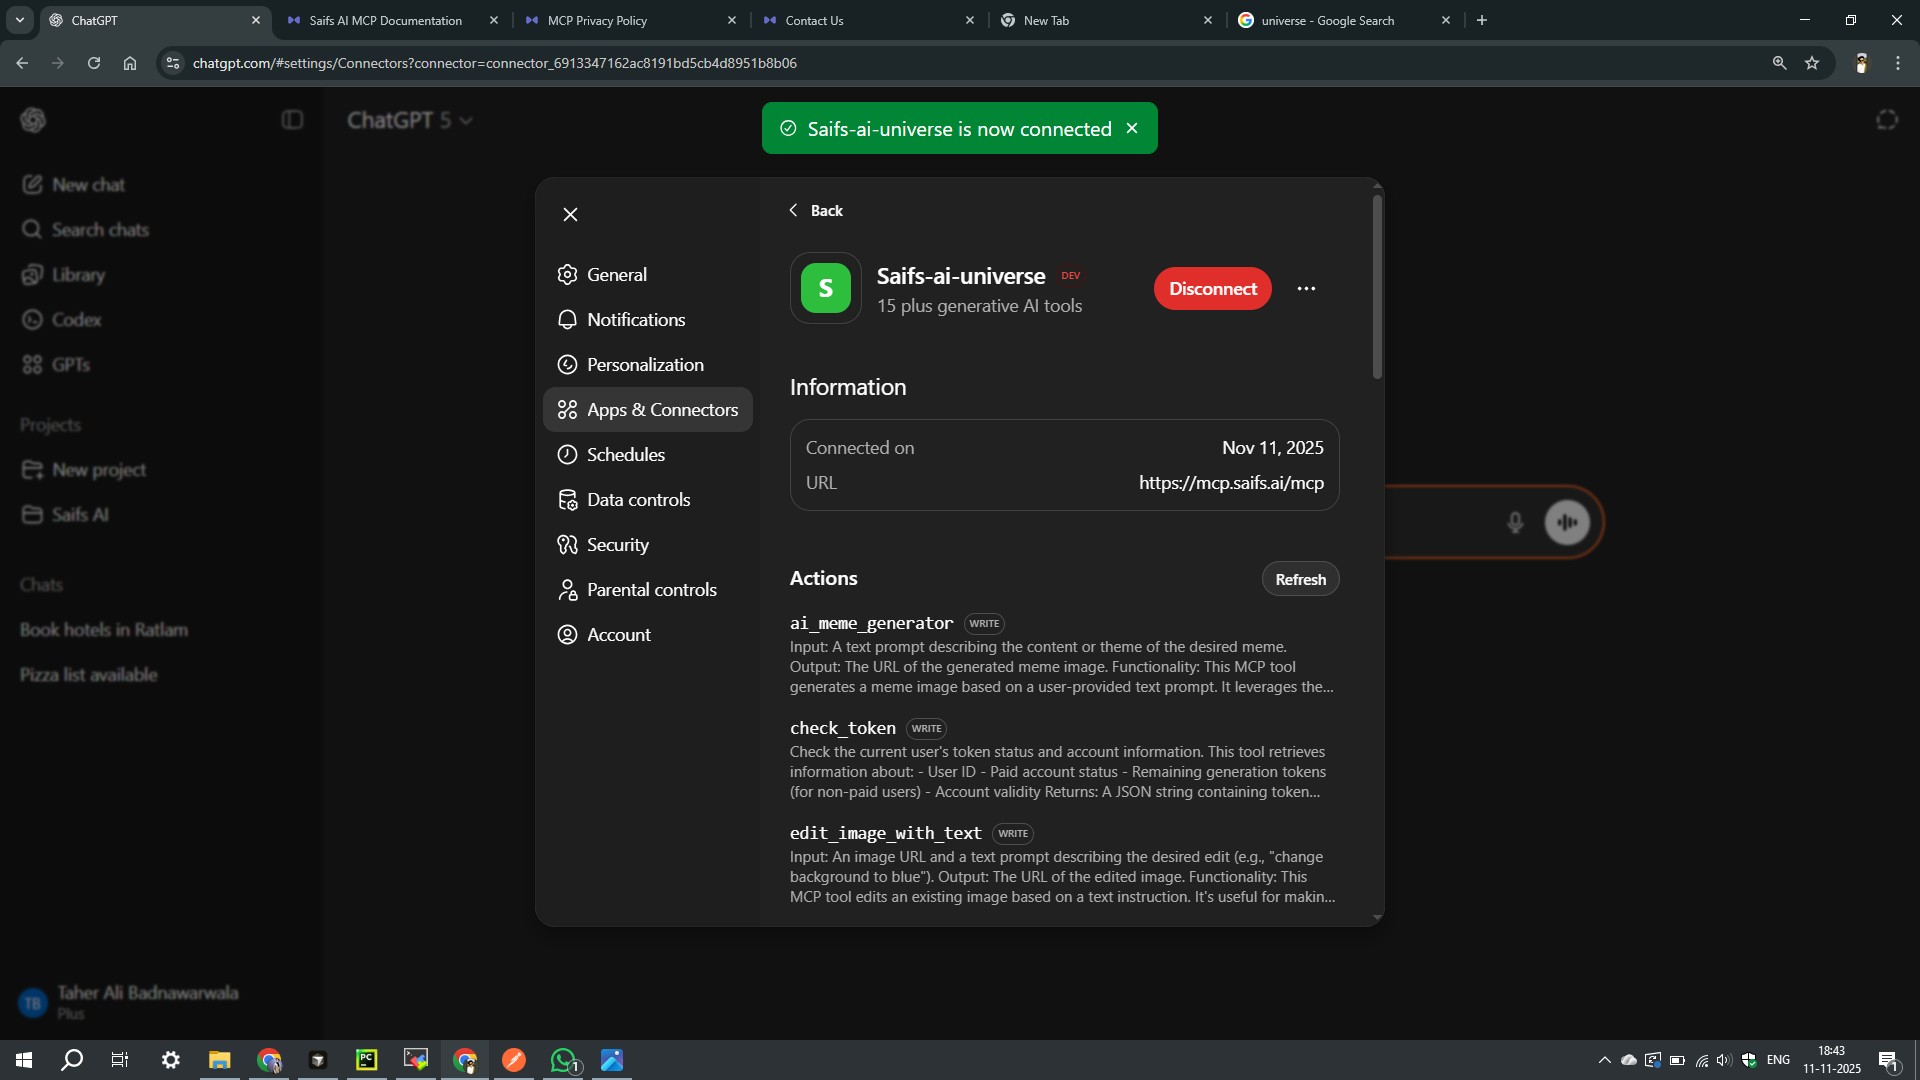
Install an MCP-compatible client
Open the VS Code marketplace and install an MCP-compatible client.
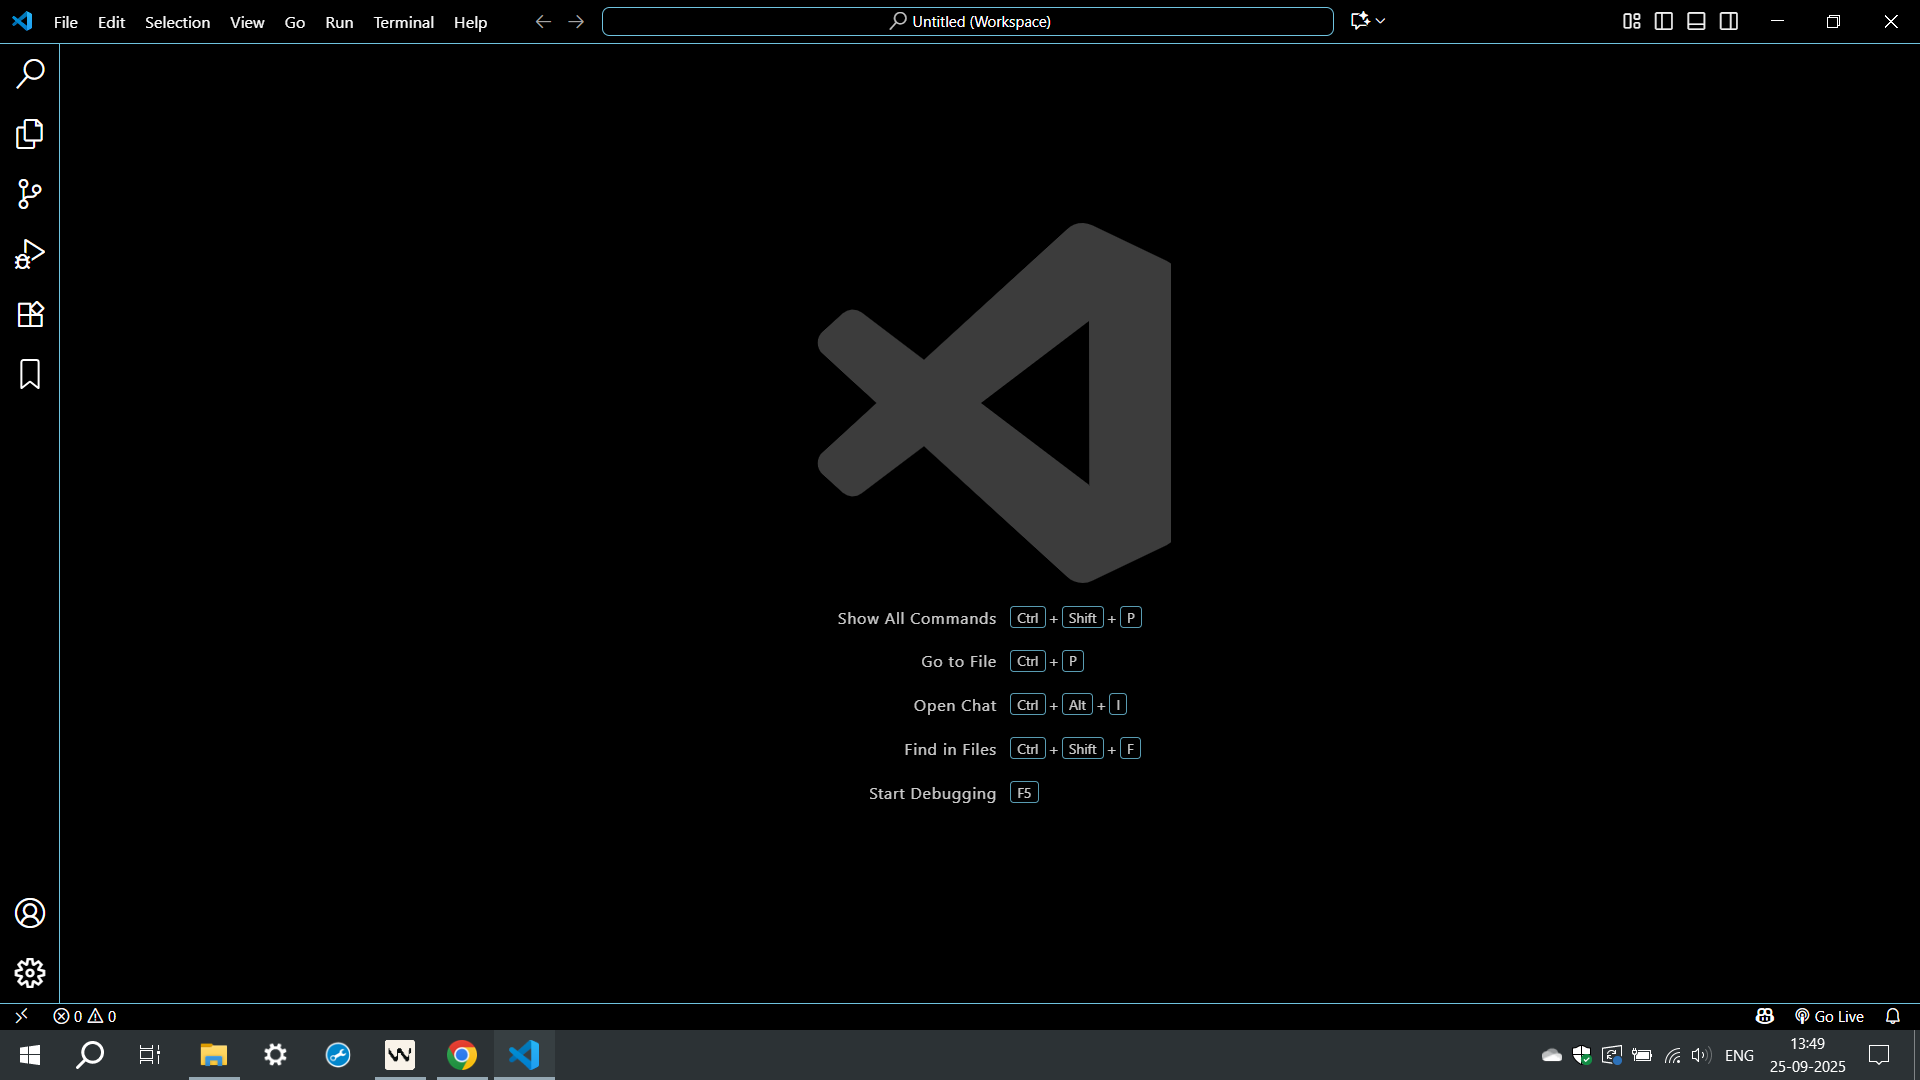
Open the command palette
Open the command palette, type MCP: add, and select MCP: Add Server to start the wizard.
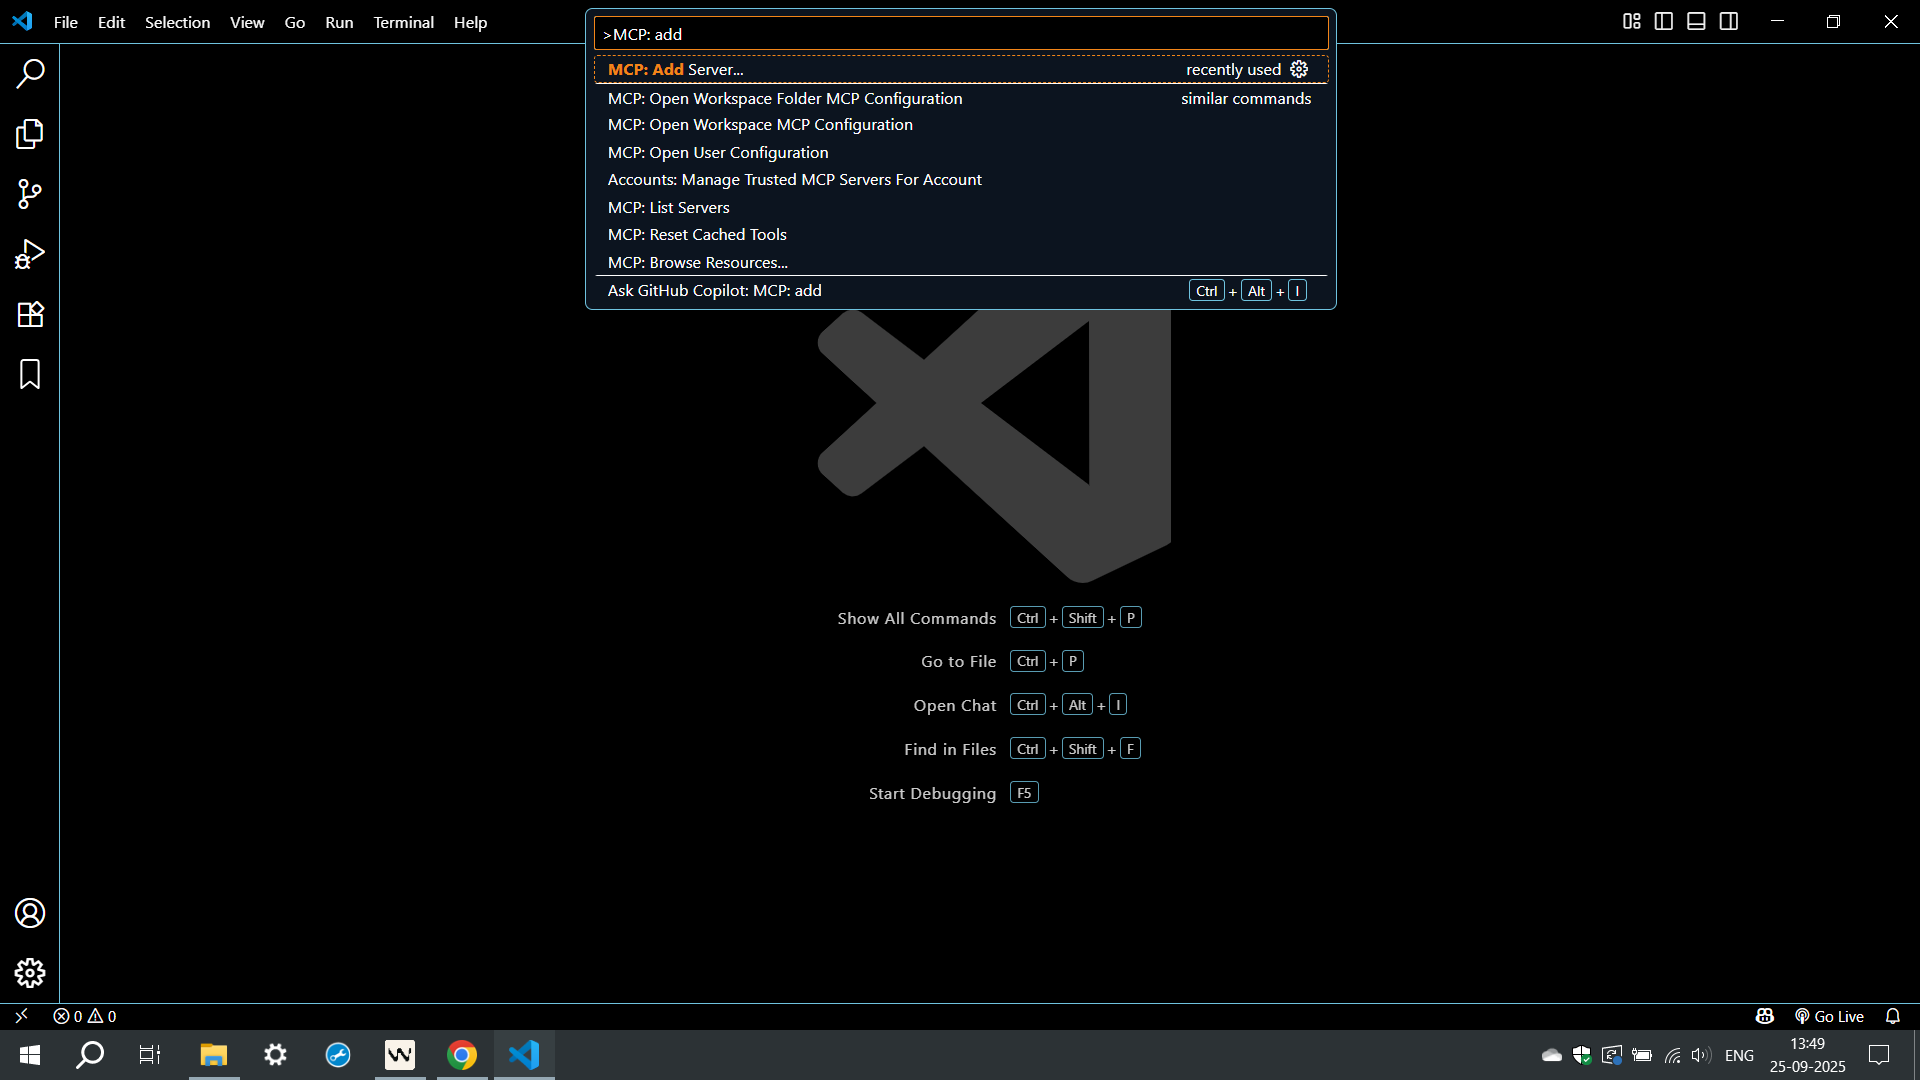
Choose HTTP server
Search MCP: Add Server and choose HTTP (HTTP or Server-Sent Events) to connect to a remote MCP server.
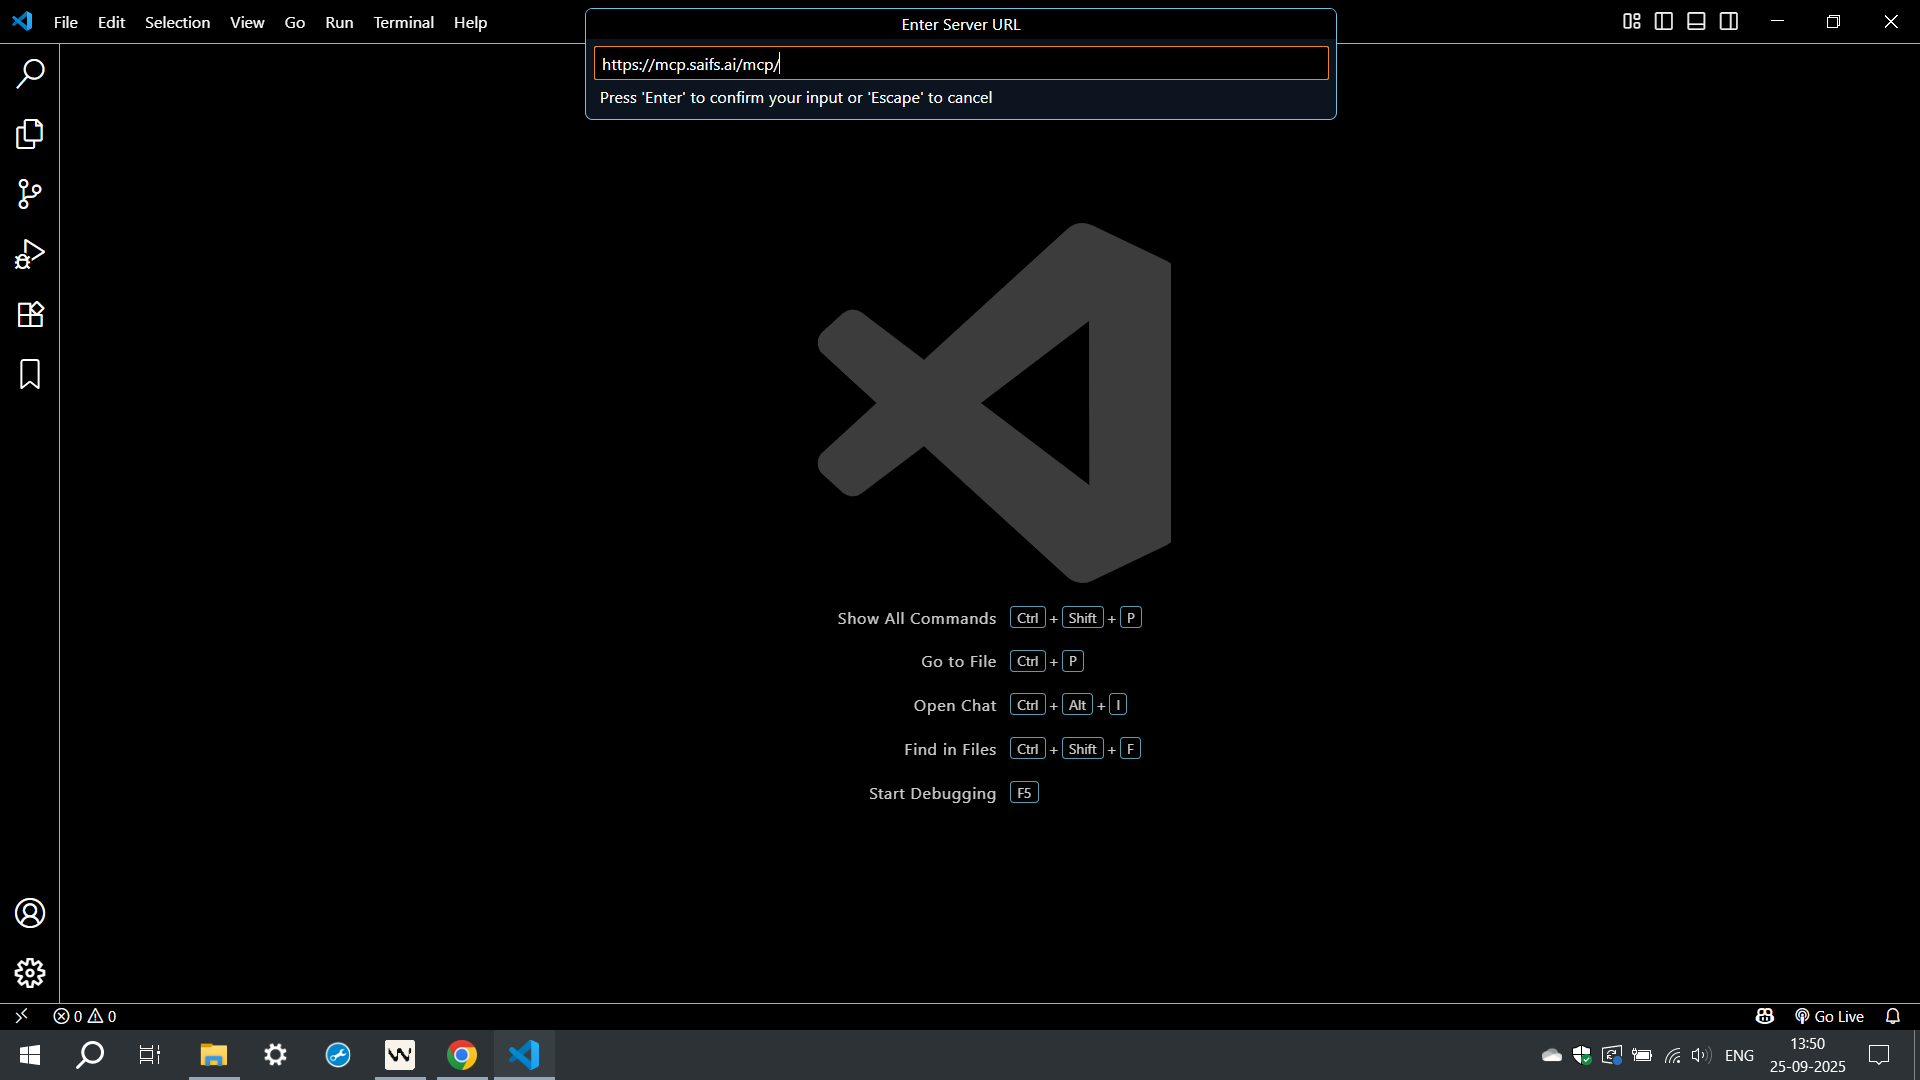
Enter the Synthetic Data Generator MCP URL
Input this server URL — not the generic Saifs AI MCP. This one is Synthetic Data Generator only. Press Enter to confirm.
https://synthetic-mint-mcp.saifs.ai/mcp
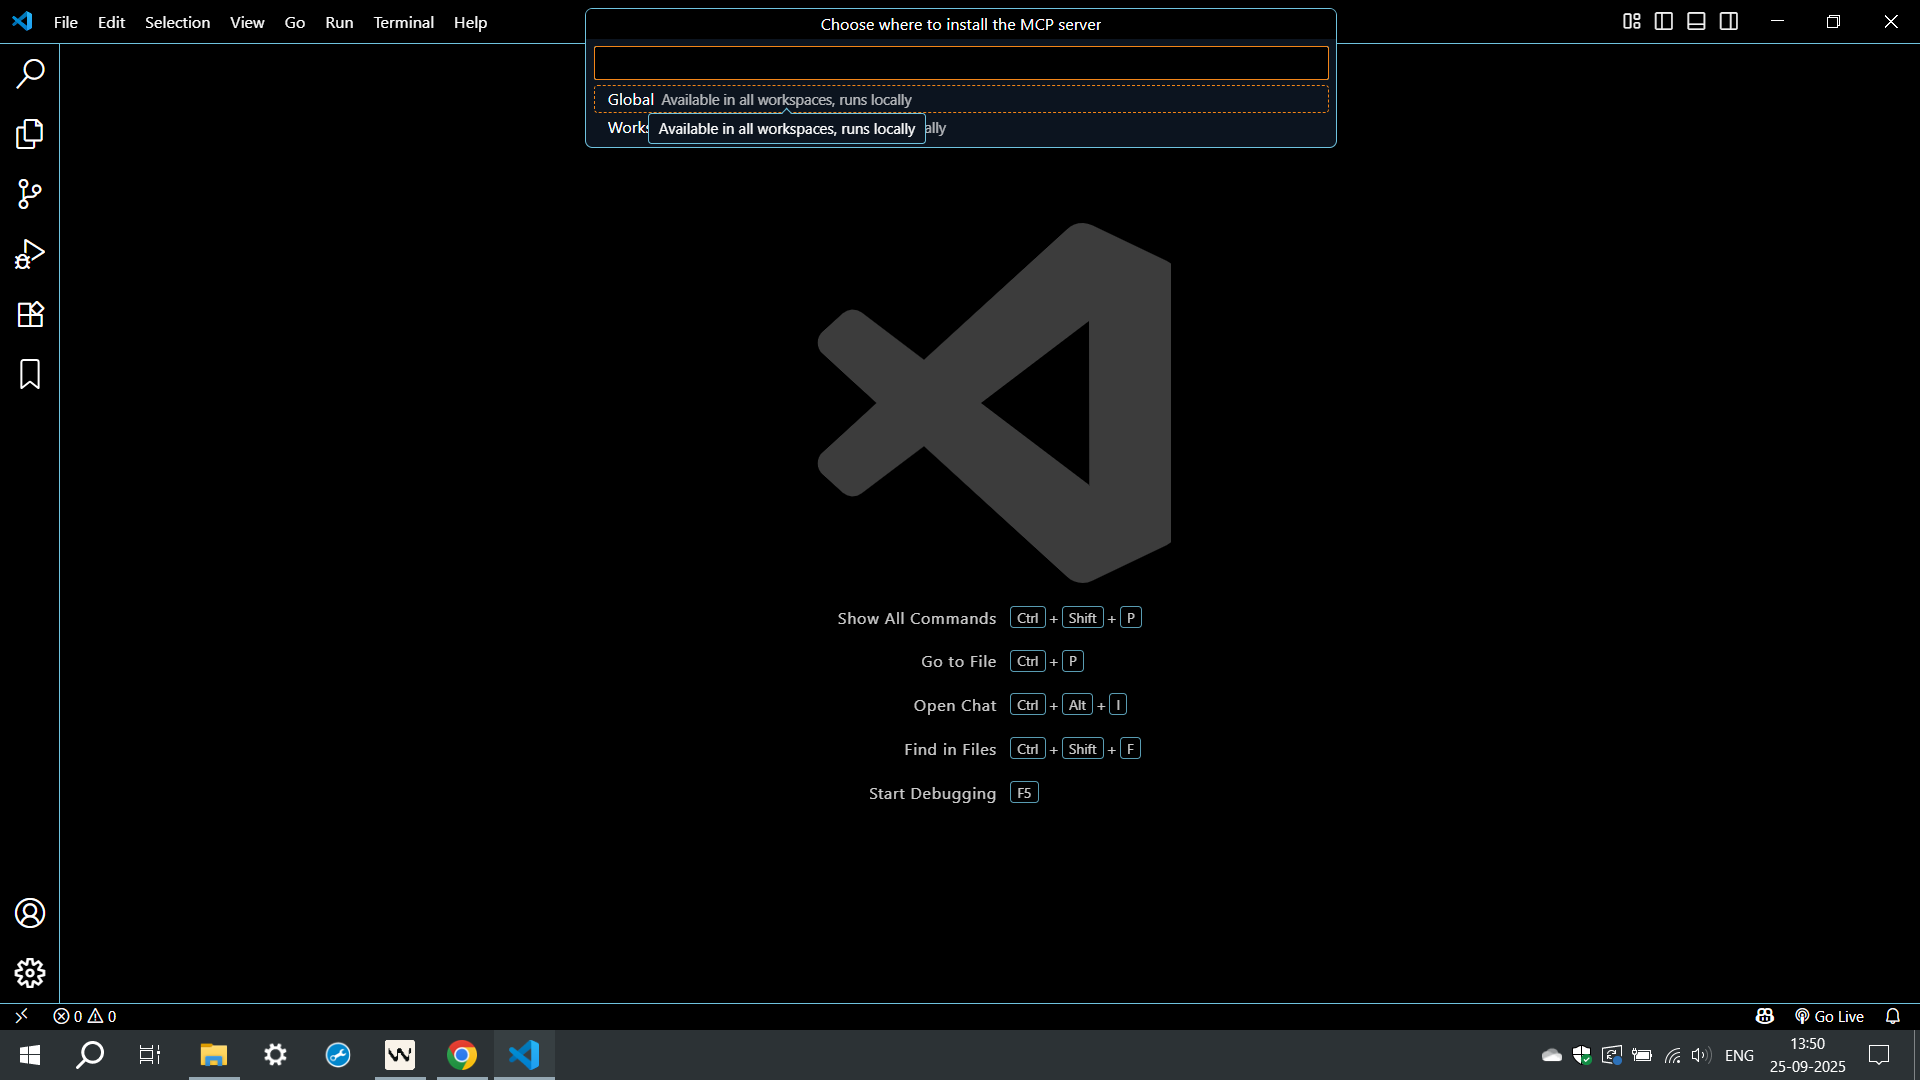
Choose installation scope
When prompted, choose Global (all workspaces) or Workspace (this workspace only).
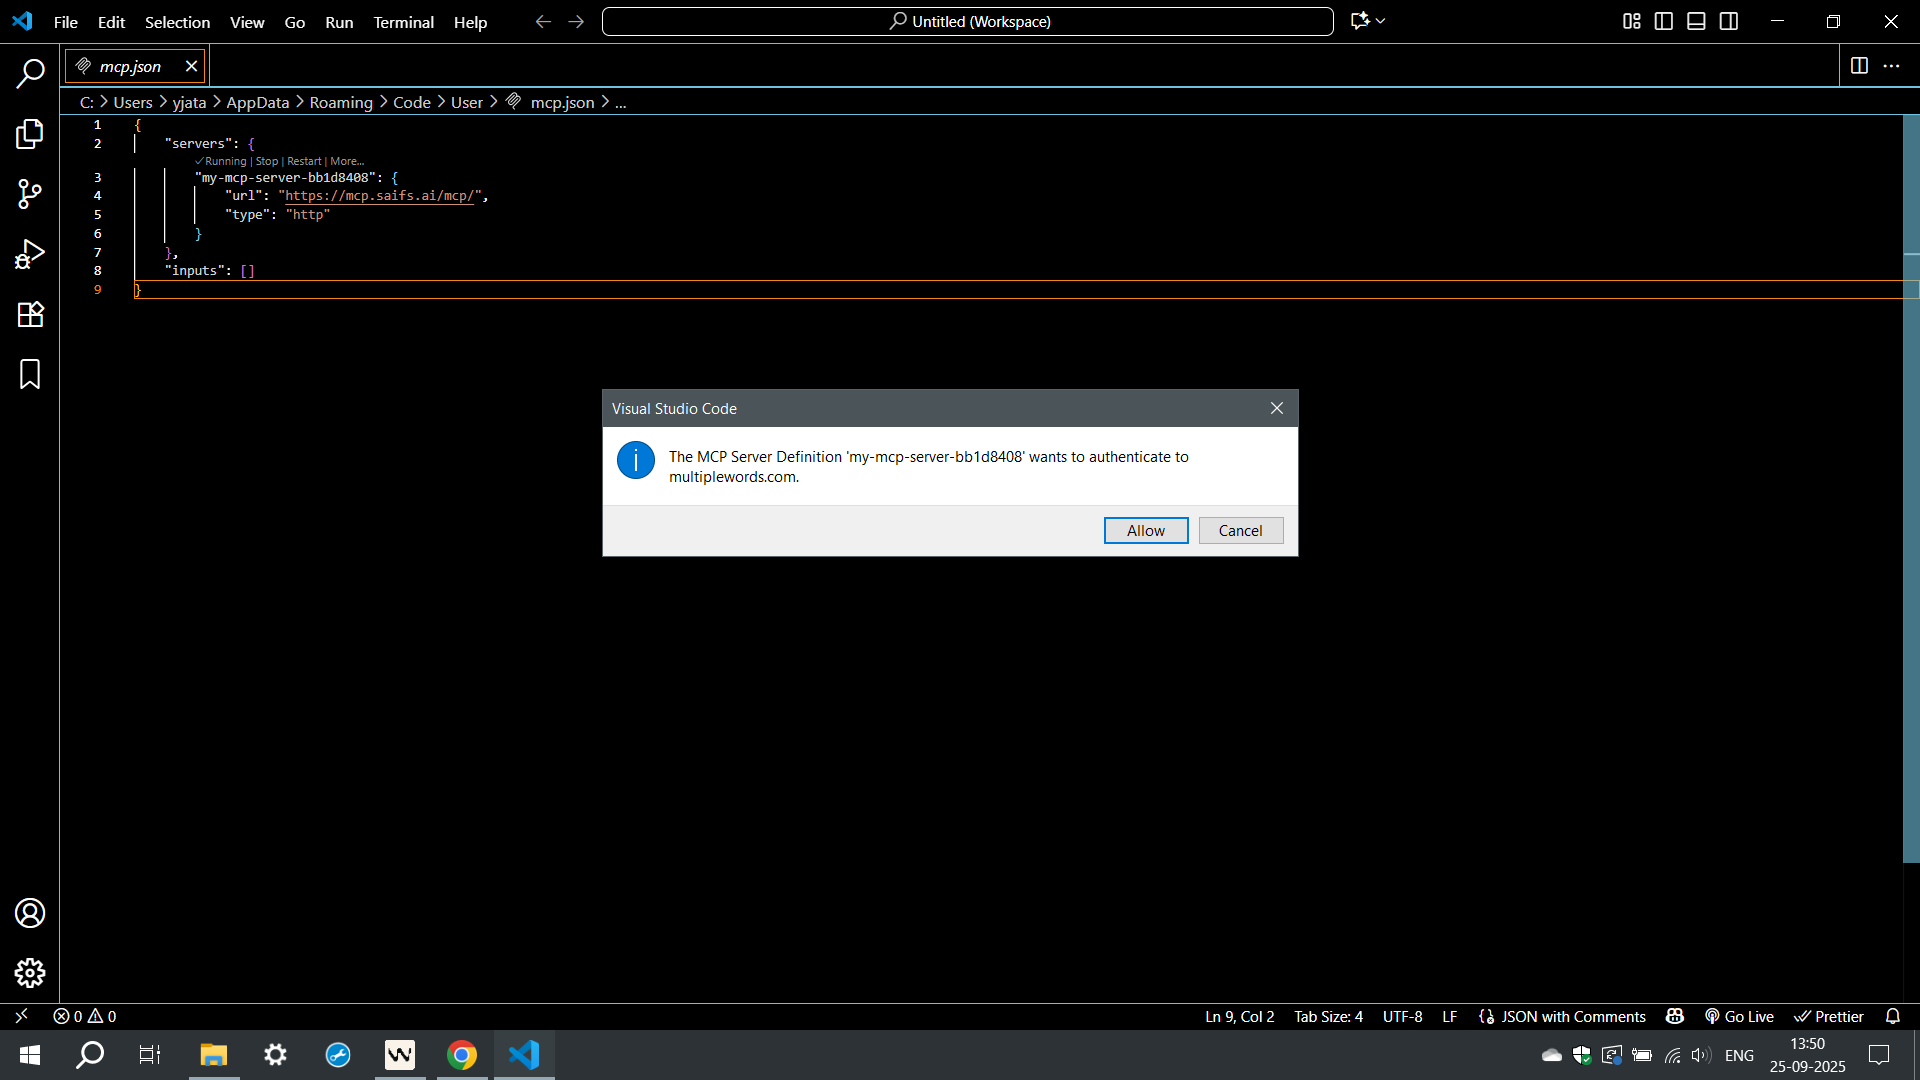
Allow authentication
Allow the server to authenticate so VS Code can talk to the Synthetic Data Generator MCP.
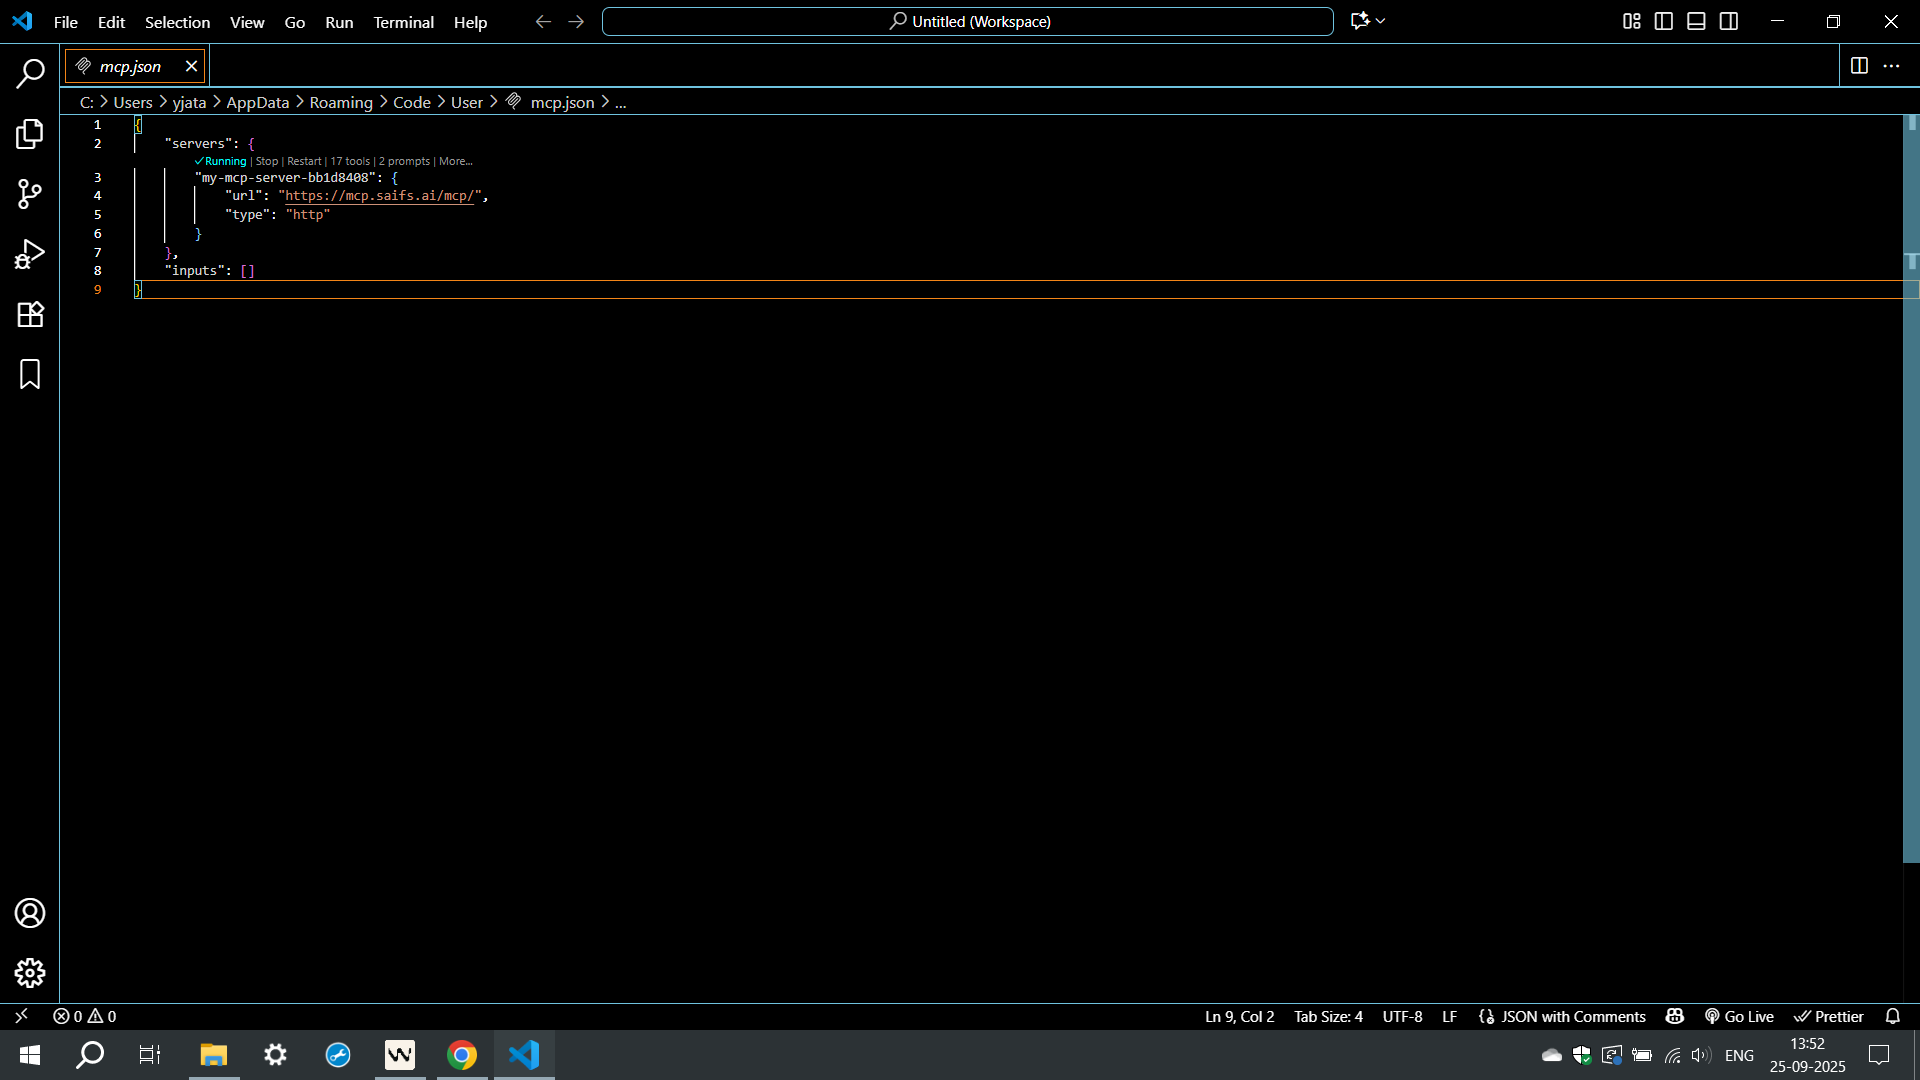
Verify the server is running
The MCP server should show as Running. That confirms the Synthetic Data Generator Agent is connected in VS Code.
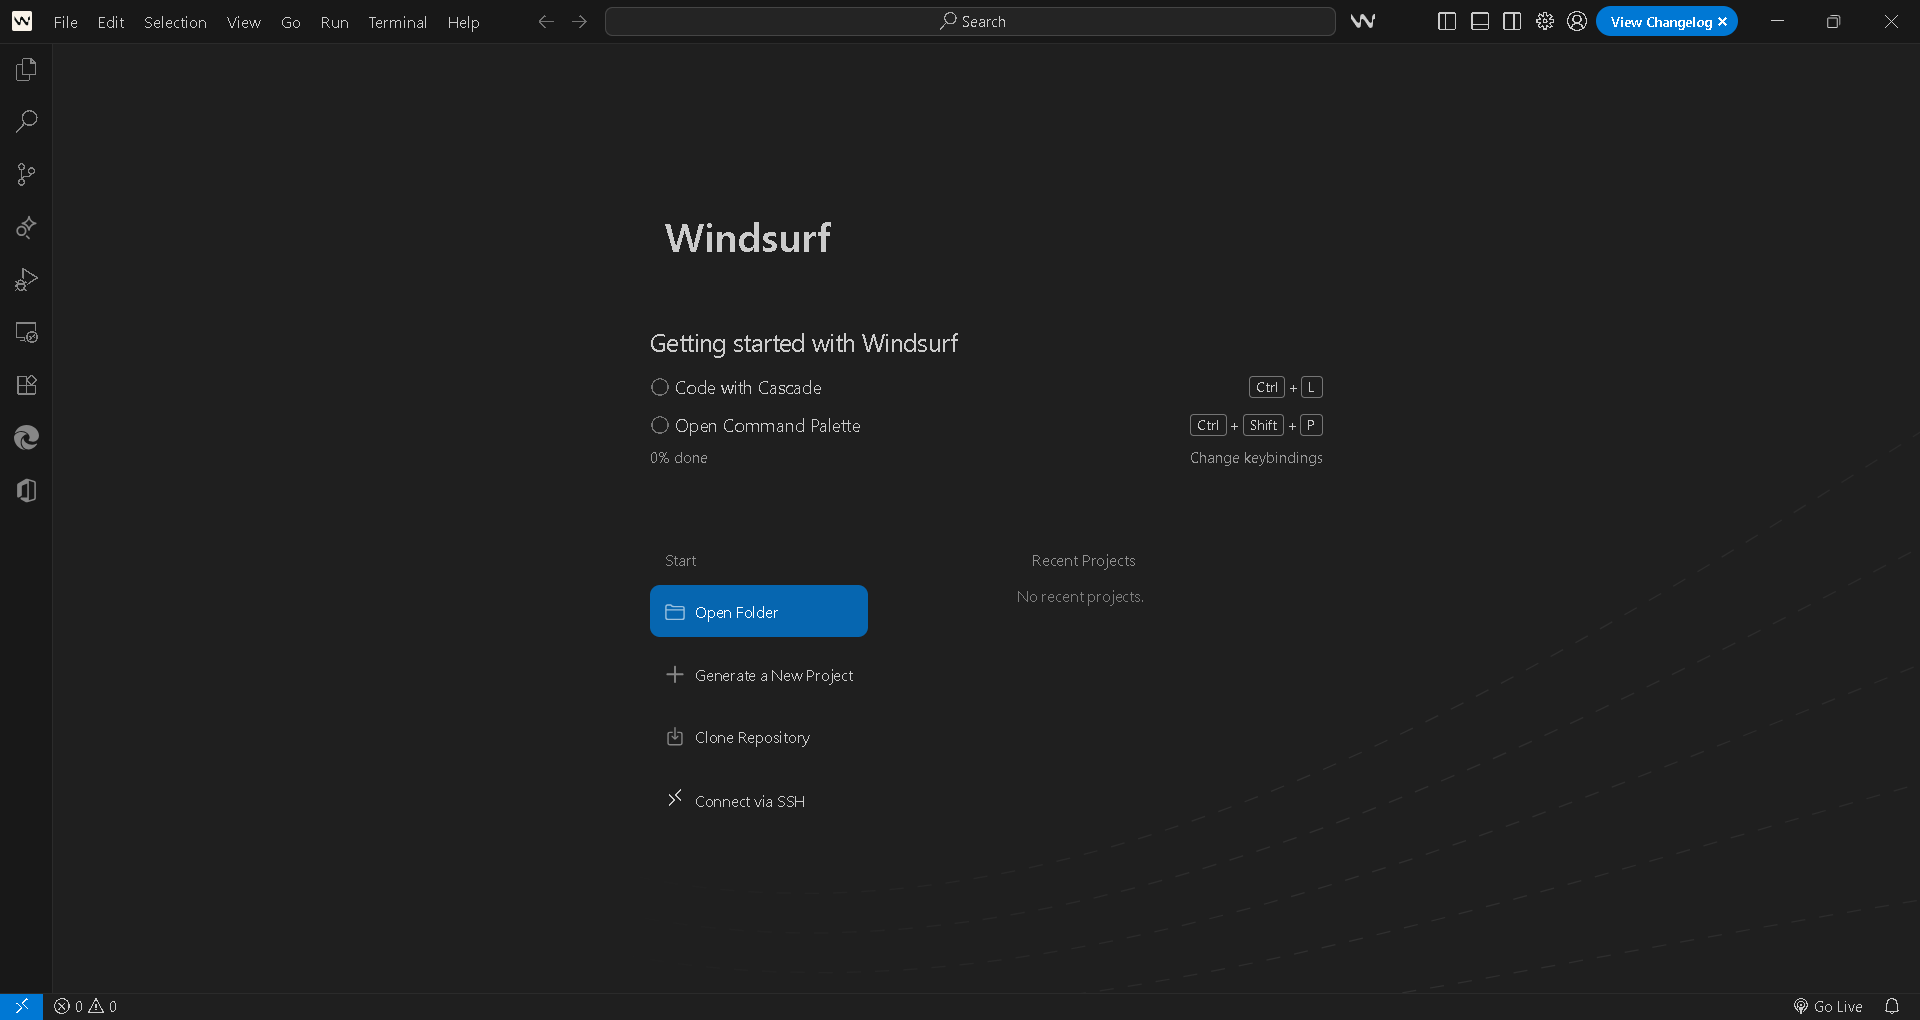
Open Windsurf
Launch Windsurf, then open an existing project folder or create a new one from the welcome screen.
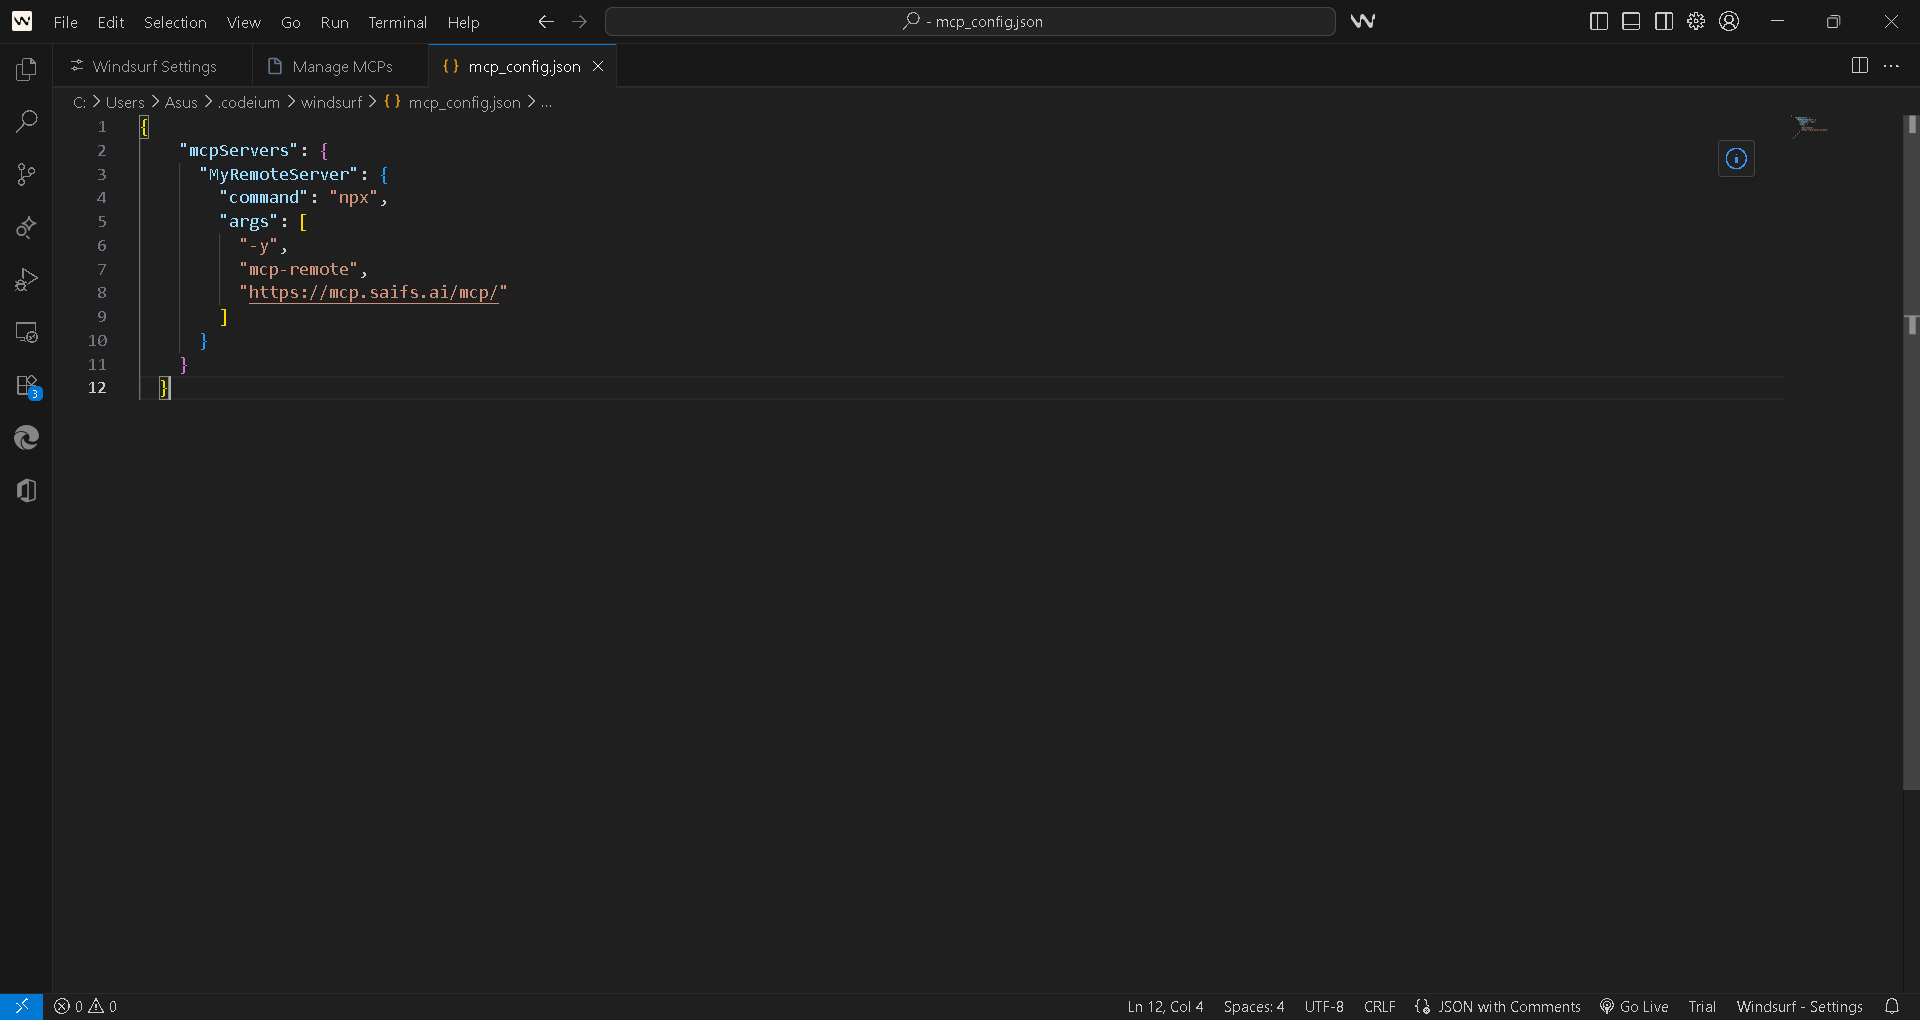
Configure the MCP server
Open or create mcp_config.json in your project or settings directory and add the server.
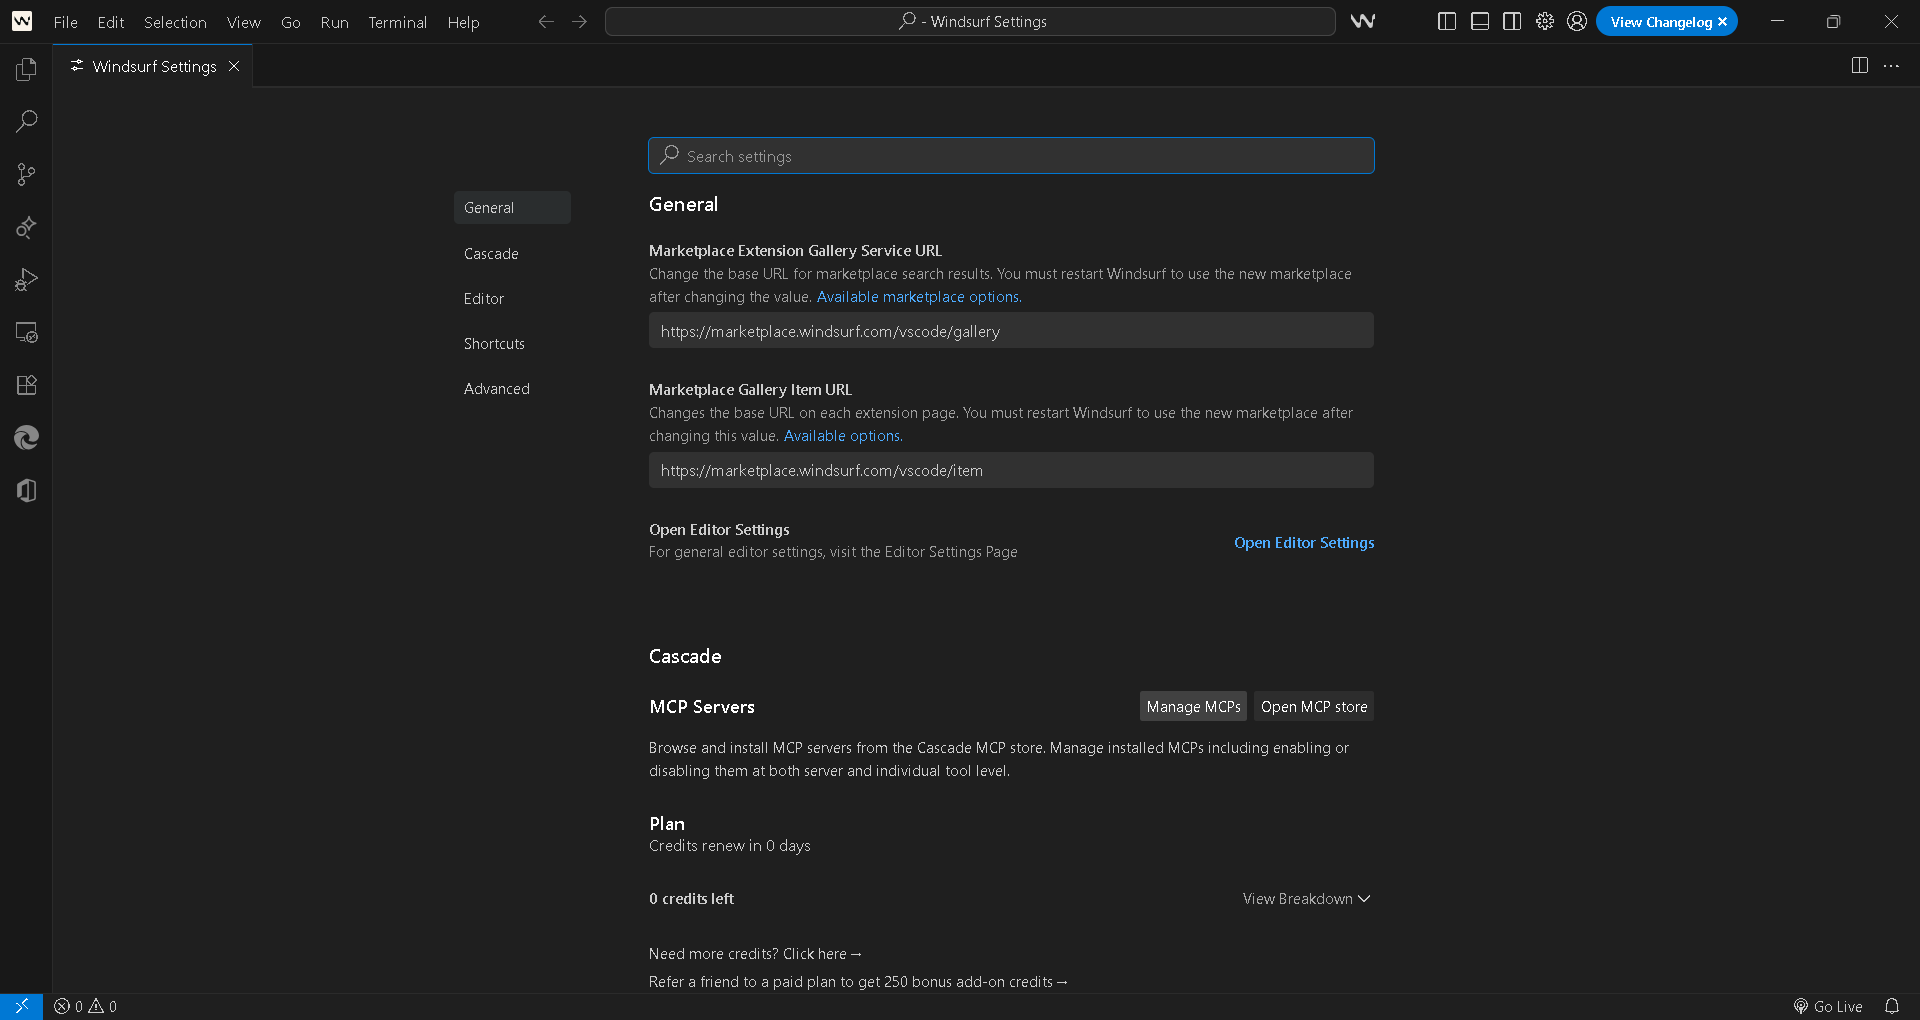
Access MCP server settings
Open Windsurf settings and go to Cascade or MCP Servers. Click Manage MCPs or Open MCP store.

Add the Synthetic Data Generator MCP
Use Manage MCP servers or View raw config. Add this block — not the generic Saifs AI MCP. This one is Synthetic Data Generator only.
{
  "mcpServers": {
    "synthetic-data-generator": {
      "command": "npx",
      "args": [
        "-y",
        "mcp-remote",
        "https://synthetic-mint-mcp.saifs.ai/mcp"
      ]
    }
  }
}
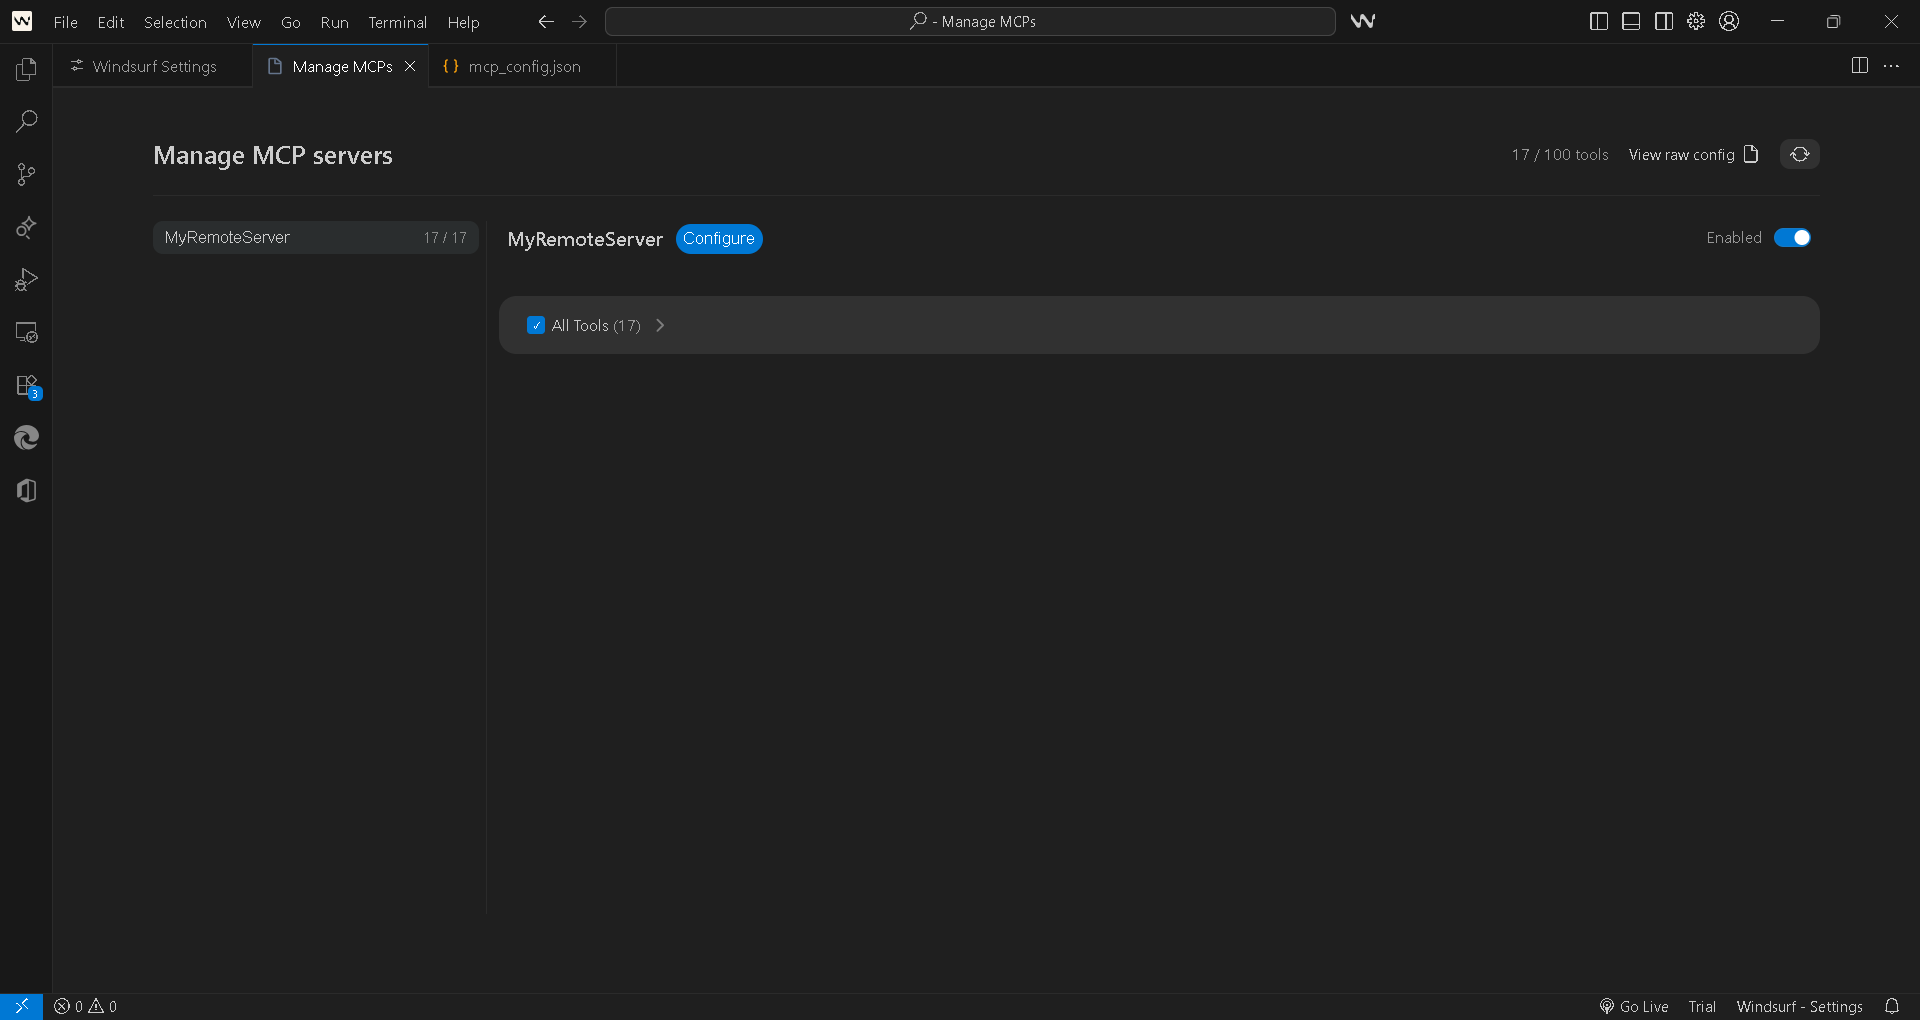
Verify the agent is on
The toggle next to the server should be ON. That confirms the Synthetic Data Generator Agent is connected in Windsurf.
What Our AI Agent Can Actually Do
Once connected, our AI Agent isn't inventing names from a static file — it's querying live synthetic profiles every time. Here's what that looks like in practice, step by step.
Say you need 10 demo contacts for a client walkthrough. Without anyone pasting a CRM export, the MCP generates the people:
- You ask a plain question. In Copilot Studio, Cursor, or wherever our AI Agent lives, you type: "Generate 5 random users for my demo contacts table."
- Our AI Agent calls
random_users— it does not invent the list. You pass how many you need (results, minimum 1). Authenticated user id is injected server-side; you never send it. - Every profile comes back complete. Not a paragraph of dummy names — name, gender, location, email, login, date of birth, phone, picture, and nationality. Fields a signup form will actually accept.
- Our AI Agent flags what a chatbot would miss. Missing emails, invalid phones, no photos. The generator returns large, medium, and thumbnail image URLs — and says these are fake people for demos and testing, not real PII.
- Our AI Agent explains itself when asked. You follow up: "Give me 10 more for Storybook — no real customers." It queries the MCP again and returns another batch in the same schema.
- Your team acts — same day, not next quarter. Drop the profiles into Storybook, Cypress, a mock CRM, or a screenshot. A single tool call, instead of a production dump, is the difference between a safe demo and a real phone number in the deck.
"Generate 5 random users for my demo — complete profiles, no real customers."
"Give me 10 fake people with names, emails, phones, and photos for QA."
That's the shift: from a spreadsheet you have to remember to fake, to an agent that generates the people — and tells you, in fields — exactly what to put on the screen.
Why Connect Our MCP
Structured Data
Same schema, every time. The profiles you get are generated by random_users, not written as a plausible-sounding guess.
Privacy
Full SOC 2 compliance. Fake people only — no real customer data required, no third-party export of your CRM, no production phones in a screenshot.
Less Token Usage
A purpose-built generator does the heavy lifting instead of an LLM inventing 10 users on every query — cheap enough to run on every demo.
Battle-Tested
Built as a dedicated Random Users MCP — not a new prompt hoping the email validates on your signup form.
Connect MCP for Creating Your Synthetic Data Generator Agent
You've seen how it works — structured, private, battle-tested, and ready to run on the platform you already use. Connecting takes minutes, and every demo after that gets fake people instead of real customers.
Connect Our MCP →No credit card. No data science team. Just fake people and a few minutes.