Step 1 — Install MCP Extension
Open VS Code marketplace and install an MCP-compatible client.
Open VS Code marketplace and install an MCP-compatible client.
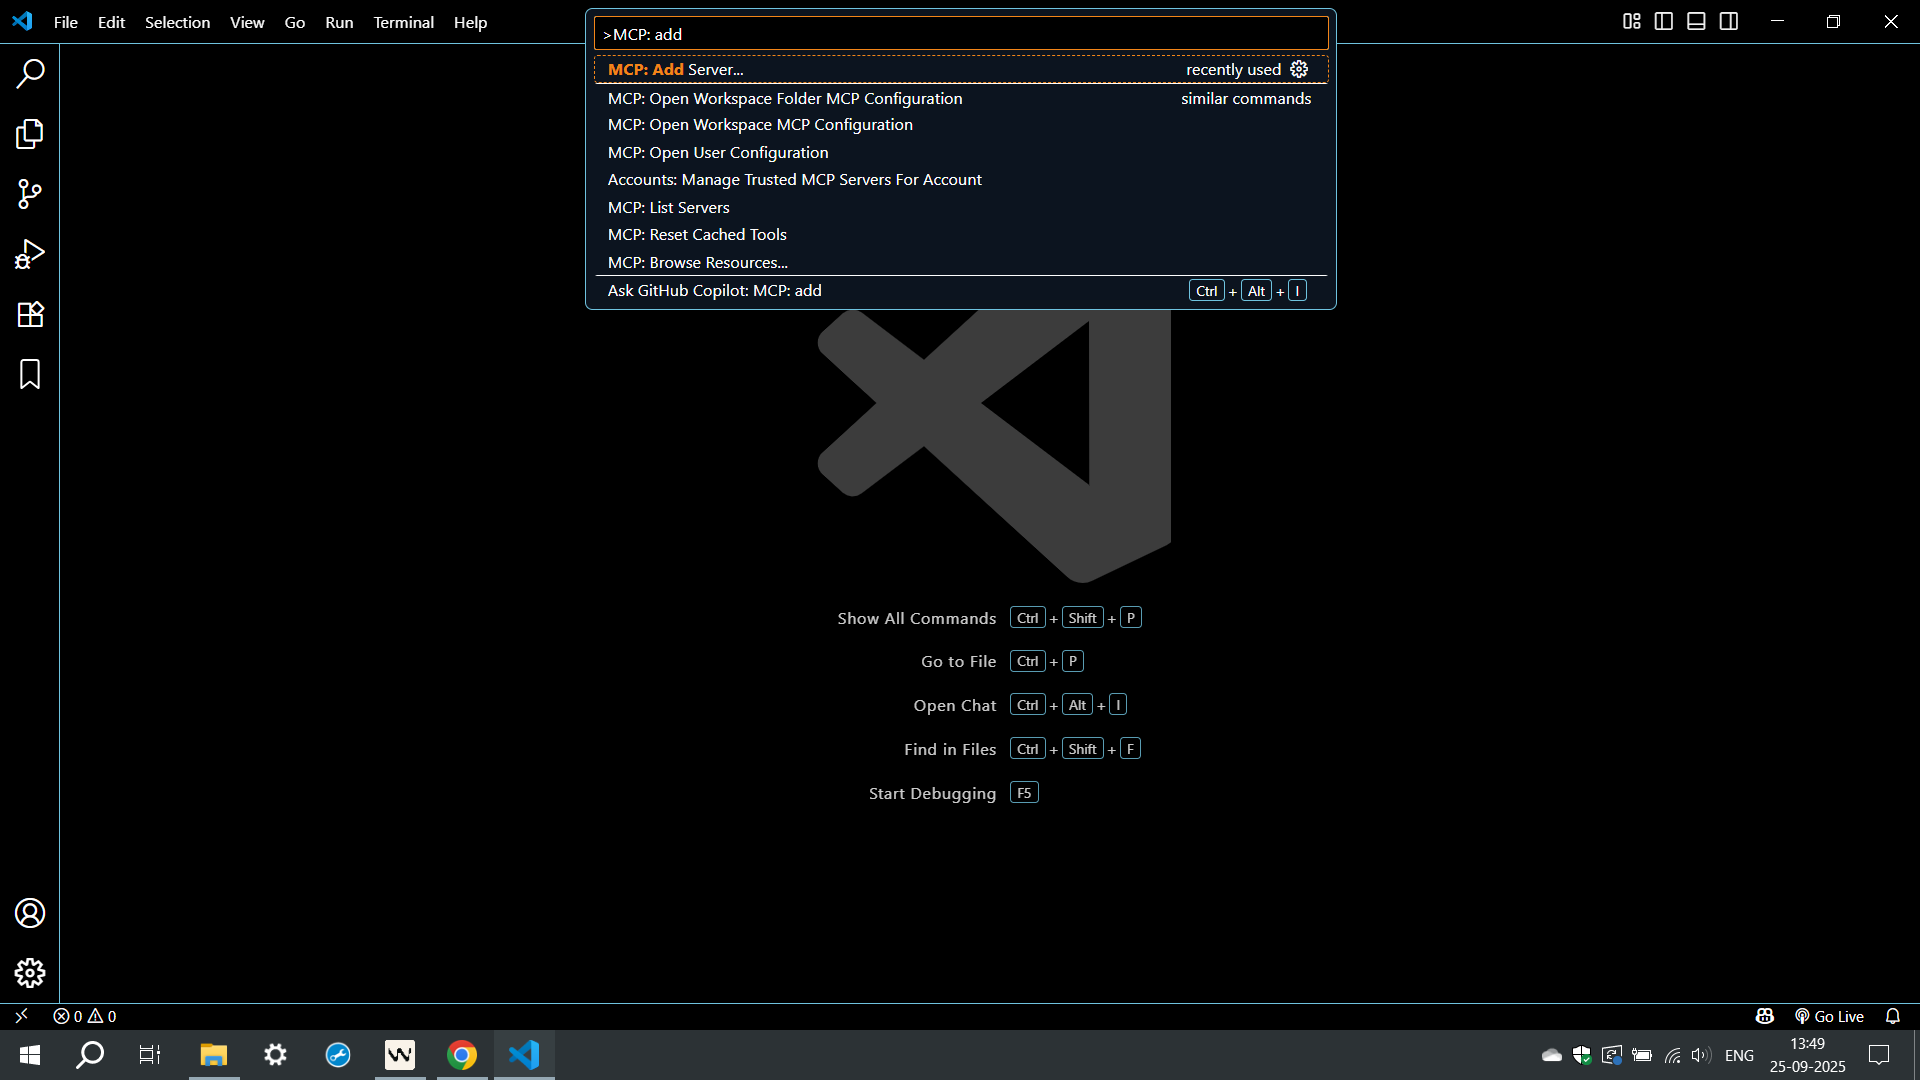
Open the command palette in VS Code, type MCP: add, and select MCP: Add Server to start the integration wizard.
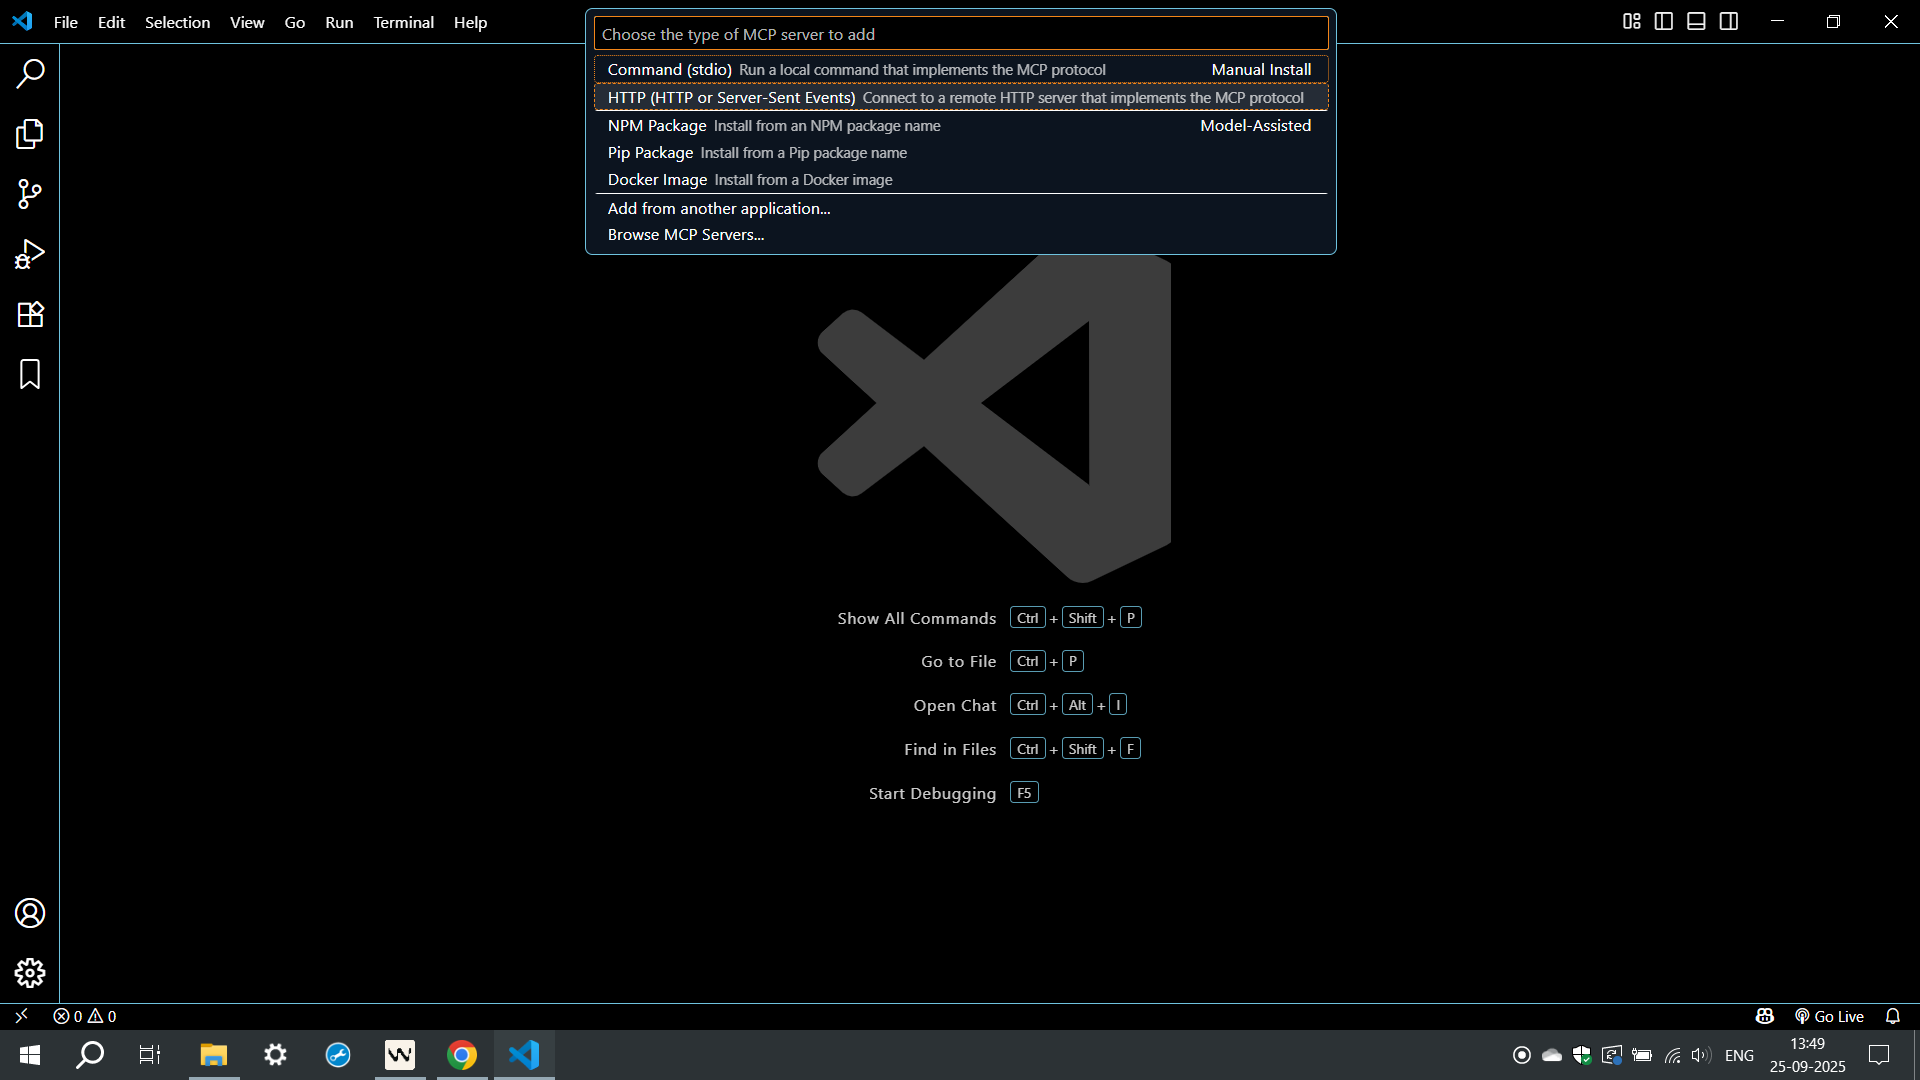
From the command palette in VS Code, search "MCP: Add Server" and choose the type of MCP server to add—for most cases, select HTTP (HTTP or Server-Sent Events) to connect to a remote MCP server.
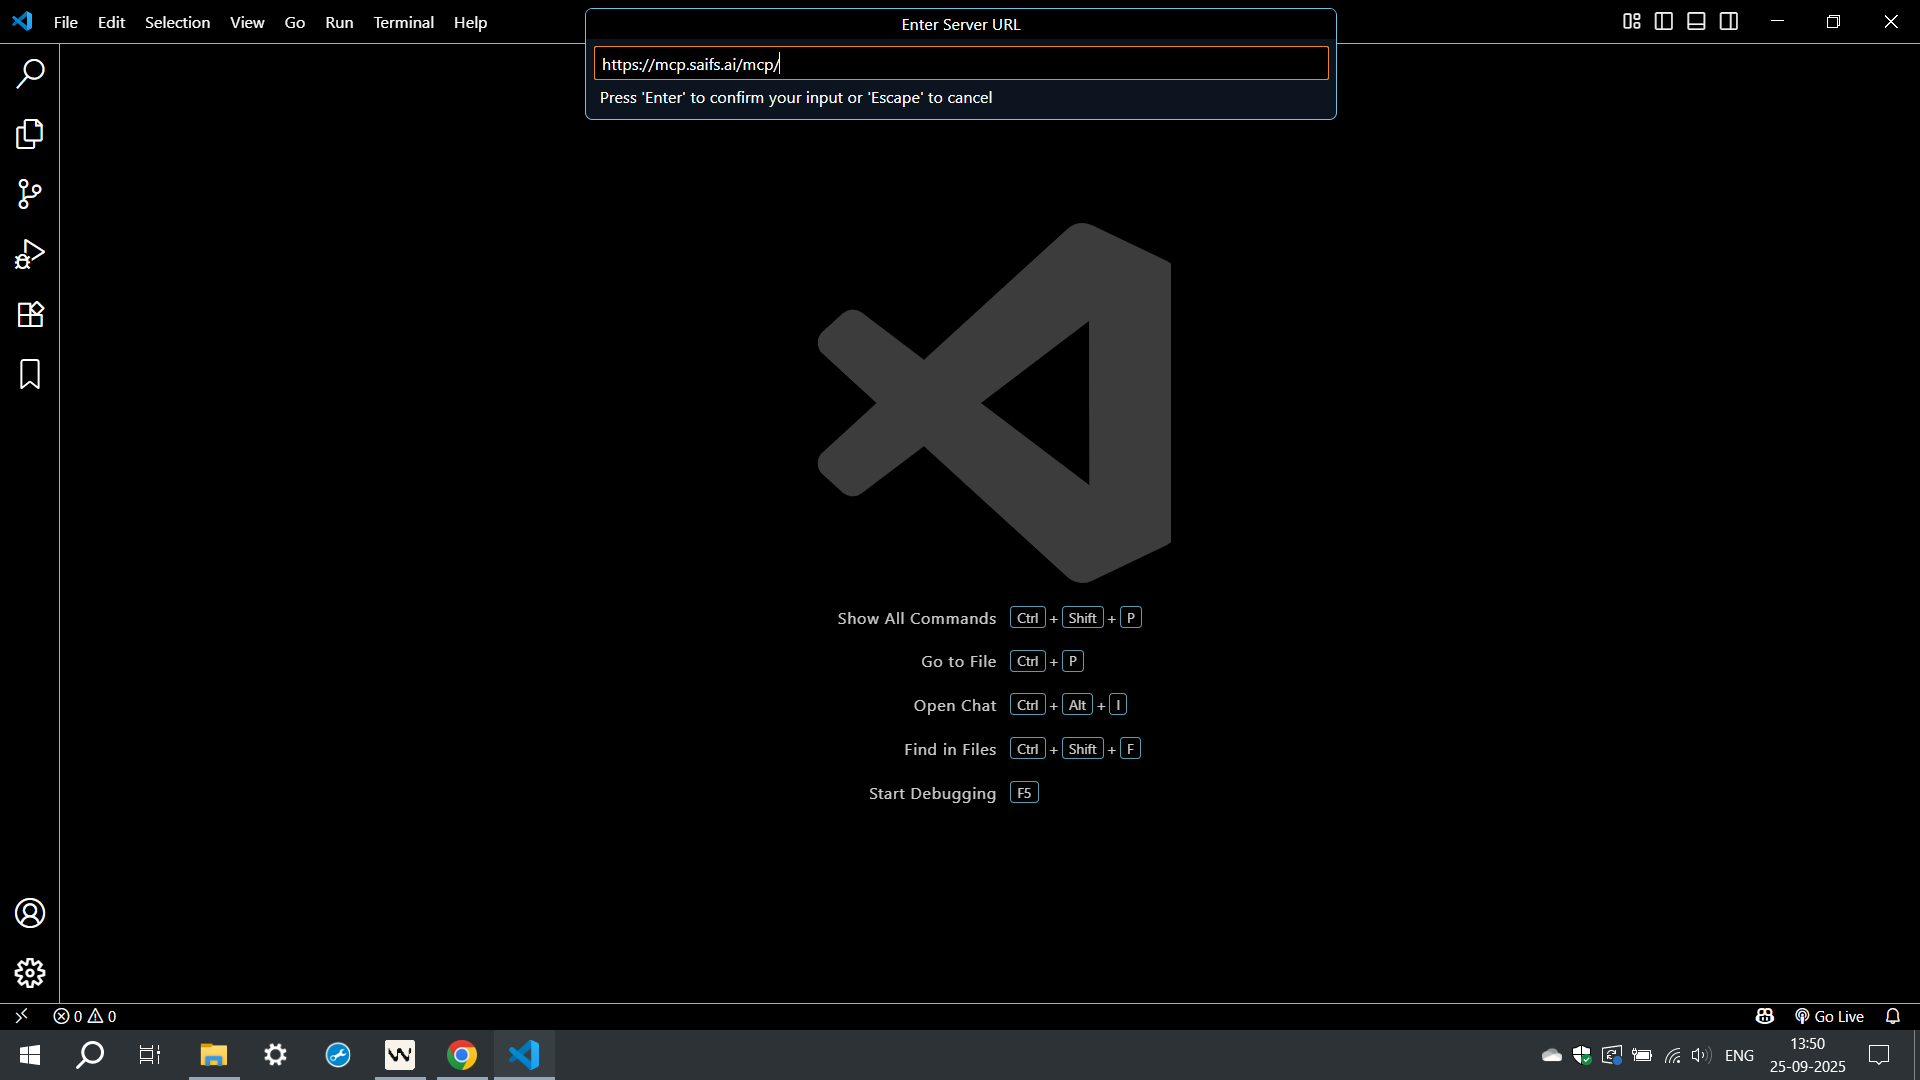
Input the MCP server URL https://mcp.saifs.ai/mcp/ in the provided field and press Enter to confirm and proceed.
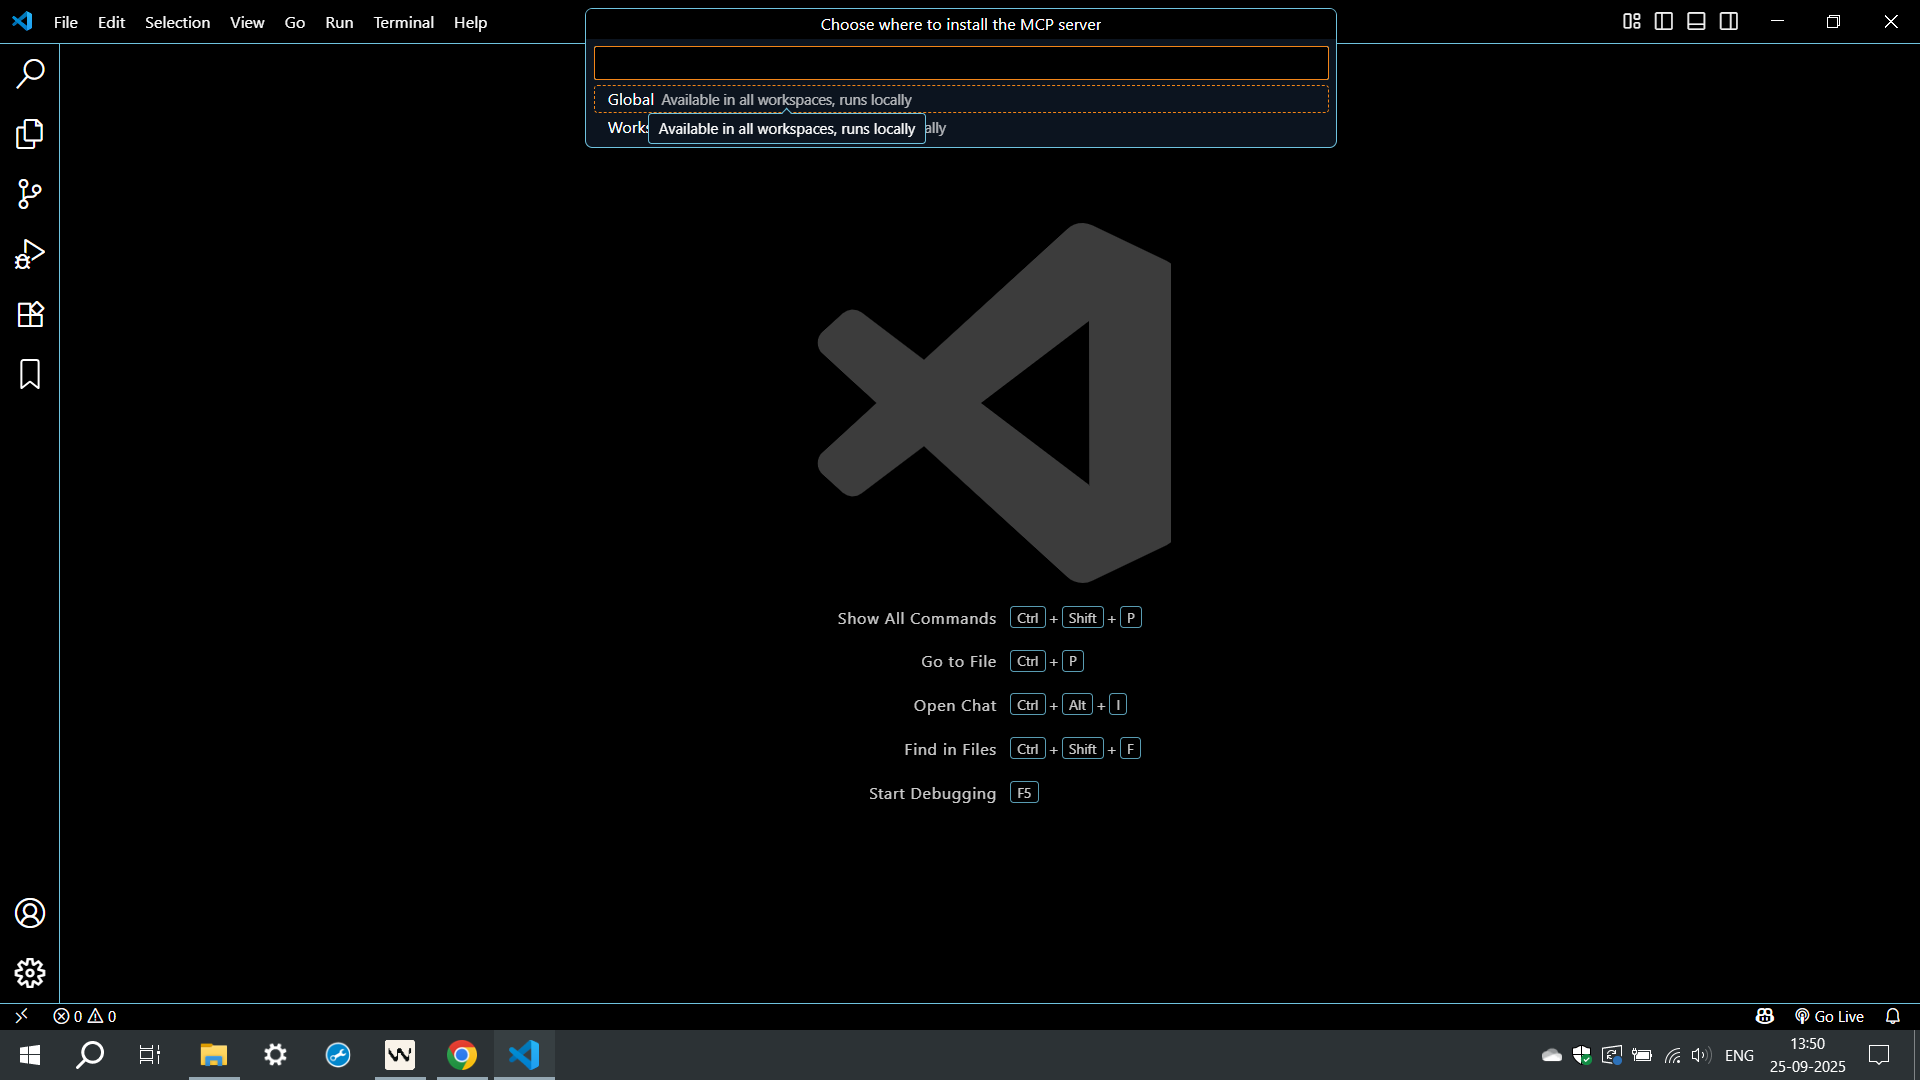
When prompted, choose either Global (available in all workspaces) or Workspace (restricted to the current workspace) as your installation scope for the MCP server.
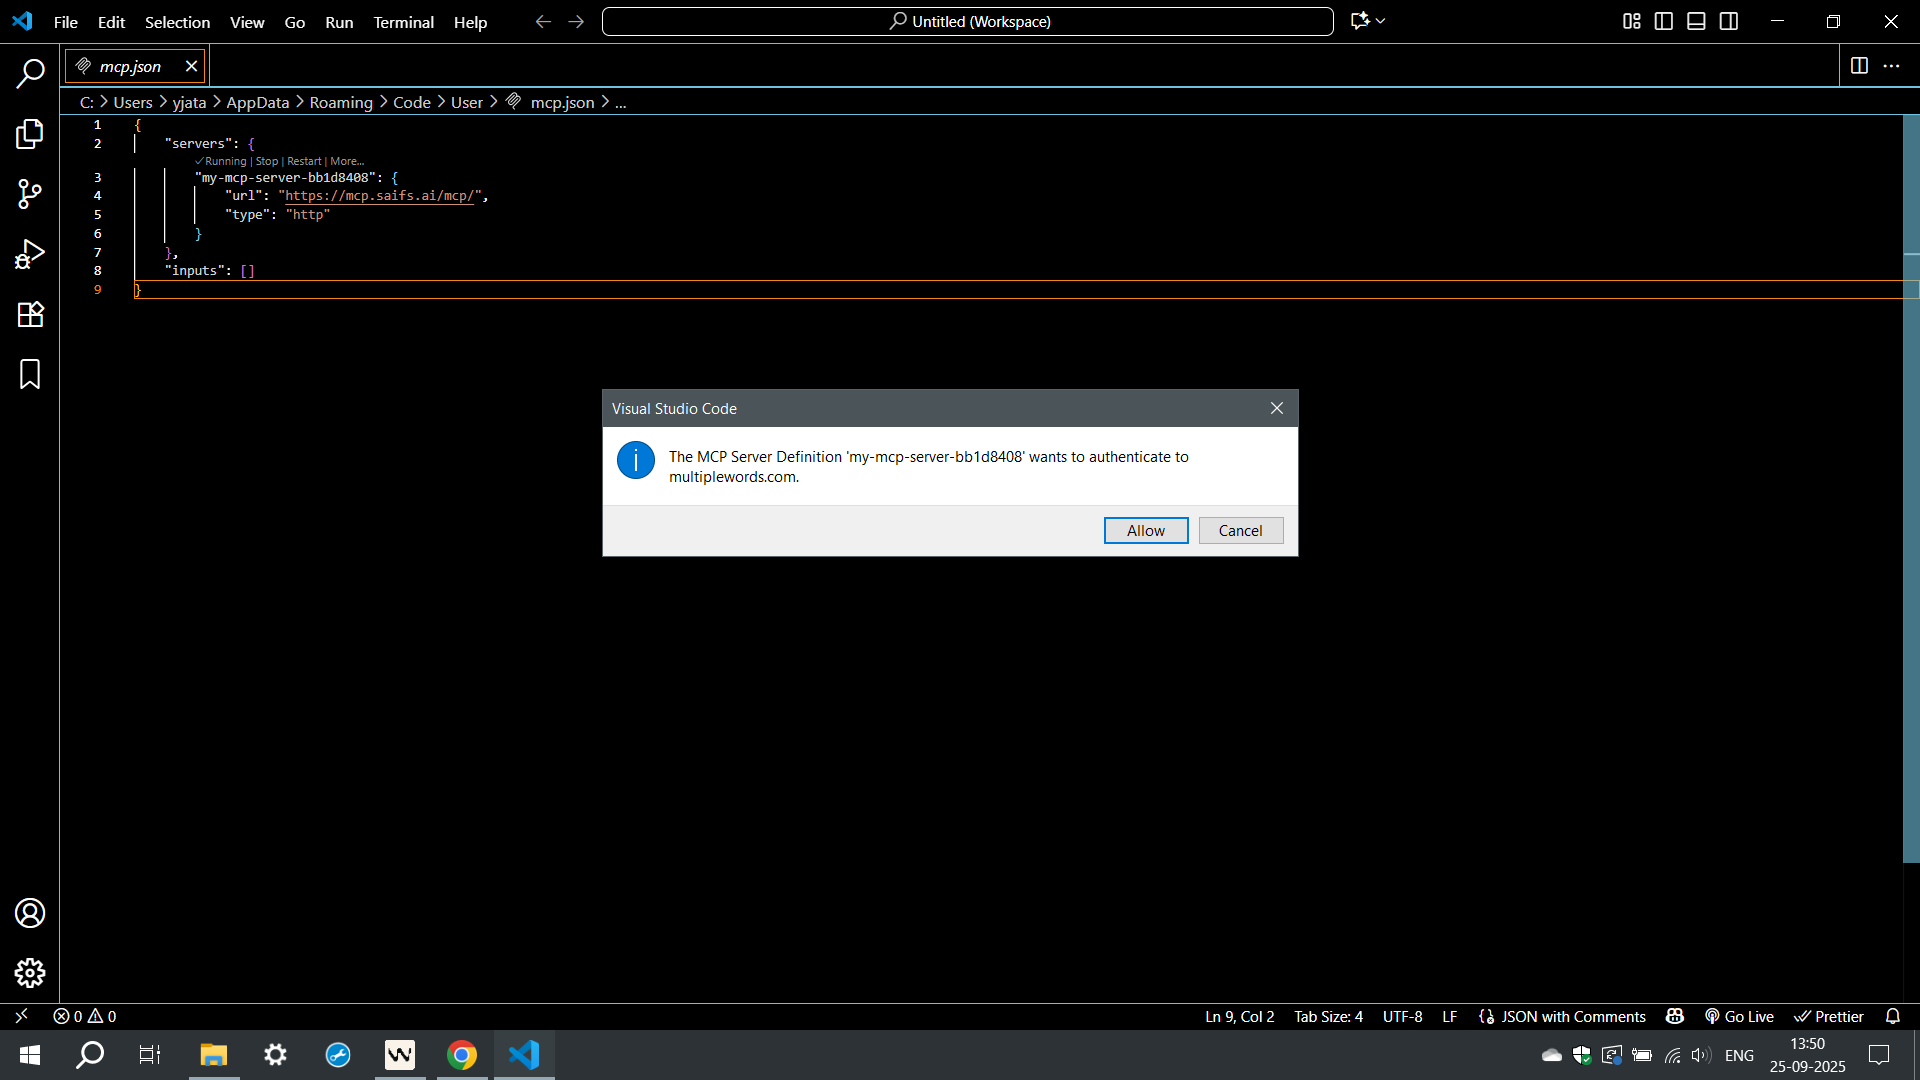
This grants permission for your MCP server definition to authenticate with multiplewords.in, enabling secure server integration and allowing communication between VS Code and your configured MCP endpoint.
Review the server status view to confirm connectivity and available tools.
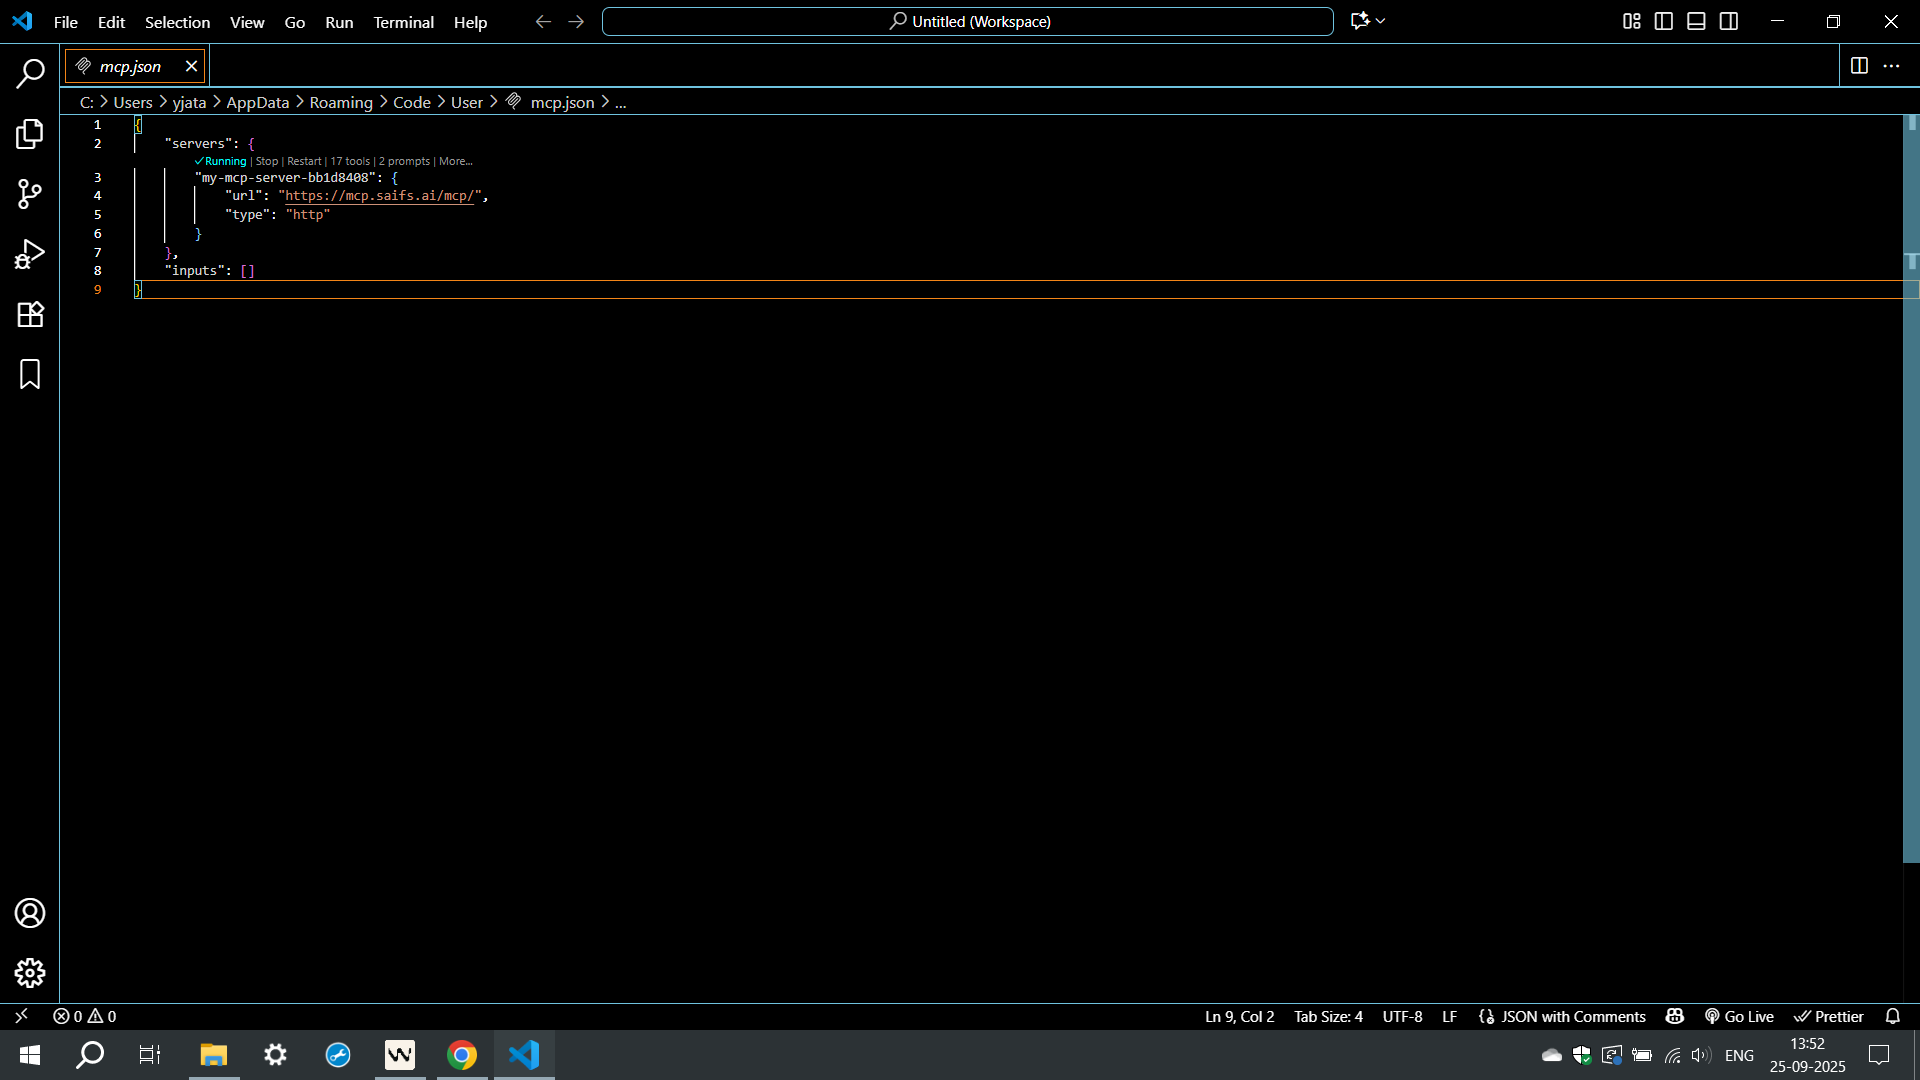
The MCP server is now running successfully in VS Code. Your configuration is complete, and the server status shows as "Running" in the mcp.json file, confirming that your MCP tools and integrations are fully enabled for use.